
Hello Friends,
in this fifth and final installment i’m gonna present the way i painted the last models of the core box.
While working on this set i was obviously free to decide the order of work but, to be honest, i followed the game progression: i started with the prologue survivors and finished with the Gold Smoke Knight!
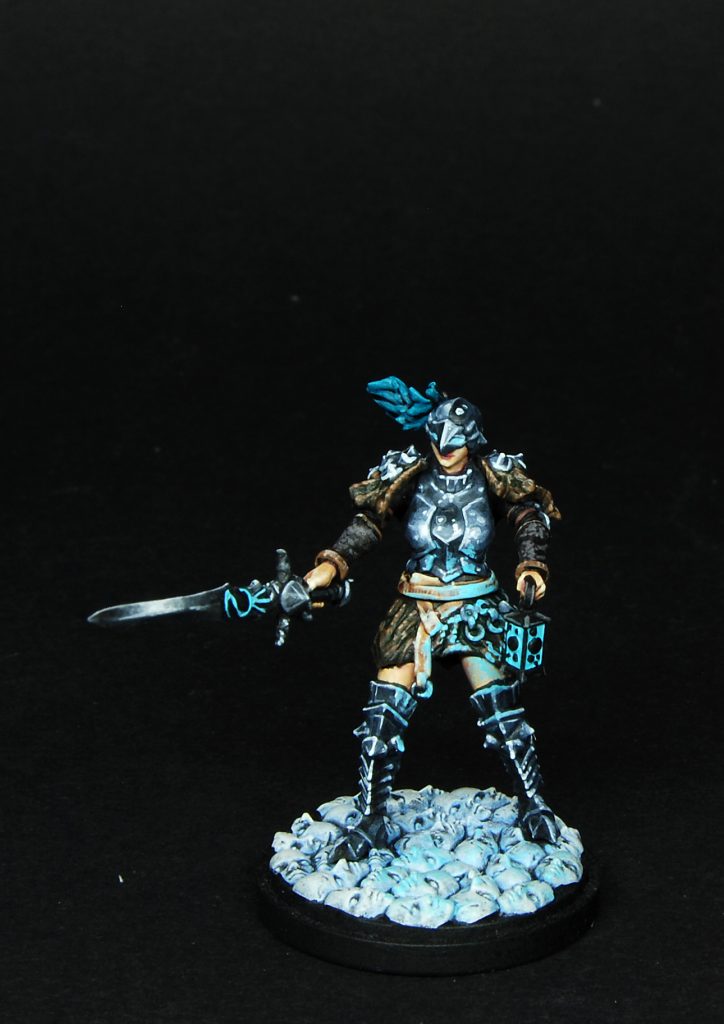
So, before him i obviously painted the Watcher, a wonderful model in my opinion.
![]()
At first, i thought about incorporating lot of colors in the scheme: lilac, electric green, violets etc..
I did not found a solution that pleased me and so decided to stick with just dirty brown cape and electric blue for the lanterns and for the energy emanations.
In fact, the model is quite simple and the paintjob took me less time than other models. More frustrating was the assembly. 🙂
The cape was painted with a mix of VMC German Black Brown, black and greys; basecoat was washed with a lot of different colors including GW Nuln Oil, Druuchi Violet, Biel-tan Green etc.
Unfortunately, these hues are not visible from the pics but, looking at the model in real, they really add some pleasent tonal variations.
I then started stippling the surface with the base color, then adding neutral pale colors to the mix (buff,sand, ivory…).
I alternated washes and stippling until i was satisfied with the result, avoiding addig too much lights since i wanted the cape to look dull and old.
Second step was to coat white all the blue areas: on top of this coat, i painted the wonderful Liquitex Light Blue Permanent.
It’s another difficult color to use and needs a bright undercoat to kick, but the pigment is very powerful.
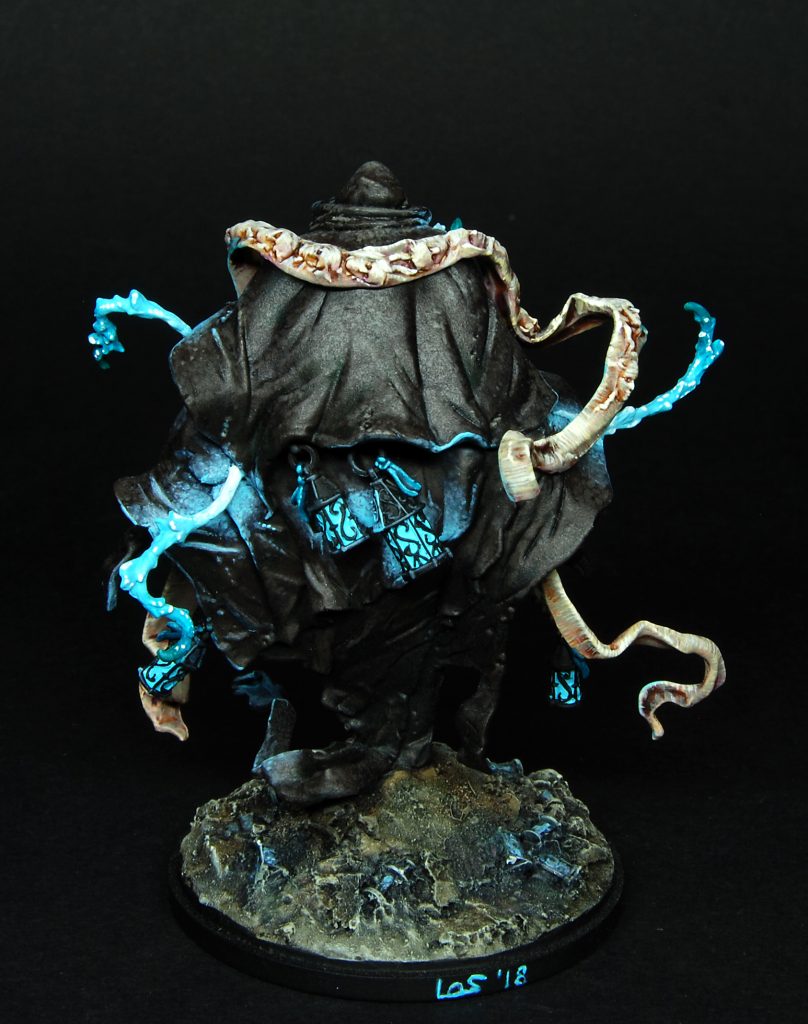
As you can see from the above picture, lanterns received only the base blue while the energy tentacles were blended with white towards the cape ad shaded with a bit of diluted GW Drakenhof Nighthade towards the tip.
Final touch was adding some pure white dots on the raised parts and near the tip.
Same procedure was used with the “face”: i painted the inside with white, but this time added gentle glazes with diluted light blue towards the edge, to simulate a strong energy coming from inside the Watcher.
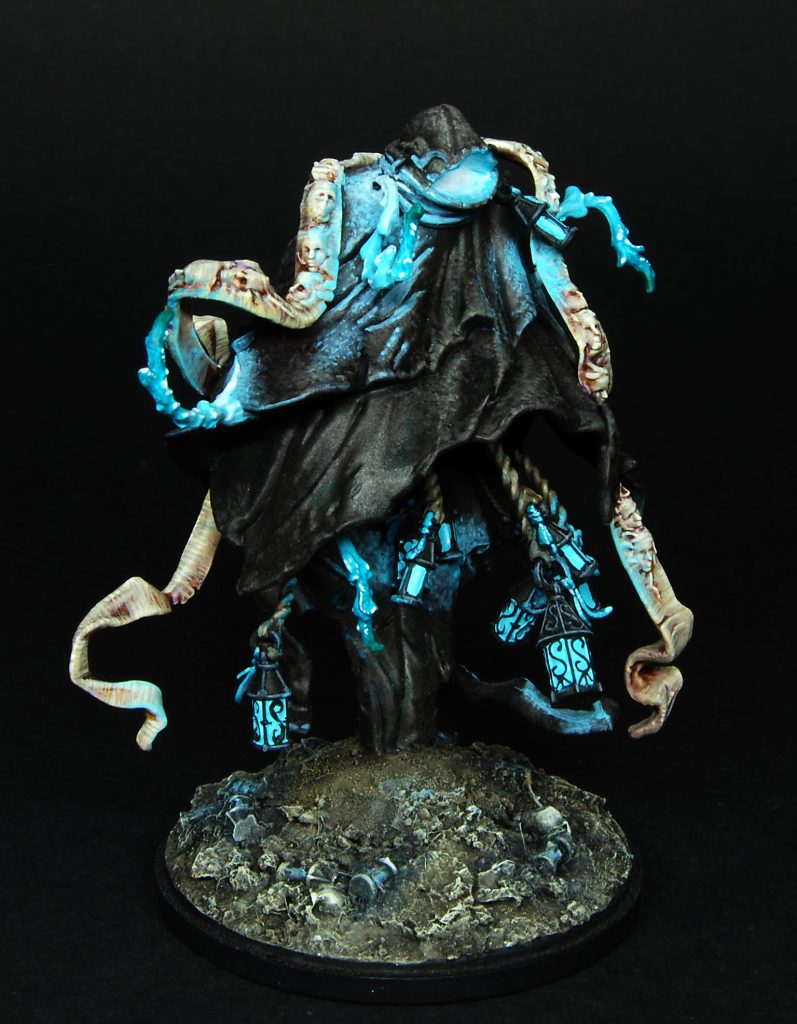
Next i painted the ribbon adorned with faces.
They were basecoated with a bone color, then it received a wash of Seraphim Sepia and a second one with diluted Druuchi Violet.
I then brought back the original color painting lot of thin, transversal lines, adding VMC Pale Sand to the mix for the final lights and avoiding touching the recesses at all, where you can see the sepia and purple hues.
The faces on the ribbon were painted concentrating the light on the nose, forehead and cheekbones, as usual. Also, at the end, i painted a final edge highlight on the ribbon adding a bit of white to the mix.
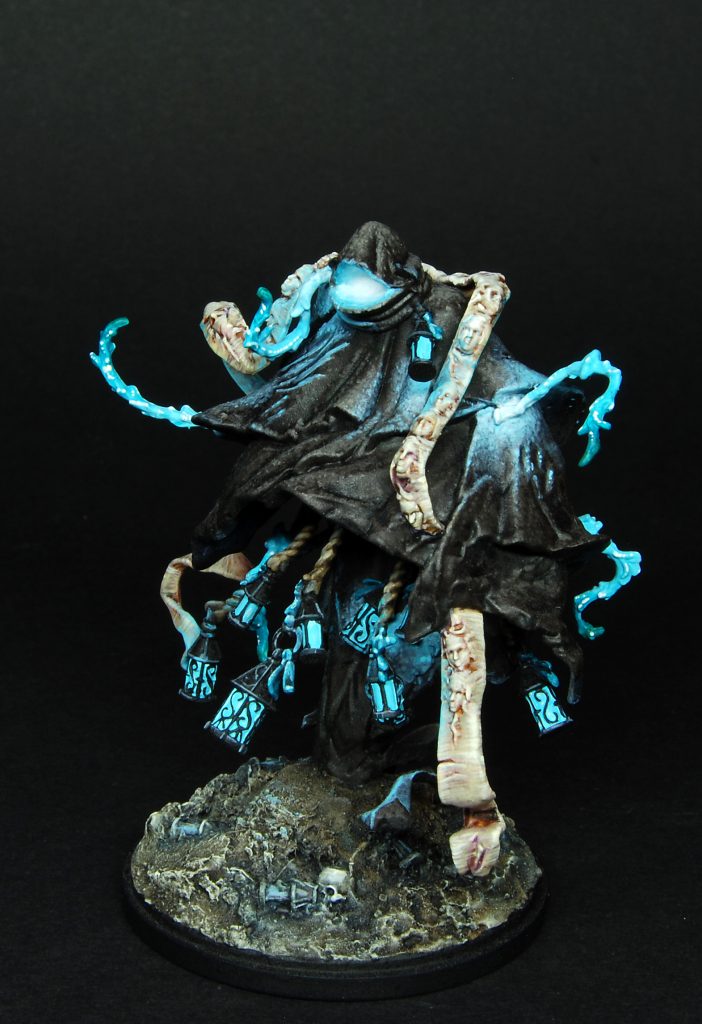
At last i added the OSL from all the lanters and energy sources, and i admit it was quite difficult.
I started adding the light blue to the cape color and proceeded adding white and blue to the mix, painting it on the raised parts and the zones of the cape connecting to the tentacles.
This is hard to explain with words: looking at pictures, both of painted miniatures and of real life OSL situation is, in my opinion, the best way to understand the physic of light.
While painting the blue on the cape i also tried to stipple the color to mantain the original painted texture. Some parts resulted good, some less, but it was my first try at something like this.
The model was finished and i moved to the base, which was made with the usual earth/sand and addition of lanterns from the spare miniatures part. Also, some skulls.
The base received direct washes of GW Agrax Earthshade and diluted Drakenhof Nightshade. A couple of rough drybrush steps brought in the highlights, then i added very diluted light blue to the lanterns, to simulate dying light.
After the Watcher was the turn to paint the lantern set: lorewise, they are not crafted with parts of the monster, if we exclude the oxidization process introduced in the 1.5 version of the game, but the customer wanted me to use the same colors of of the Watcher for painting them.
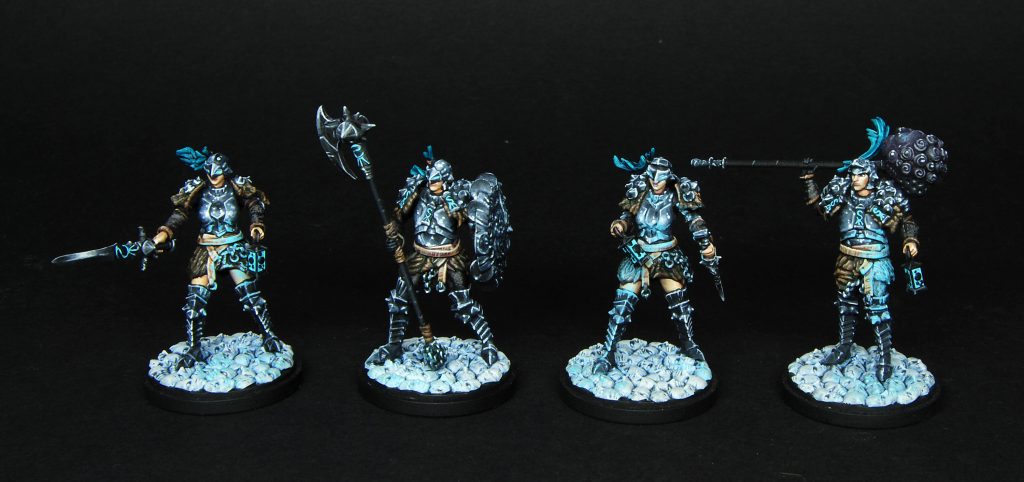
Since i was going to paint the armor like steel, i decided to use dirty brown for the fur parts and electric blue for the details. Also, the blue lanters really look good on these models.
I won’t talk about the fleshtone since it’s the usual mix of skincolors.
The fur parts around the shoulders and around the waist were painted with the same colors and washes used for the Watcher’s cape, while the light blue was painted on the lanterns and all the “S” shaped symbols. Also, it was used for the eyes of the survivors wearing an helmet.
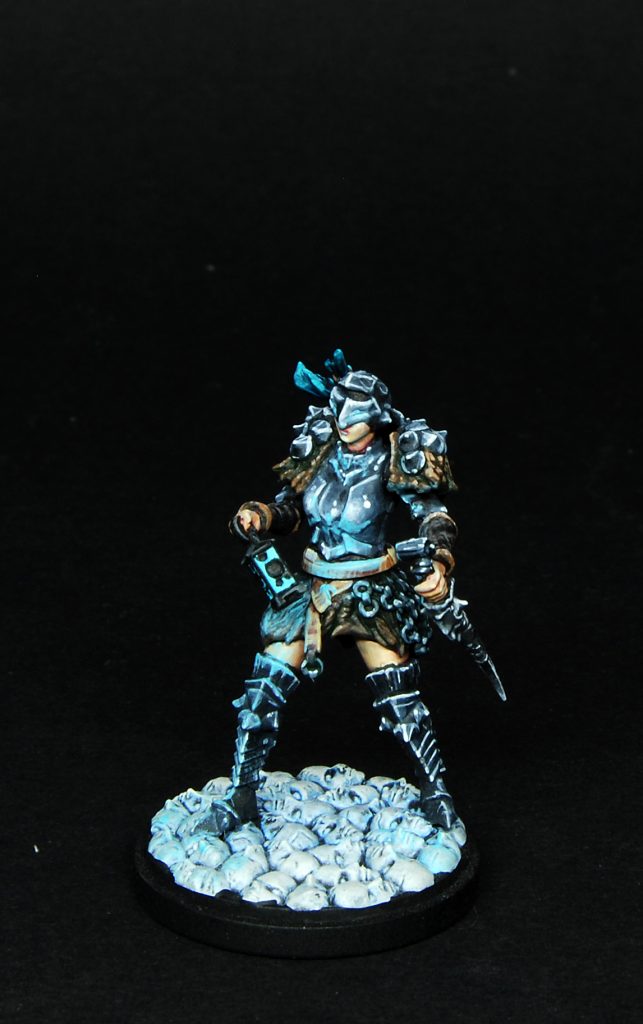
By the way, is it just me or the lantern helm looks very similar to Griffith’s helm from Berserk ?
The armor was painted in NMM but, since i couldn’t afford perfect blendings, i had to extremize the sketch of light positioning.
In the end it’s a bit rough, but i think it works.
I reduced the number of layers and went for pure black in the shadows and pure white for the lights, painting dots and stripe in the points of maximum reflection, especially the helms, the spiky shoulderpads and the round parts of the chest armor.
This process was also used on the weapons.
(The grumpy survivor also reminds me of Guts, another cameo from Berserk? : ) )
After the armor, i painted the bands, again using the color of the Watcher: so, a buff basecoat followed by a Seraphim Sephia and a Druuchi Violet Wash. Then, i added a quick edge highlight and some scratches.
Finishing touches were painting the ribbons on the helm with the light blue, but this time washed with Drakenhof Nightshade to make it look darker, and painting the blue OSL from the lanterns.
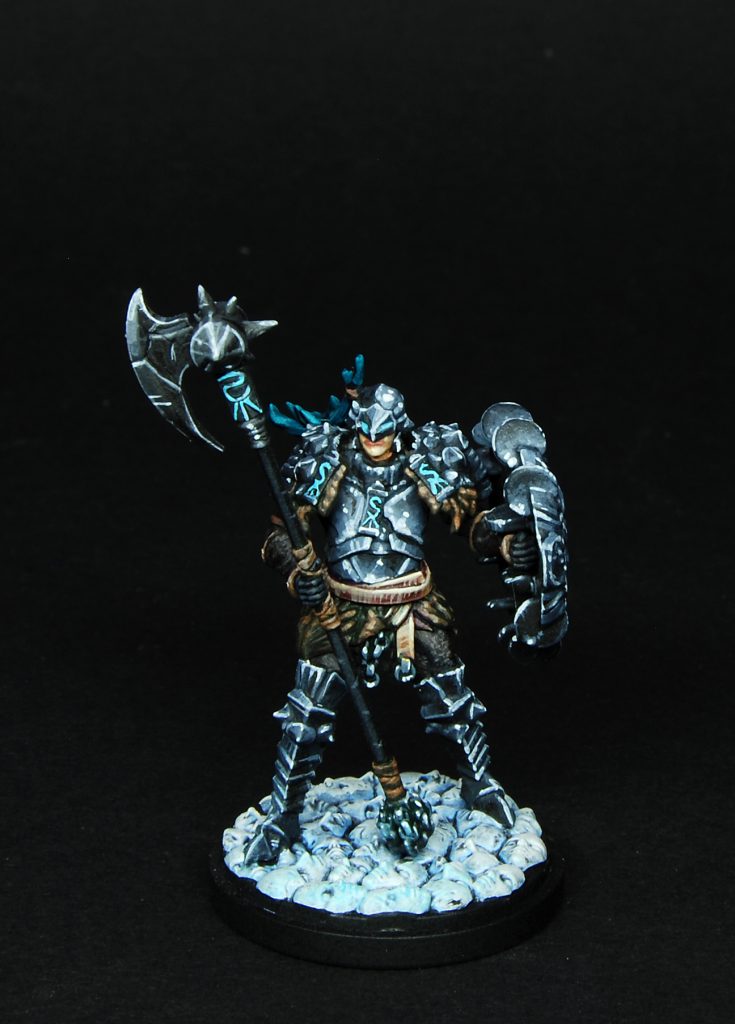
Before moving to the final boss i’m gonna speak about old survivor Joe:
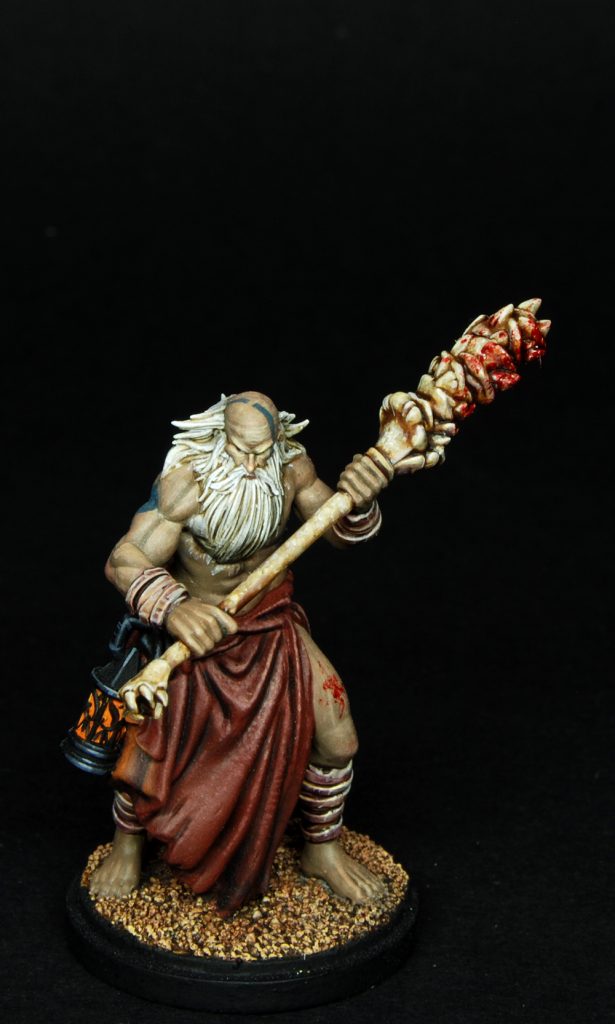
Along with young Rachel (no pics of her, unfortunately), he’s quite a nice addition to the survivors; he fits in the “settlement” theme but still he’s different from usual survivors.
He’s also quite bigger, roughly 1,5 times the size of a standard miniature, so it takes a bit more to paint.
For him, the customer decided red/brown clothes, that i painted with a base of GW Doombull Brown, shaded with a wash of Agrax Earthshade+Nuln Oil and highlighted repeating the layer of Doombull Brown and adding VMC Pale Sand to it.
For the skin i tried to put some green into it, to contrast the clothes.
I basecoated with a mix of Nocturna Base Flesh and Nocturna “Nocturna Shadow”: the latter is an awesome dark green, formulated for painting skintones but in my opinion useful for others materials like plants-leaves, because it’s satin and its hue eavily reminds me of the greens you found in the nature.
However, since the miniature it’s big and with a lot of volumes i decided to avoid washing and instead i quickly painted layers of shadow adding this green and a bit of black to the mix.
Highlights were painted adding pure Base Flesh and a bit of VMC Buff for the last steps, but leaving and overall dark skintone.
I also added some tattoos (mainly to cover areas with visible seams…) adding some blue to the skintone.
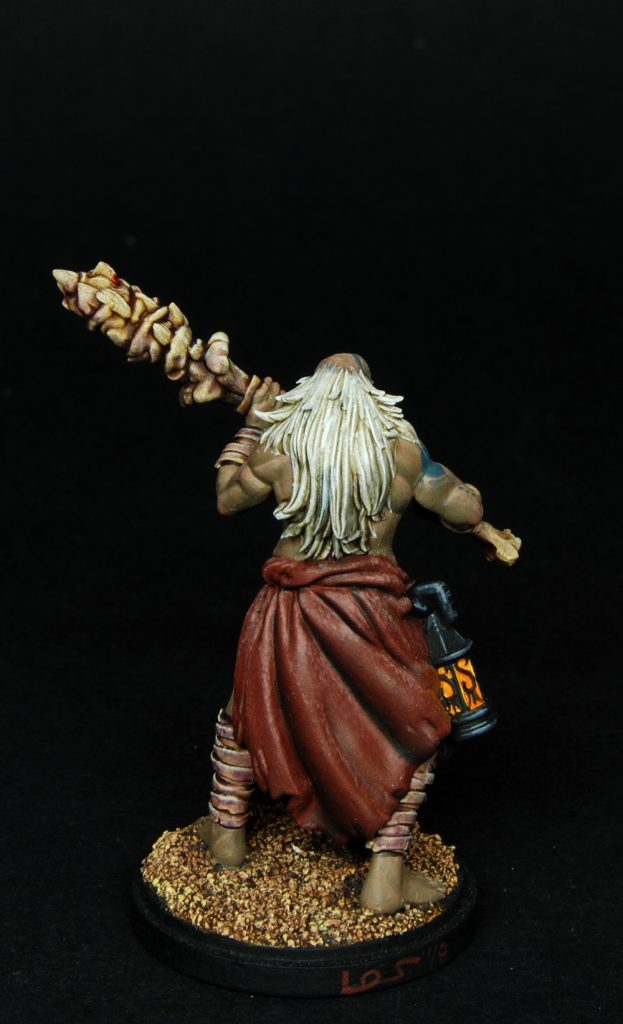
Bandages were painted using the same procedure for the Watcher’s “scroll” while the bone mace received a coat of VMC Pale Sand and two washes of GW Seraphim Sephia. It was then highlighted with diluted Pale Sand, until i used it pure, and some spots were painted for last with pure white.
The blood splatter it’s the usual Tamiya X-27, applied randomly.
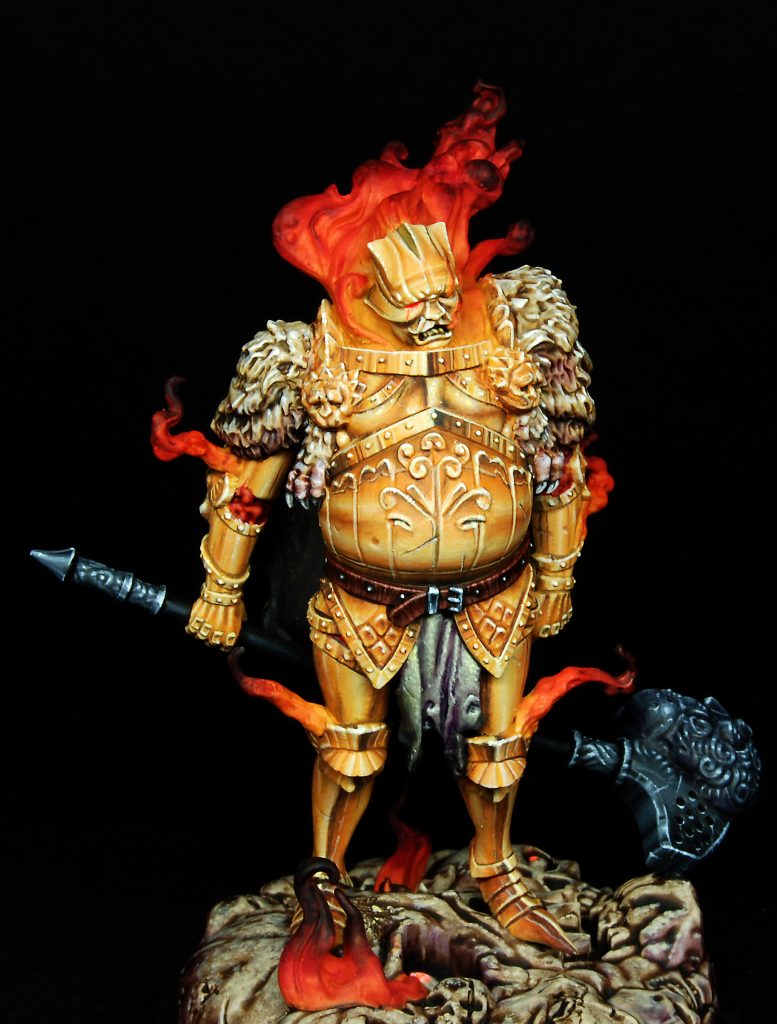
We now reached the final boss and let me tell you, this is a miniature worth painting!
The Gold Smoke Knight, apart from being a great sculpt, has this baroque look that tantalizes my painter’s taste.
Also, seems like a boss popped out from some Final Fantasy.
Beside that, it’s a hard model to paint.. but enough chitchat and let’s talk about colors.
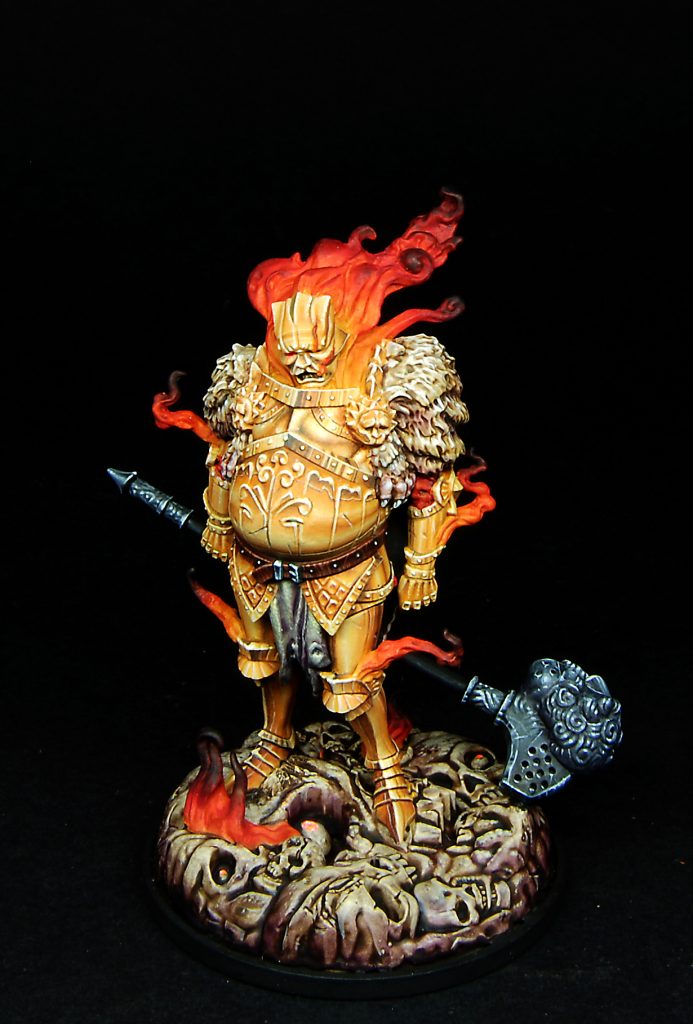
As you can see, my version again draws eavily from the official art.
I slightly changed the colors of the armor – which in the artwork has a more yellowish hue – and the flames, which were originally orange-red but instead i decided to paint starting from the “gold” color and shifting towards a strong red.
First step was to apply all over the armor a basecoat of GW Averland Sunset + VMC Amarantha Red; the latter was added to strenghten the color, so it was a warm yellow-orange.
Then, the hard part: i tried to copy from the NMM of the great painters and draw reflections. It was my first time doing this. In certain areas i think the effect looks good, in others less good.
First parts i painted were the legs and feet, where i drew a strong contrast line on the kneecap and all over to the foot tip.
For the shadows i added Vallejo Model Air Mahogany and black, for the highlights VMC Buff and white.
So, after carefully painting the dark lines, i tried to placed a strong light near them to maximize contrast.
This was not possible everywhere: not on the round parts of armor, but i did on the “spiky ones”.
I carefully blacklined (but with a dark brown) the armor plaques to ehnance definition, see the feet for example.
I then moved to the belly, and here i think my attempt has not been so good. I tried to draw two large bands of lights near the center and a small, stronger one on the bottom; the blendings are good but i did not took into account the shape of the belly, which in reality would have deformed the reflections.
Also, with hindsight i should have added more contrast.
![]()
I then added some scratches and edgelighted all the carvings on the belly.
This approach worked a little better on the arms, where the tubular shapes were easier to tackle.
On the convex chestpiece i looked to some reference pics and tried to draw deformed reflections adding round lightspots. Not perfect but also my first attempt at it.
The metallic “bands” all over the model were all treated in the same way, drawing perpendicular reflections. Somewhere i used the max shadow color to draw a thin line, and the same i did with white in the points of strongest reflection.
On the chest piece, where two bands meet and a concave angle, i put max shadow in contact to max light.
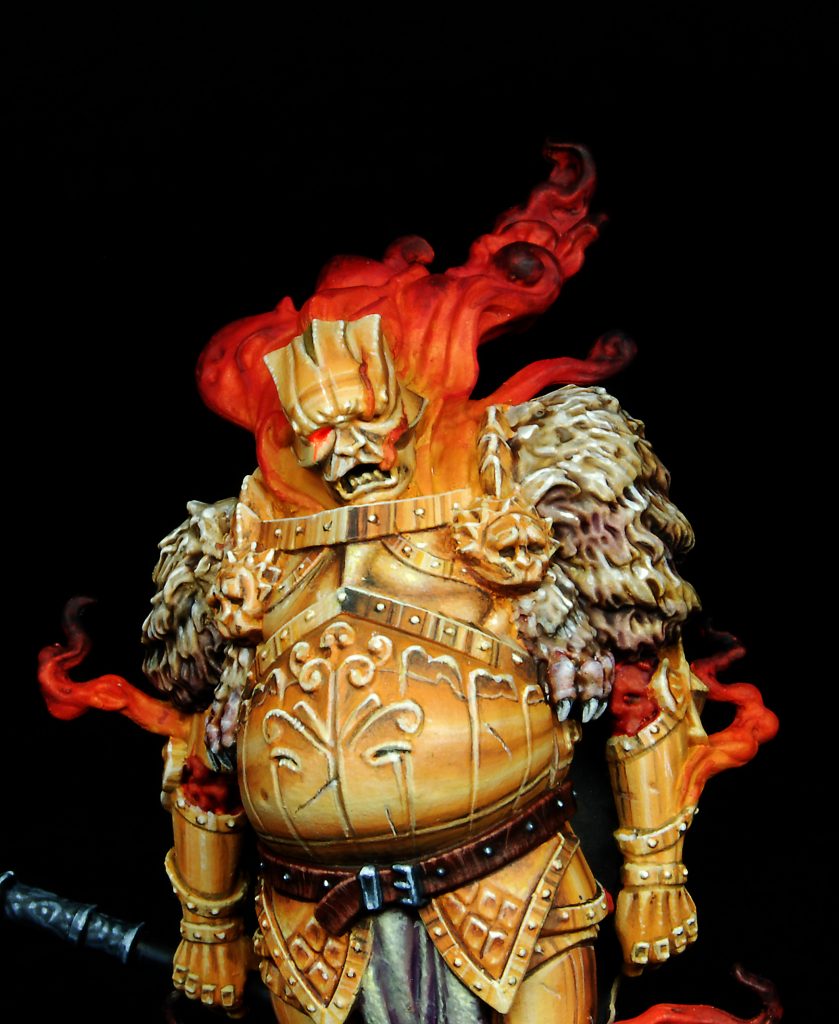
I left the face for last and i admit at the time i was pretty unsure how to paint it in NMM, since it’s a very complex shape.
I remember i tried to paint every single volume as an indipendet shape, but in the end i sort of concentrated the highlights toward the center of the facial features, like you sometime do while painting normal faces.
I also added a reflection on the upper part(visible in the pic above) but avoiding using too much white in it.
As a final touch i very carefully added a thin brown line to separate some volumes.
Once completed the work on the armor, it was time to paint the flames.
I started basecoating them with the same yellow-orange color used for the metal, since i wanted to give the idea of armor trasnforming directly into flame.
So, with a patient work of multiple layers and glazes, i started adding VMC Flat Red to the mix until i came to use it pure.
At this point i was halway throught the lenght of the flames; i started adding VMC Black Glaze and, after LOT of layers, used it pure for the last part of the flames. If used correctly, the glaze dries very matte and really gives the idea of smoke.
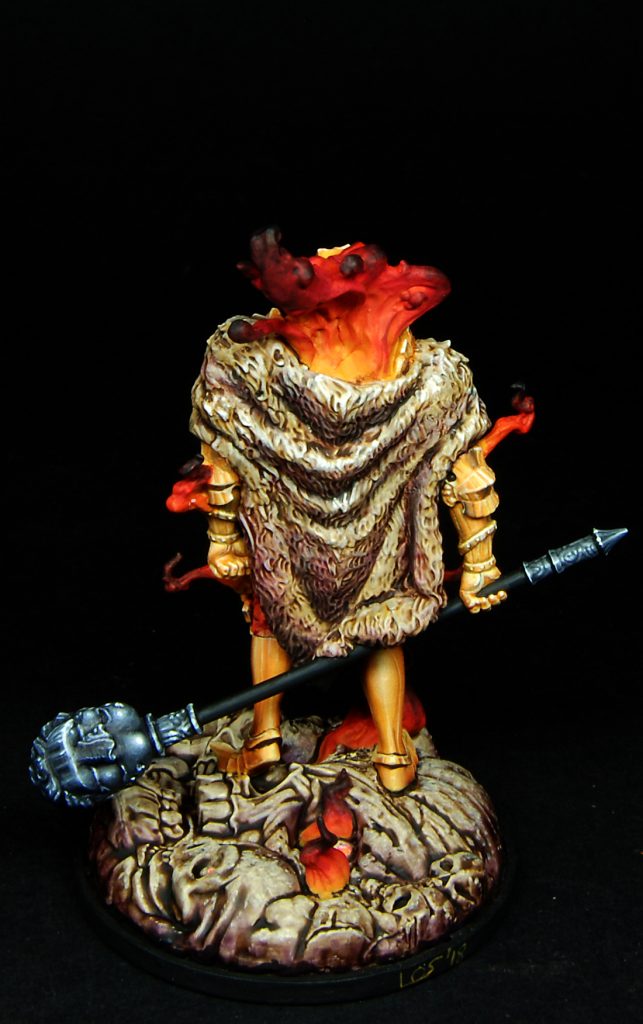
The same process was used for the flames on the base.
Speaking about the base, i went for quite a fast method of painting: on the white primer i gave many washes with GW Agrax Earthshade and Druuchi Violet until i obtained a solid but dirty color, then highlighted the volumes with very diluted browns/buff/bone colors, using less diluted colors for the last layers and adding some stippling here and there.
Back to the Knight, the steel NMM was painted with the same recipe described in the previous articles.
The loincloth and fur parts were painted in neutral colors adding purples washes in the shadows, to contrast with the golden armor.
As a final touch, i added a fluo, orange color in the eyes of the knight to simulate a glowing energy coming from inside. Also, a tear in the same color since the knight’s expression is so sad.. look at the pics above to see it.
This concludes this series of articles about the painted core set.
As always, i want to thank you if you read this far and i hope you’ve been able to find some inspirational hints.
If you like my works and would like your models painted this way, feel free to contact me HERE.
These days i’m painting another core set and i regularly upload pics on my Instagram.
So stay tuned, maybe more tutorials and articles will come.
So long!
Lorenzo