
Hi Friends,
lot of things happened in my life (mainly i was busy for commission work, but also personal issues) and i was unable to update the blog.
I’m the meantime i’ve also started a commission on another core set, so, if you like the game, be sure to follow me on Instagram and on my Facebook page to see what’s coming out of the hat!
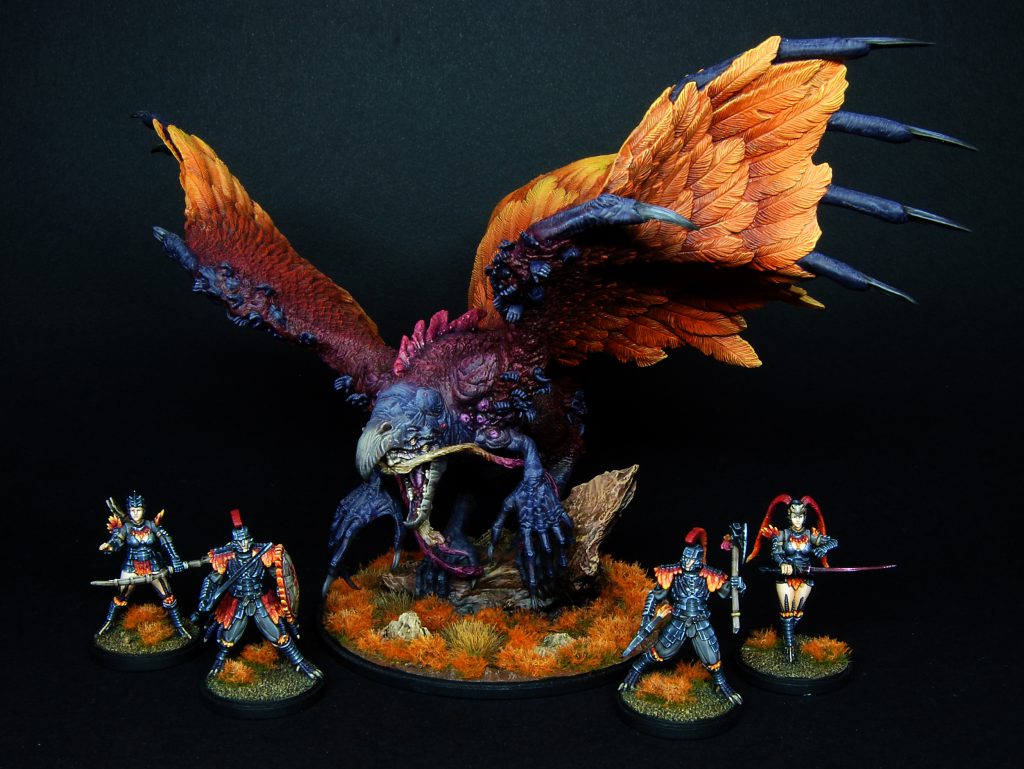
Now i’m happy to write part 4 where i will try to describe my version of the Phoenix: i hope it will be useful and inspirational for many of you.
The first thing i did when approaching this beast was to look at the original art: since the artist used my favourite color combination, purple-orange, i immediately decided to use this scheme.
Below you can see a comparison picture.

With hindsight i probably went too saturated, but i wanted the model to really stand out and look like a shiny and exotic animal.
Speaking of the paintjob, first step was to spray some base colors.
As you can see, colorwise the body can be divided roughly in three sections: wings, upper body and lower body.
With the airbrush i basecoated the lower body with a desaturated purple-blue, the upper body using a mix of dark, gory reds, (coloring also the part of the wings) and i continued to the upper part of the wings with VMC Amarantha red and VMC Buff.
I tried to blend the different colors as much as possible to give an idea of skin shifting naturally.
Then, i started with the brush: i wanted the inner face to be focal point, so i started painting it with a mix of flesh colors and small quantities of blues and purples, to keep consistency with the blueish parts, like if this was an area of bleached, old skin.
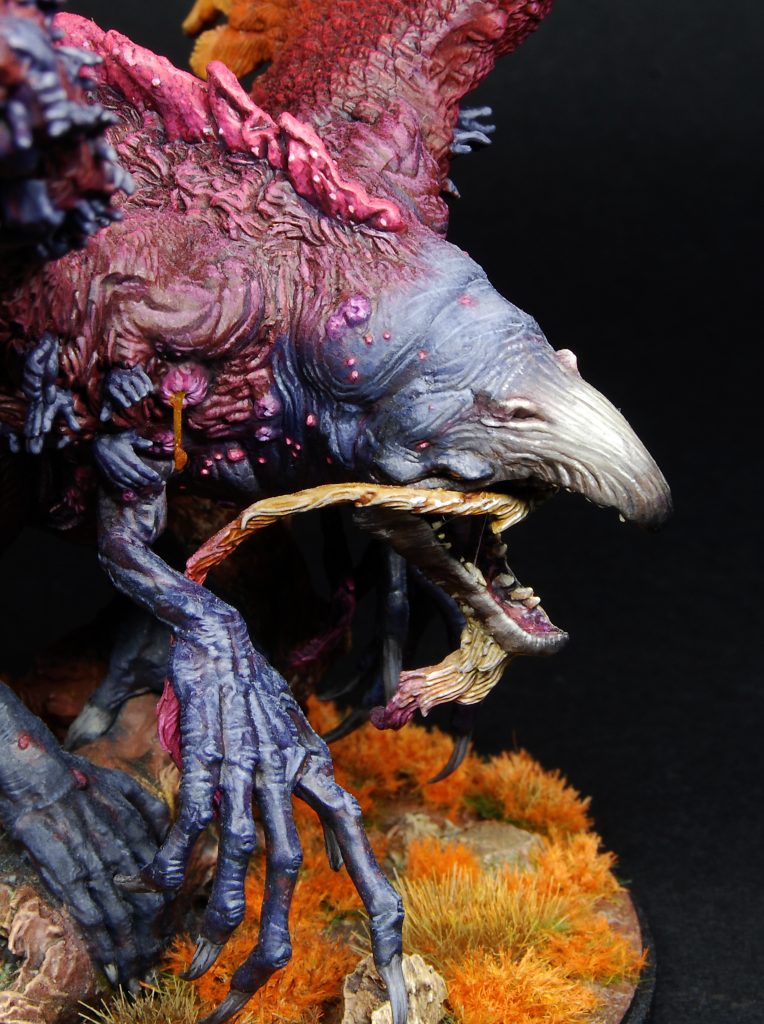
 It was difficult to give it some focus because the sculpt has lot of wrinkles and small details, so i tried to concentrate the light towards the nose and inner eyes.
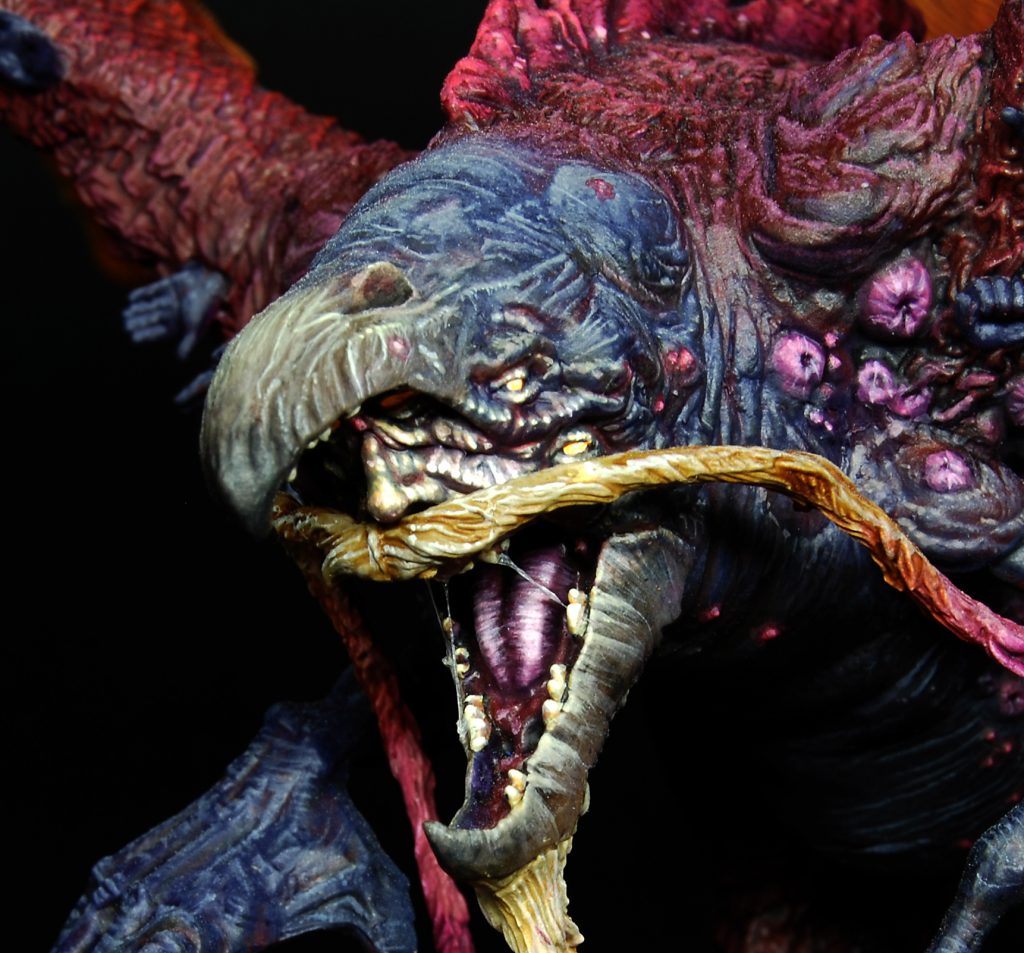
Inside of the mouth was painted fleshy and worked with lot of red/purple washes to give it a gummy and wet look.
Same technique was used with the tongue, alternating washes with thin strokes of pink and fleshy colors, to add some texture.
The beak was painted at a later stage, blending the brown (can’t recall the recipe) with the blue flesh. I payed attention to the texture on it and added additional thin lines.
Also, i lightly added a black blending towards the tip using VMC Black Glaze.
IMPORTANT: from the pics you can see that dark red was used in the shadows: this was kept on every area of the miniature to give consistency and add contrast.
You can also see that horrible dust effect left by the sealer..
Beard and mustaches were painted white and then lightly washed with GW Seraphim Sephia, starting diluted and adding Druuchi Violet and Nuln Oil towards the tips. Then a careful edge highlight with a pale color.
Take note that mustaches were painted separately and glued at the end.
Let’s now talk about the lower body: base mix was VMC Oxford blue, greys, and GW Khantor Blue. First of all i washed the entire area with GW Druuchi Violet to give depth and to shift the color towards purple, but this made it difficult work on the highlights because i probably used too much wash and it dryed satin.
However, i added second was of GW Druuchi violet mixed with GW Nuln Oil in the lowest parts, like bottom of the belly and legs, to give a sense of general shadow. Also, i added the dark red in the recesses.
I started working the lower legs with base color, careful not to add too much light because i wanted them to be less illuminated than the rest: in fact, after the base color i only applied 1-2 highligts, mainly concentrating on the wrinkles.
I don’t have good pics of this area, but here you can see the difference in contrast and saturation beetween legs and arms.
![]()
As you can see, legs are like “shadowed”, while i added more flesh, white and VMC Buff towards the upper parts and the area surrounding the face.
Especially on the hands, i tried to work every single wrinkle and volume to add contrats and give the feeling of old, creepy hands.
The red flesh was painted in a similar way but i can’t really remember the recipe; probably a mix of dark reds, blue and purples.
Here i added more black in the shadows since, obviously, the red wasn’t all that visible: the muscles on the back/shoulders were highlighted in the same zenithal way while the feathery zones received a lesser precise treatment. Sometimes i alternated red/purple washes in the parts where i overdid the highlights.
Only exception is the fleshy comb, which was painted in a rosy color, then highlighted with a lot of stippling up to pure white, then darkened again with washes.. wax in-wax out until i was satisfied with the result.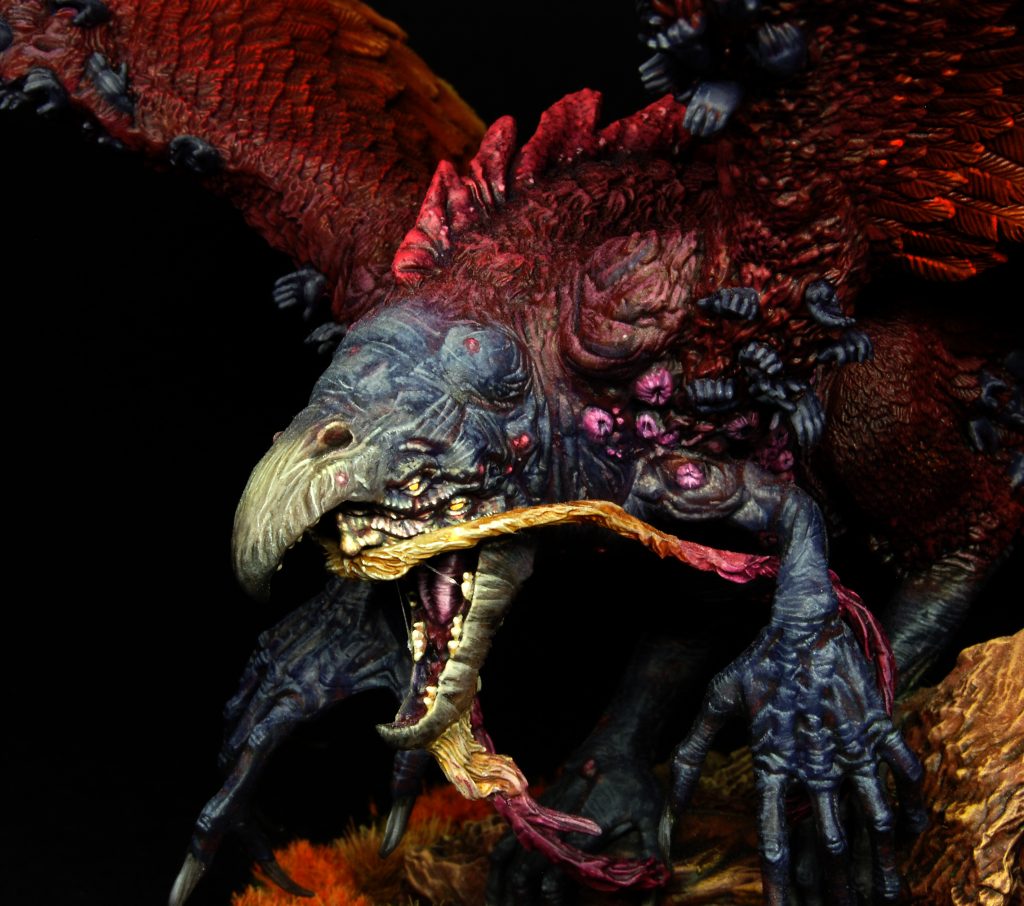
After that i moved onto the wings and i will admit my big crime, they were painted almost entirely in drybrush!
The base sprayed with airbrush was a gory red shifting towards orange, blending into yellow to the tips.
First step was to “separate” the rows of feathers by giving a shadow on the junctions: on the bottom rows i used a diluted Druuchi Violet was, in the middle layers Fuegan Orange, then Fuegan Orange mixed with Seraphim Sepia, then very diluted Seraphim Sepia on the upper rows.
The washes were very gentle and controlled, to avoid stains on the feathers. I wanted everything to look soft and natural, like real plumes.
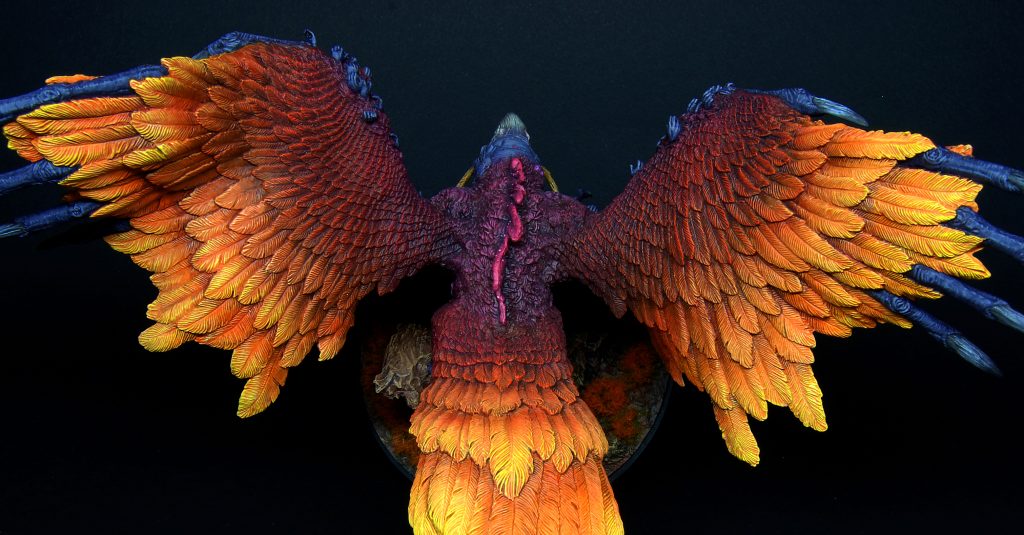
The drybrush was done with a big and flat syntethic brush that is perfect for that: i started with red-orange on the bottom wings, slowly adding VMC Amarantha Red towards the middle section, then using it pure.
VMC Buff was added to the mix, working to the top section. As a final highlight, pure white was drybrushed on the final rows: on top of that i painted VMC Lemon Yellow, which is a wonderful color but needs a bright underlayer to shine. The yellow was also painted as an “edge-highlight” on some of the outer and prominent feathers.
IMPORTANT: every drybrush i did was very careful, using undiluted paint but leaving very small quantities on the brush.
Drybrush is often despised as a bad technique but, in my opinion, can give good results.
As you can see from the above pic, the transitions are subtle: notice how the lower part of every row has a strong shadow and touches the strong light of the next row.
Final touches were:
- fingers on the wings, painted in the same way of the body. Nails were also painted with the colors used for the beak.
- Small hands on the wings, same as above.
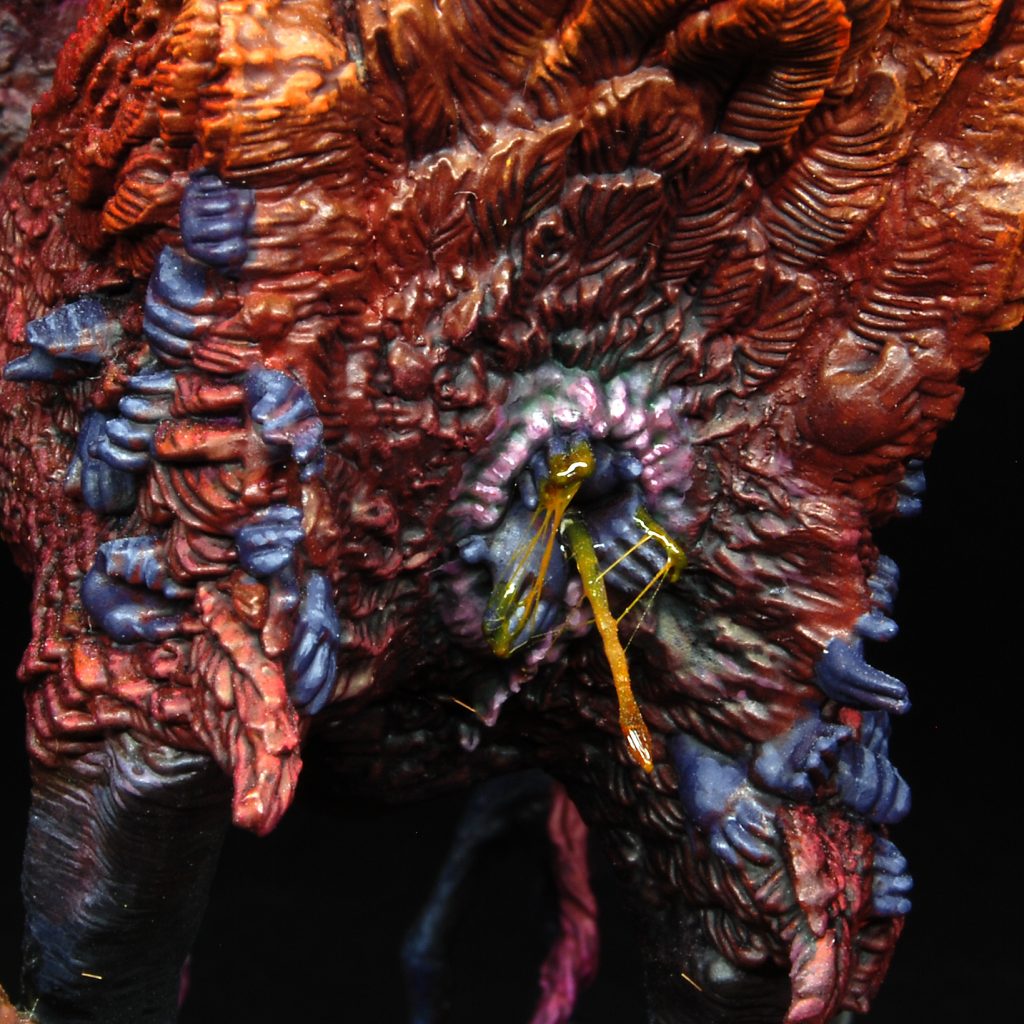
- Pustules and sphincter, painted in a light rosy color, damped with washes. On the Sphincter i added a green wash.
- Adding droppings at the aforementioned parts: for this, i used the usual fishing line and some wood glue mixed with a unhealty brown, see below pictures. Same technique was used for the drool in the mouth, but without the fishing line: only sticking strings of glue to the teeth.

The trunk at the base was painted with natural colors: greens-browns-yellows, directly mixed on the surface to give a natural look, then washed several times with Nuln Oil and repainted with the base color for the highlight. Final drybrushes, adding buff to the mix. Very simple.
The base itself, as usual, it’s made of real soil with the addition of cork pieces to simulate rocks.
The orange grass it’s from Mininatur: tufts with an orange cover on the top, they have different colors in store. Very interesting for creating fantasy or alien landscapes.
I think this is all i can write about the Phoenix.
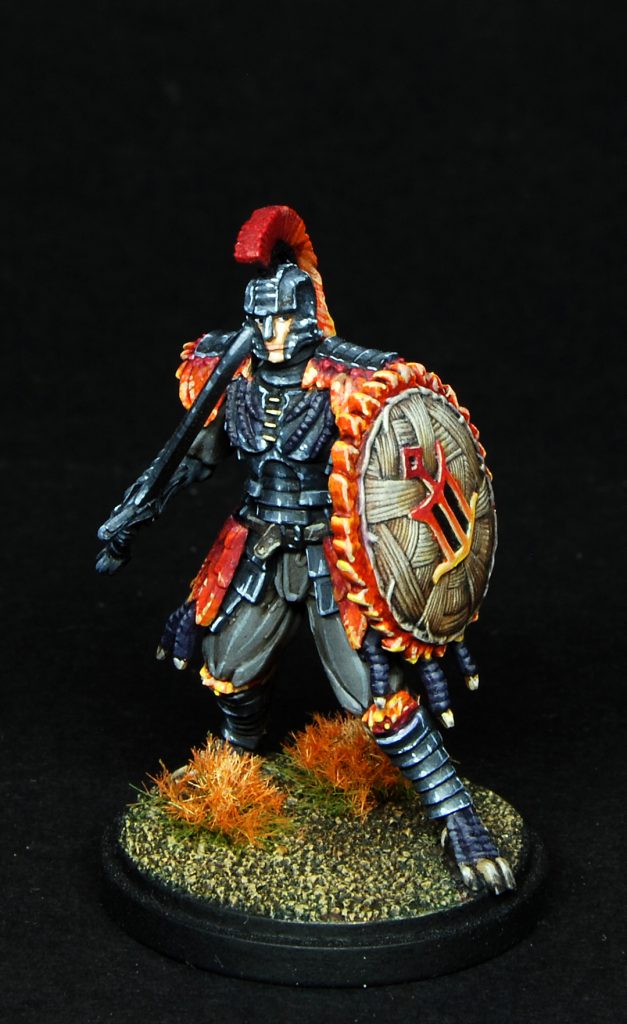
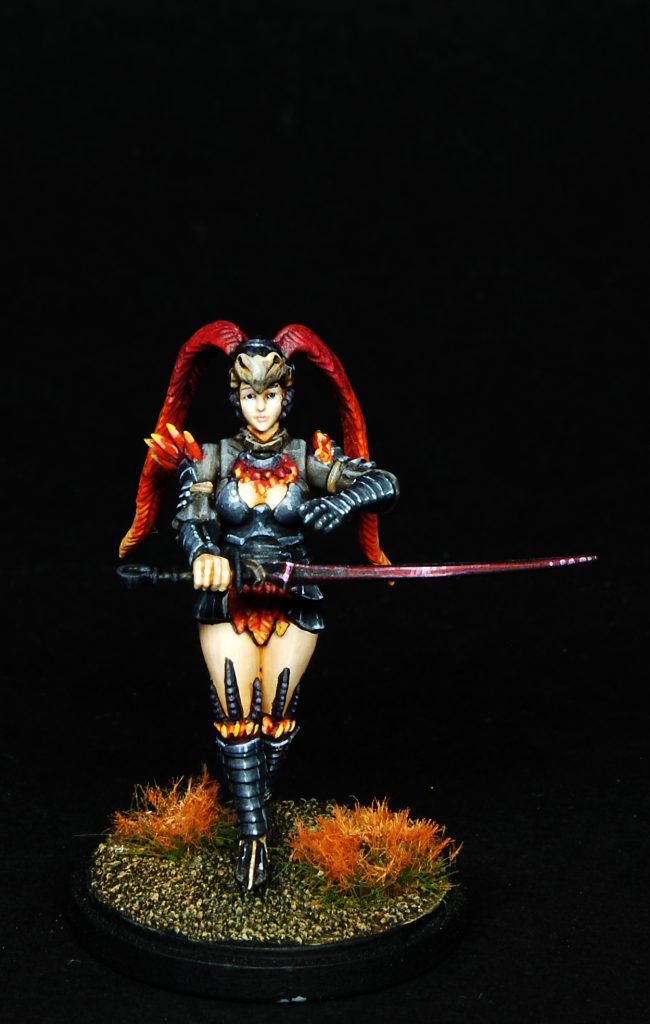
The survivors, as always, were painted using the same colors of the monster.
Not much to say here: since the miniatures are way smaller than the Phoenix, of course i was not able to perfectly recreate the blending in the feathers. However, the transition it’s there and gives the idea of armor crafted with parts of the monster.
The nmm metals were painted basically with VMC Dark Seagreen adding black/white for shadows and lights.
I went for a sketched paintjob, carefully positioning the reflections and avoiding perfect blendings.
In the fleshtone i tried to add some “golden” tones to give the idea of oriental skin, since this set somehow remembers of eastern countries.
Final models i will present in this article are the Intimacy Couple.
Now, imho they are quite unique in the core box since they represent probably the only happy characters in the game.
Kingdom Death is a terrible and nightmarish world and the birth of a new life is one of the few, if not the only, serene moment in the story.
I wanted these two miniatures to be different from the others, painted in bright colors.
I looked at the artbook and took inspiration from the art where green dressed, smiling survivors cheers a newborn(unfortunately can’t find a link), and decided for green clothes and reddish hairs.
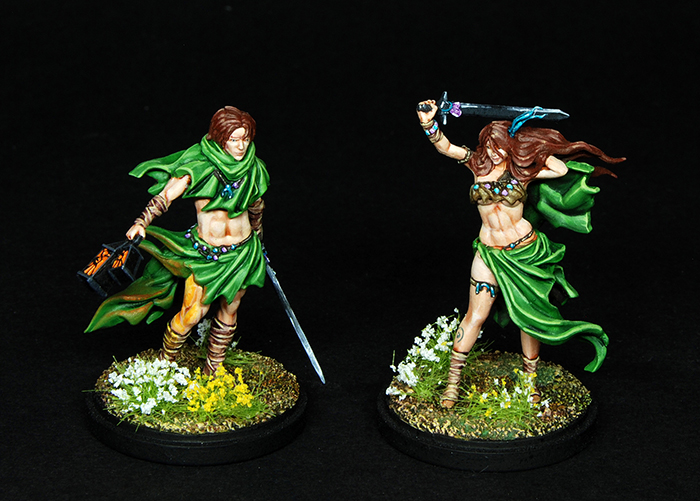
The skin was to be very soft and pale, to depict young people, so i used Nocturna Models Fairy Flesh, gently washed with Reikland Fleshshade and reworked all the way up to Nocturna Highlight skin. In the deepest shadow i remember adding some Druuchi Violet to the wash.
The clothes were painted with some mixture of green but there’s no way i can remember the recipe.
I really need to purchase some greens since i’m lacking them, so i think i mixed primary yellow with some bright green from VMC and maybe added something else.
Whatever, they were painted more in a GW-style, concentrating the highlights on the raised parts of the folds.
One of the hardest things in painting these models is their complex shape, with fabrics running around the body.
The hairs were painted adding some black and red to a basic brown and then pushing more red in the lights and more black in the shadows, adding the usual VMC Buff for the stronger lights.
Final details were the jewels, painted with turquoise and lilac, and then adding some tattoos to the girl.
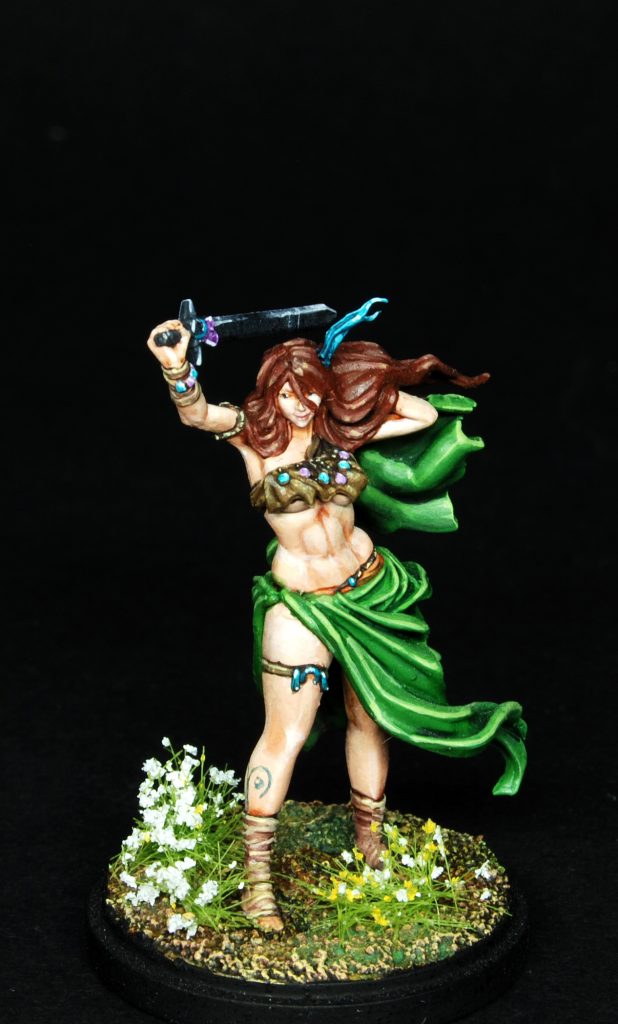
Also, in the process i lost the feather adorning the girl’s hairs so i hade to create a new one melting some plastic stripes in shape.
It’s easy and can be used for a lot of interesting techniques, for example creating strucutures for water/slime/lava. Try it!
This time the basing was done using Mininatur flowers, again to give an idea of happiness.
Very well, we reached the end of the article and next time i will conclude my speaking about the core set.
As always, if you’ve read this far i hope it’s been an interesting read.
Leave a comment if you have additional questions and don’t forget to follow me on my other media.
Until next time!
Lorenzo
Yeah. Love your phoenix. One of the best ones I found investgating for pictures.
Thanks Susanna!