
Hello Friends,
in this second part of the post dedicated to the KDM core set i’m gonna talk about some armor sets, the Screaming Antelope and its own Screaming Fur set.
The stuff in the core box it’s a LOT;
i perfectly remember the decisions and composition behind every set/quarry/nemesis, but sometimes i have difficulties remembering color recipes since i stupidly never took WIP photos, so i’ll will give you general color indications to work with.
Anyway, let’s see one of the most used set in the game, Rawhide:
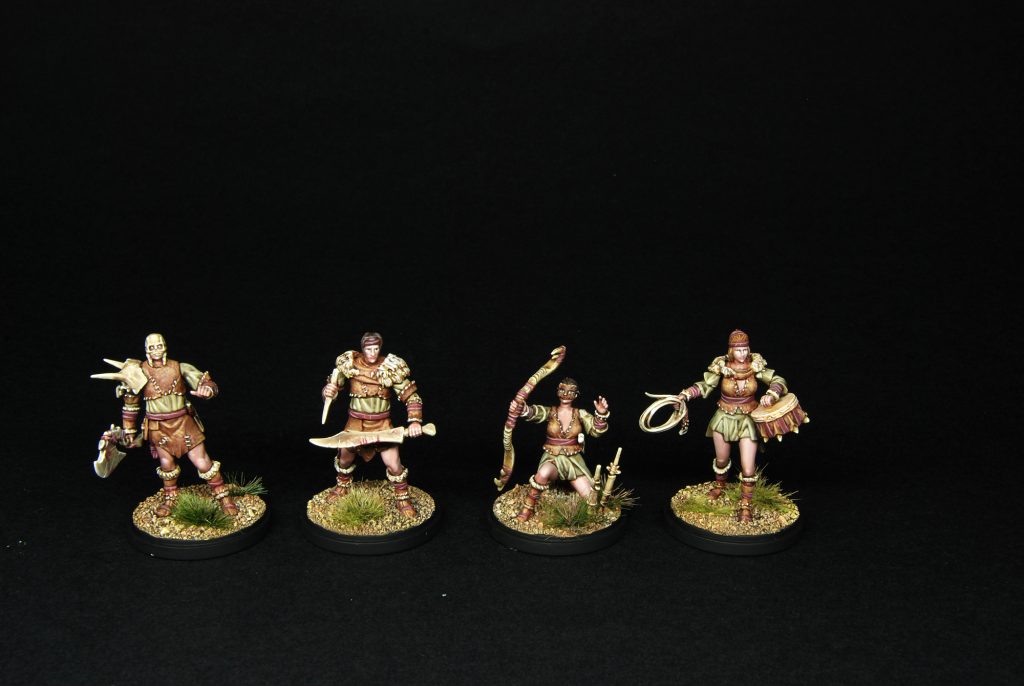
Now, for the color scheme i took inspiration from the armor set cards but, during the painting, i realized i went too bright: anyway, the customer was happy and i kept the scheme.
The painting process was very simple yet effective.
The skin was basecoated with a mix of basetones from Vallejo Model Color, washed with Agrax Eartshade from GW and then highlighted with pale colors(probably buff and sand), adding more lights on the faces.
The cloth parts color were a mix of khaki and brown, shaded with Agrax Earhshade and again highlighted with the same pale colors: when painting a miniature, if possible i try to use the same color to highlight all the different parts, this give consistency and atmosphere to the job.
Leather was again basecoated then shaded with Agrax Earthshade, then highlighted with stippling technique, to give it a texture, first adding some yellowish brown to the mix and then with pure buff/sand for the final lights.
Bone parts were also shades with Agrax Earthshade and roughly highlighted with diluted bone color, until i used it pure for edge-highlights.
As you can see i applied simple techniques that, if used correctly and with precision, can give very good loooking miniatures!
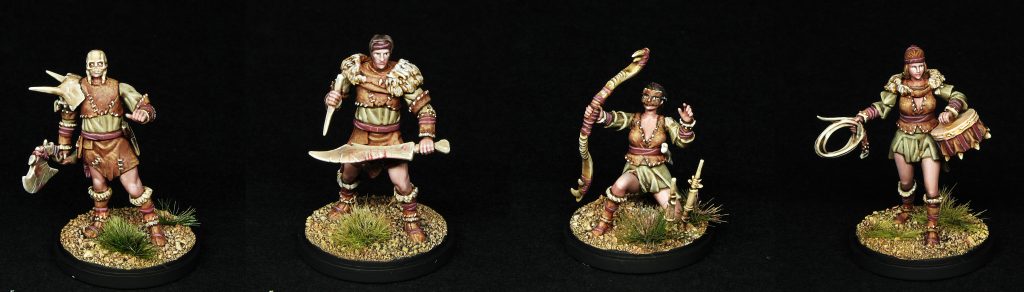
For the Leather armor set i wanted to achieve a darker, grisly overall look:
In this case, for the skin i wanted a bright and saturated tone to contrast with the dark armor.
I tried using Medium Flesh from the paint set i got from Nocturna Models: it’s a strange, orangish colors at first but gives a very bright finish. I mixed in Fairy Flesh from the same set for the highlights, while the shadows where again a simple but controlled wash of Agrax Earthshade.
Unfortunately, since i am inept at photographing, the pics can’t show the real hue of the skin which is WAY brighter and interesting than you can see here.
Now, for the leather parts i wanted to give some texture.
One of the thing i like the most about painting miniatures it’s differentiating every material: i don’t like to simply put colors and blendings, i prefer to paint materials adn reflective properties as they would look in real life.
Since it’s very difficult to create textures on such small minis, for the leather i went with a dark brown basecoat shaded with lot of Druuchi Violet, then painted a lot of thin scratches in two applications.
The final effect is a very worn armor and the contrast is high enough to be seen on the playing field.
The yellow parts also received a similar treatment: basecoat was brown + Dark Yellow from VMC, again adding thin scratches on the edges.
The tunic was instead basecoated with some mix of Khaki and browns and received a gentle stippling as highlight, adding VMC Pale Sand to the mix.
Metal parts were quickly painted in NMM with a dark bluegrey mix: on the armor sets i couldn’t afford perfect blendings NMM since i was working on a budget and with a timeframe, so i went for a “sketch” approach.
It’s my opinion that careful positioning of lights and shadows does half the work in painting NMM.
Considering they’re gaming miniatures, i like the result; but please, feel free to let me know what you think.

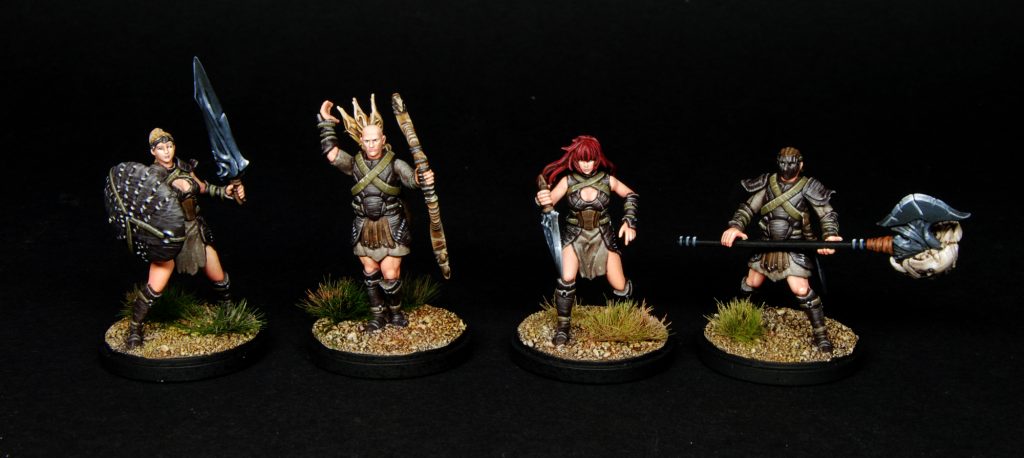
And it’s now the time to talk about the Screaming Antelope and its set. First, a group picture.
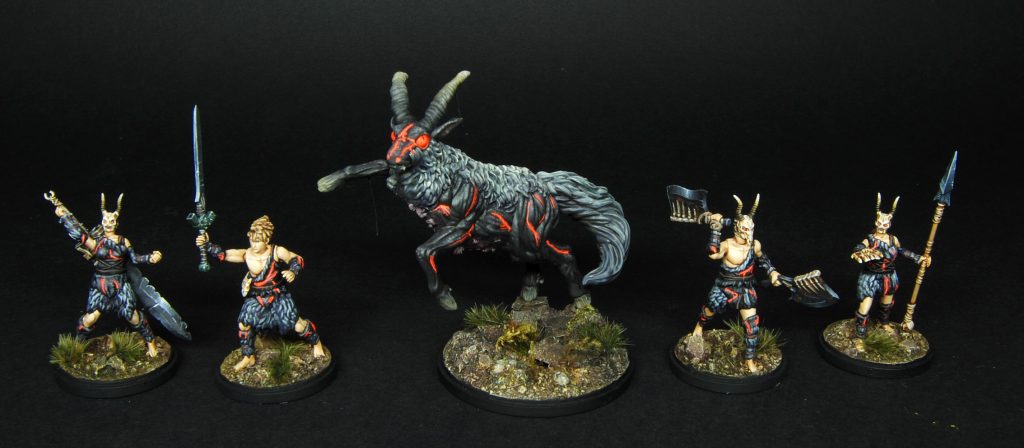 My goal here was to paint the beast in a style opposed to the White Lion: while the latter is pale and noble, i wanted the former to be dark and filthy.
Me and the customer agreed to copy the color scheme from the artbook, where we found a very grim representation of the antelope.
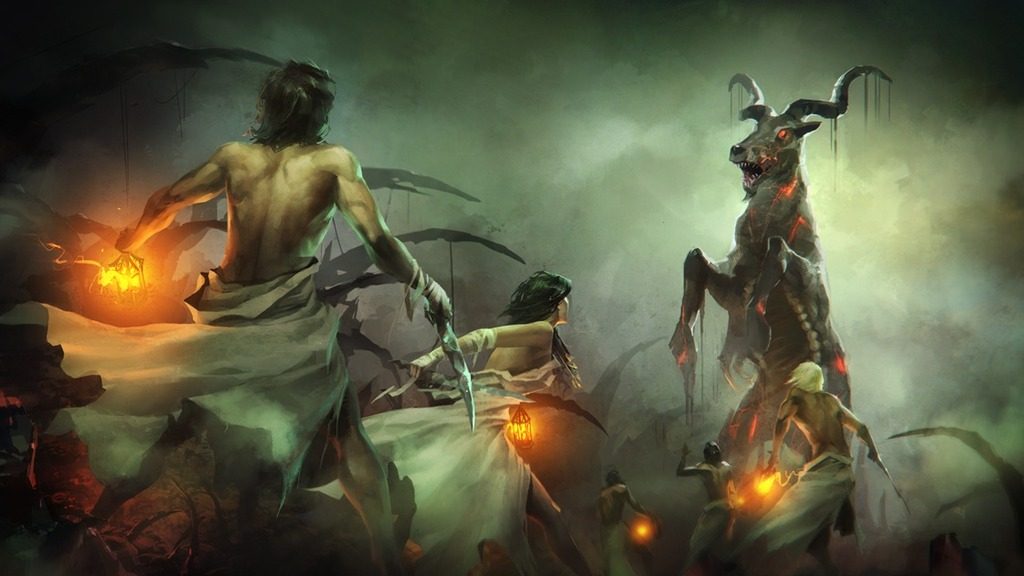 Every KDM player knows about this artwork, yet i’ve never seen used these colours, which is strange because i really think they fits the antelope.
Here is my take.
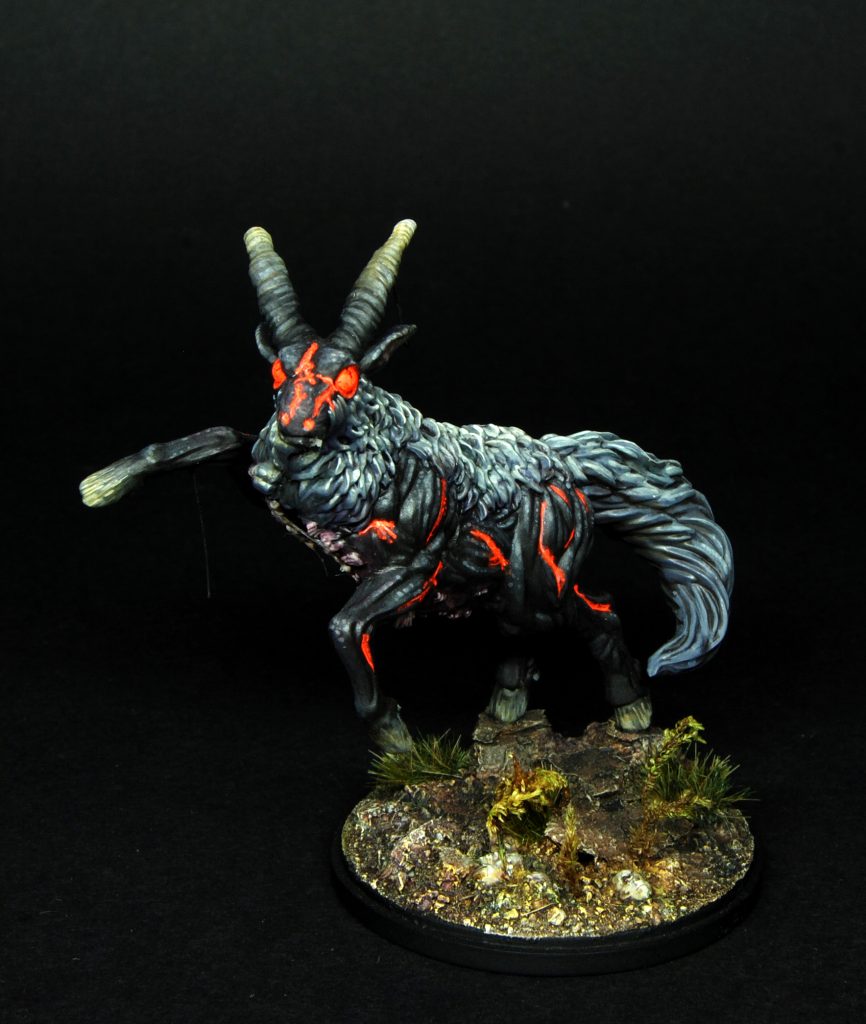

I have to be honest: i think this sculpt isn’t on par with the rest of the models.
Some parts are not bad, others really lack details, e.g. the face and nose and hooves.
Speaking about the paintjob, i basecoated the flesh with a really dark brown( i think a mix of 80% VMC German Cam Black Brown and 20% black) highlighted adding small amounts of pinkish fleshtones and, for the last lights, VMC Pale Sand.
One thing i’ve learnt over the years is to avoid highlighting black(in this case, black-brown) with only white, except for certain materials: white gives a really chalky and uninteresting finish.
Adding other colors to the mix, like fleshtones or off-whites, helps the blendings and gives “life” to the black.
From the pic you can see the last lights were stippled with small dots. I aldo added some purple washes here and there to, again, add some life to this dark color scheme.
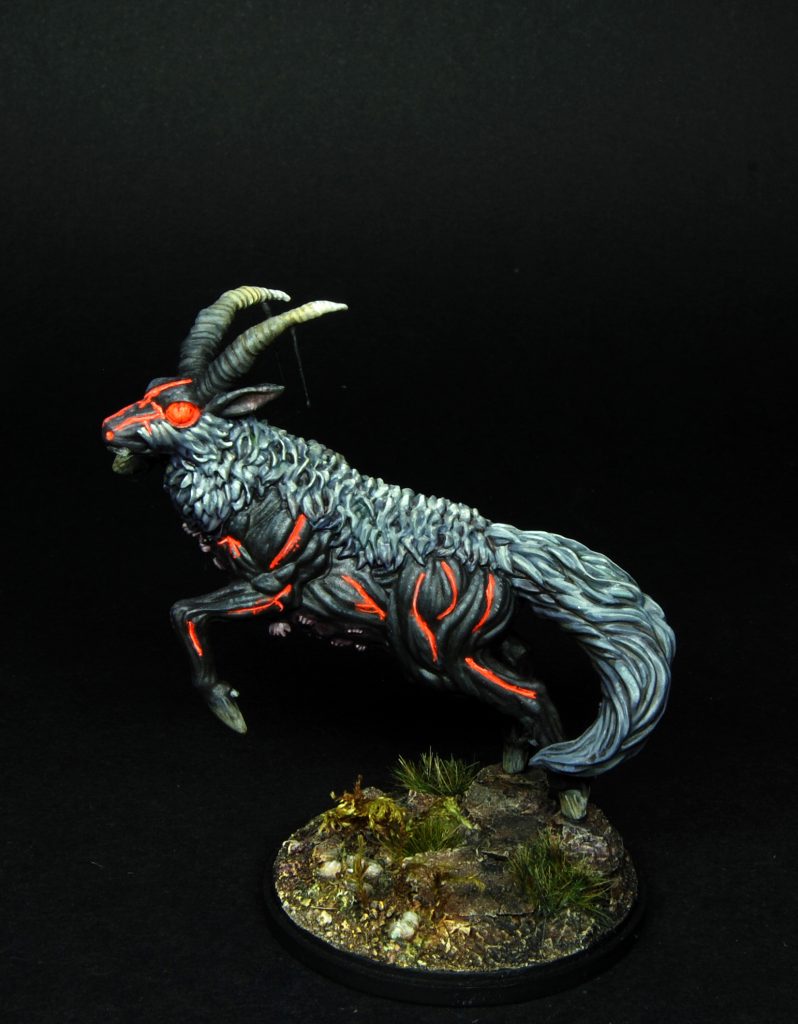
Fur was painted from a base of dark grey, also washed with Druuchi Violet and Drakenhof Nightshade, while lights were simply painted adding buff and VMC Pale Sand and concentrating on the top of the back and on the top of the tail.
Horns and hooves were wet blended from black to a bone color towards the end, then i added edge highlights on the horns and fine lines on the hooves, to give a bit of texture.
The gooey dropping on the horns (like artwork suggest) enhance the idea of a dirty animal and were done glueing fishing line and using UHU glue mixed with black to create volume.
Follow this useful tutorial from Massive Voodoo: Blood Drops.
Now, a fun part was painting the scars on the body. I own a set of fluo pigments from Forged Monkey, now sadly out of production:
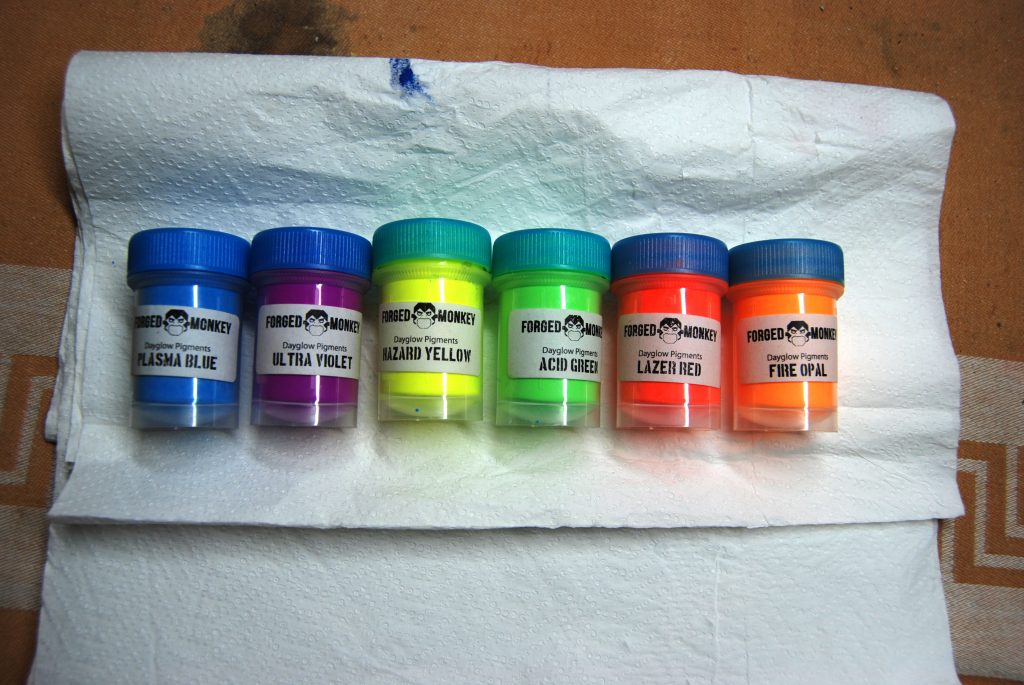
They are perfect to create glows, pools of lava or slime, fiery eyes and whatever your imagination suggests.
I used Lazer Red, a very powerful pigment, for the scars.
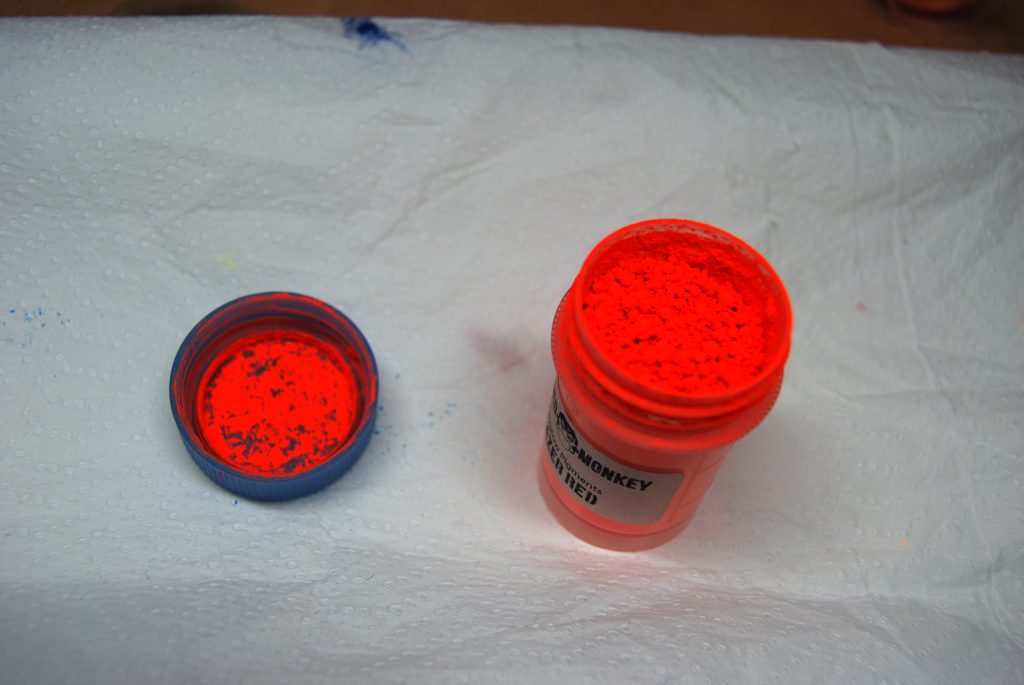
First step was to paint white lines beetween the muscles, and some dots: this step is very important!
To obtain the max power from these pigments, but also colors like reds or yellow, i find easier to paint them over a white basecoat.
After that i simply diluted in a resin medium some pigment and repainted over the white. If you try this, be careful not to add too much pigment, otherwise the resulting color could be way too chalky.
Eyes were painted the same way.
The mouth was painted with a fleshy color, then washed red and purple multiple times, then the protruding parts highlighted with the flesh color, adding buff for the final coats. A bit of gloss was added to give the idea of wet tissue.
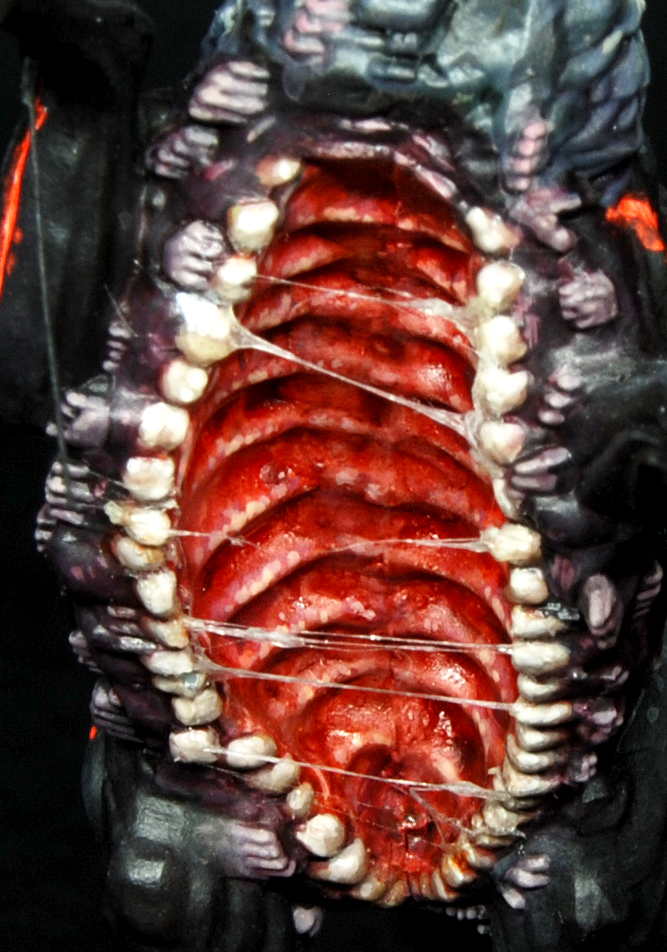
The area around the mound was glazed a lot with purple and a reddish flesh color until i reached an “inflammated” look, then all the hands were picked with a purple-flesh mix and all the teeth painted with a bone-yellow mix first, then roughly highlighted with bone.
The slimy strings are done with the same Uhu glue used before, mixed and mashed until it became stringy and then, VERY carefully, applied to the teeth with a toothpick.
Disgusting, isn’t it ?
Base was done with cork to simulate rocks and add height to the antelope: otherwise, the work on the mouth would have been barely visible.
The soil is real earth and plants are from a Christmas decoration pack, thay should simulate the dried achanthus presents in the showdown. I also added some stone faces, hardly visible in the pics.
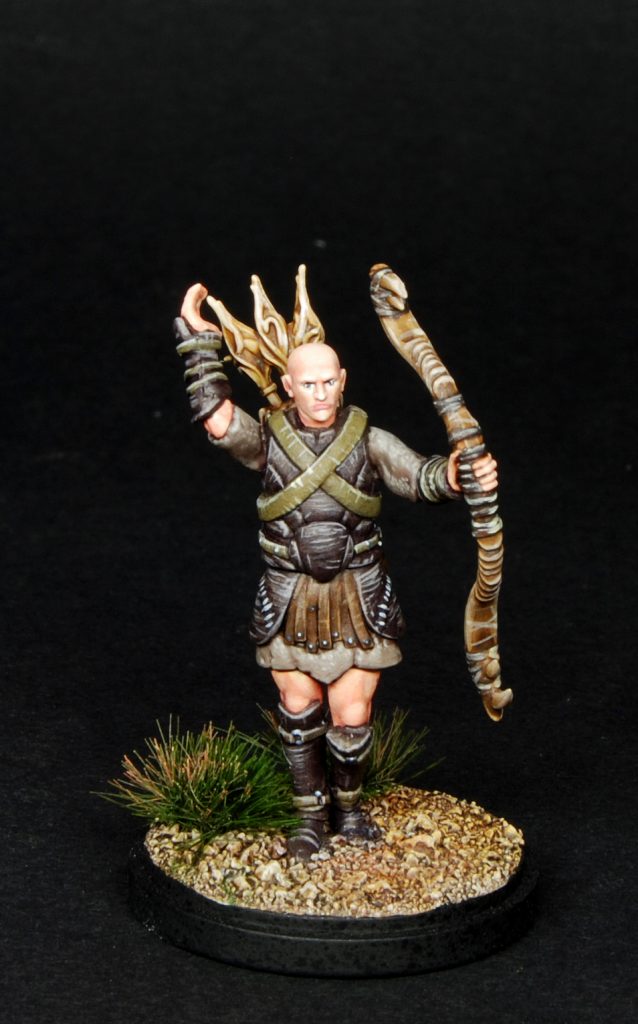
I don’t have much to say on the Screaming Fur set, it’s painted exactly like the antelope.
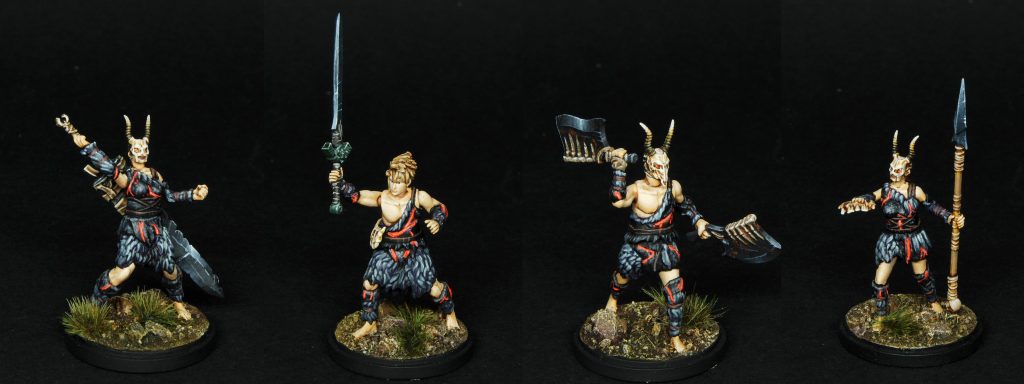
This time i added contrast on the NMM starting from black-blue and adding sharp highlights with white.
The survivors wearing skull helms got orange fluo eyes like the antelope.
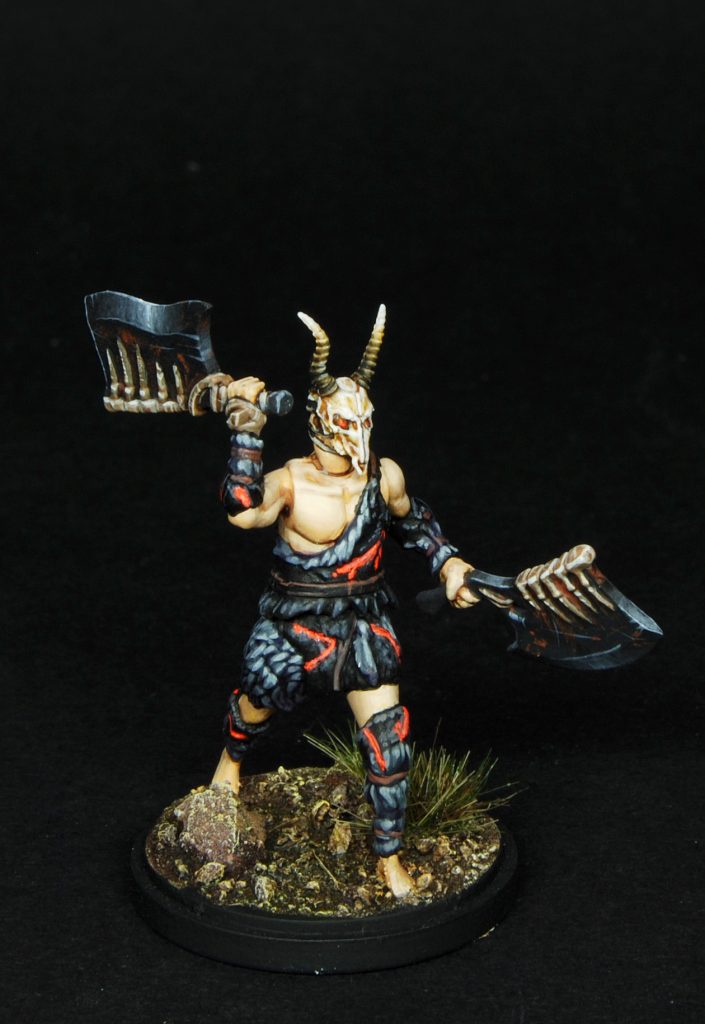
This fella above is my favorite survivor from the set: he’s got two cleavers from the Butcher, has fiery eyes and is ready to rampage.
Part 2 ends here!
Again, If you liked my work and you’re interested in commissioning your own KDM core set, or other miniatures, feel invited to contact me HERE for a quote!
Also, don’t forget to follow my Facebook Page and be ready for part 3, where i will talk about The Butcher, The Hand and King’s Man!
Hope you enjoyed the reading!
Lorenzo