
Hi Friends,
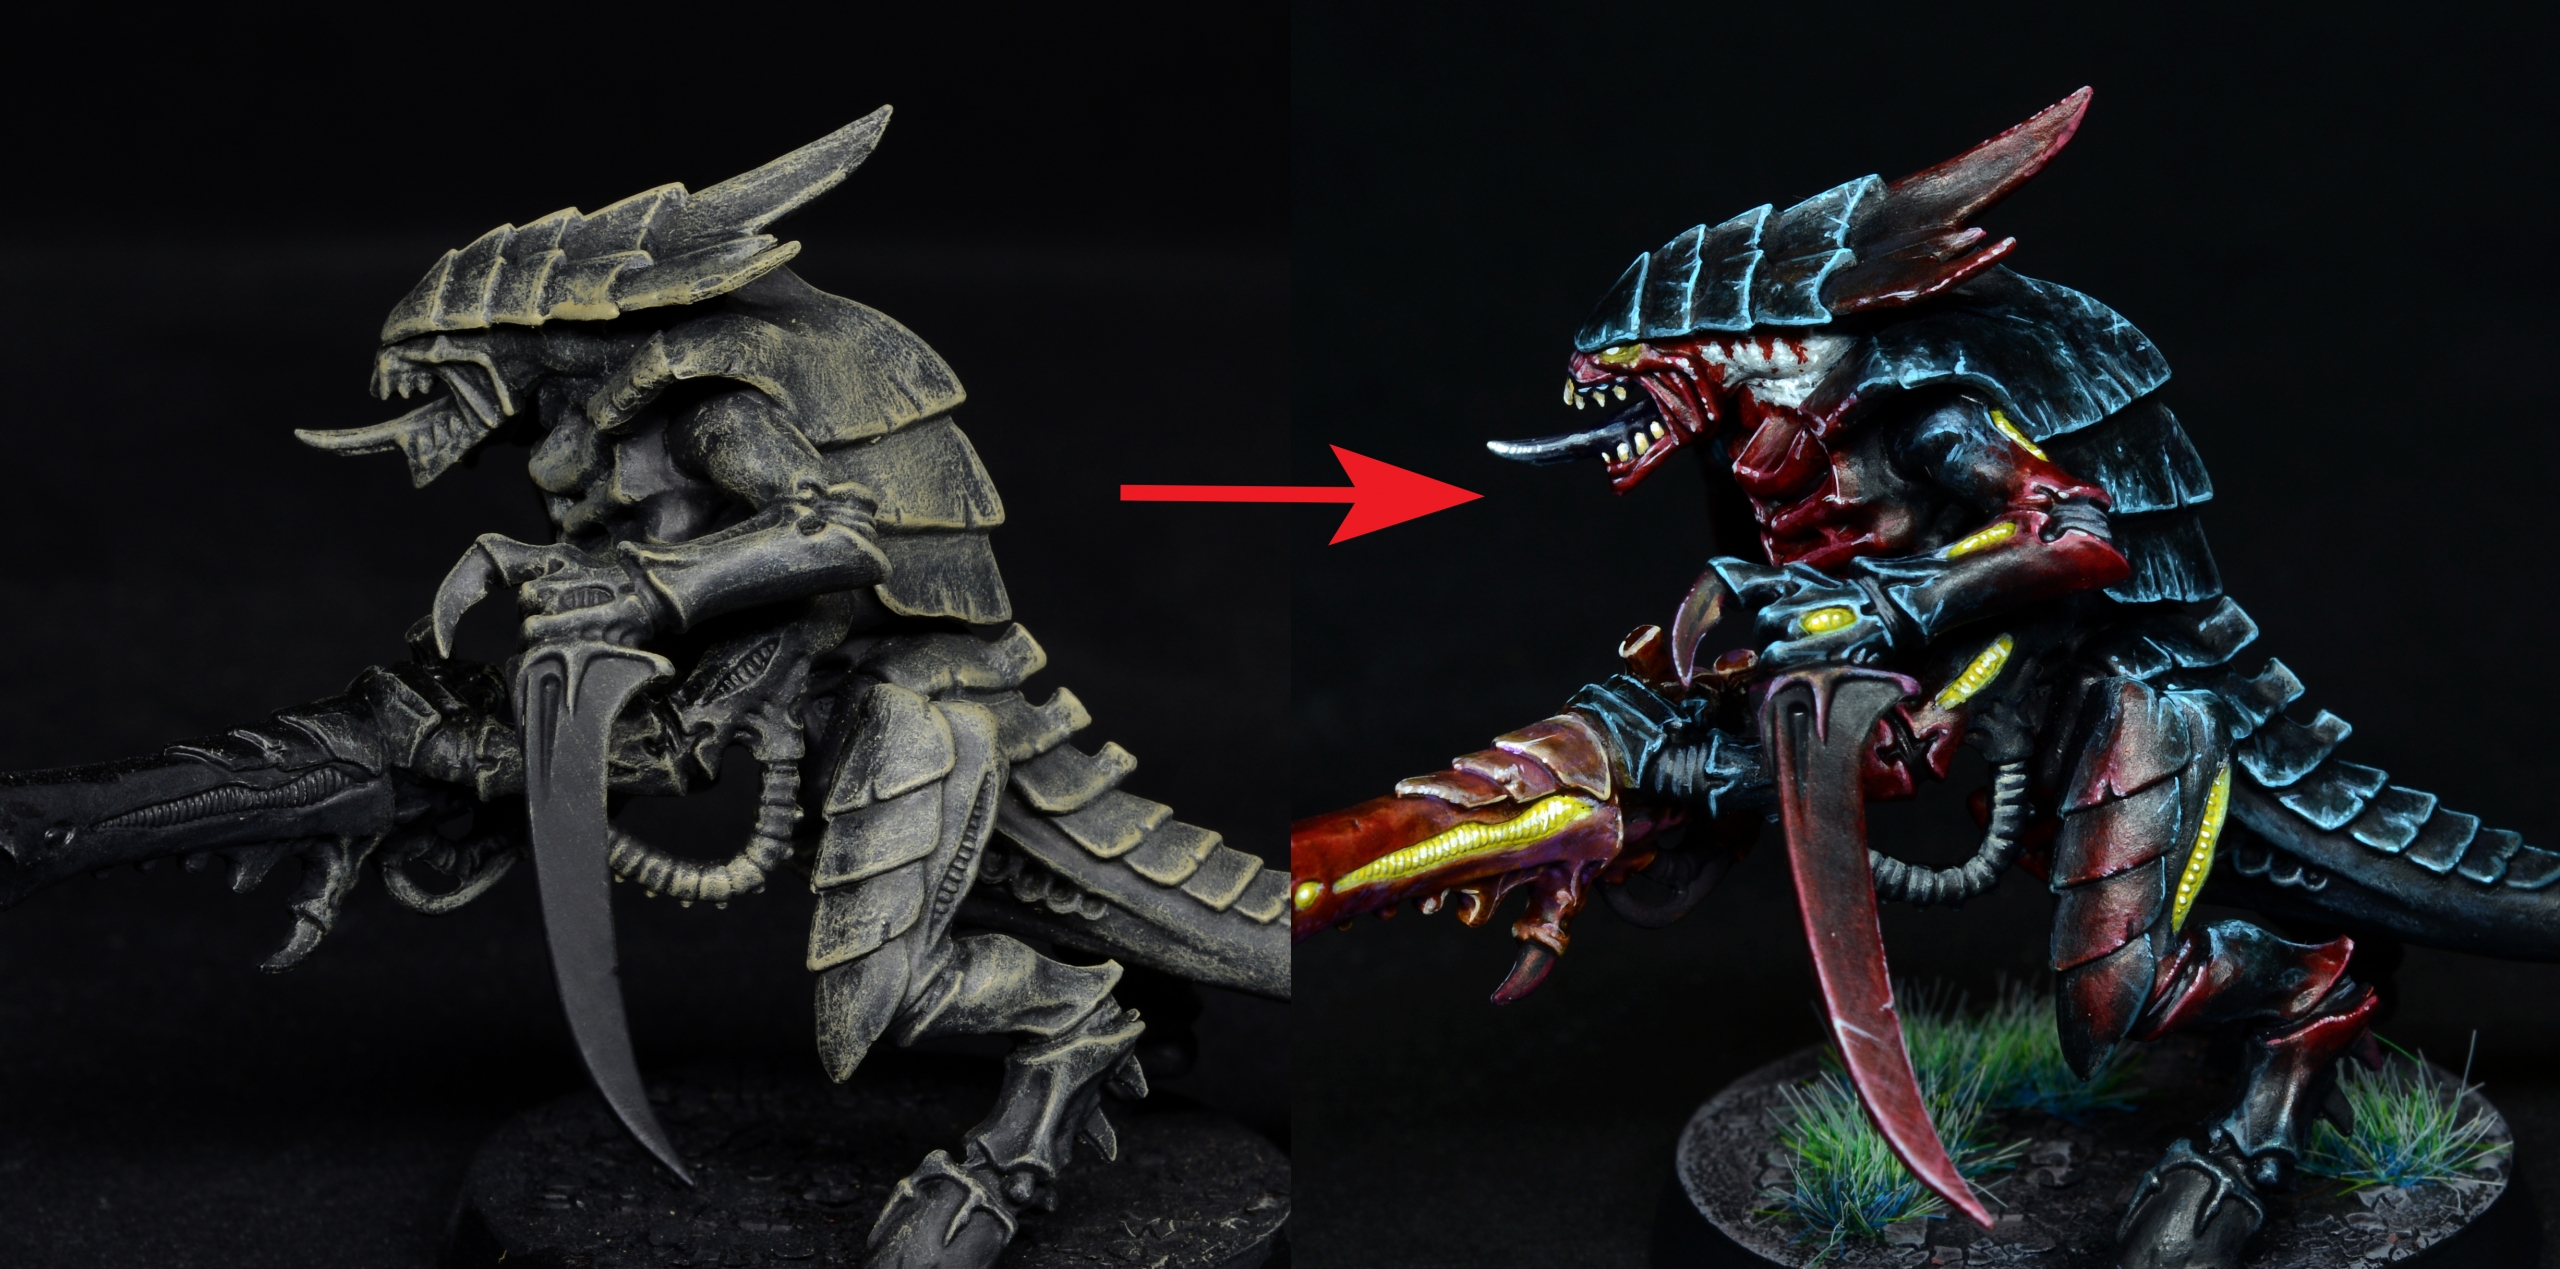
welcome to the second part of the tutorial where i will try my best to explain how i’ve painted Tyranids with the color scheme depicted in the third edition codex:
I want to thank again my customer, Reddit user u/Autoxidation, who commissioned me this tutorial deciding it would have been free for the community.
In the first part of the article i showed some quick techniques to create that color scheme and achieve a good tabletop level; in this second installment i will use mostly the same process/palette, but adding details and flairs in order to bring the models at a higher tabletop level, something that would fall under my “advanced” painting tier.
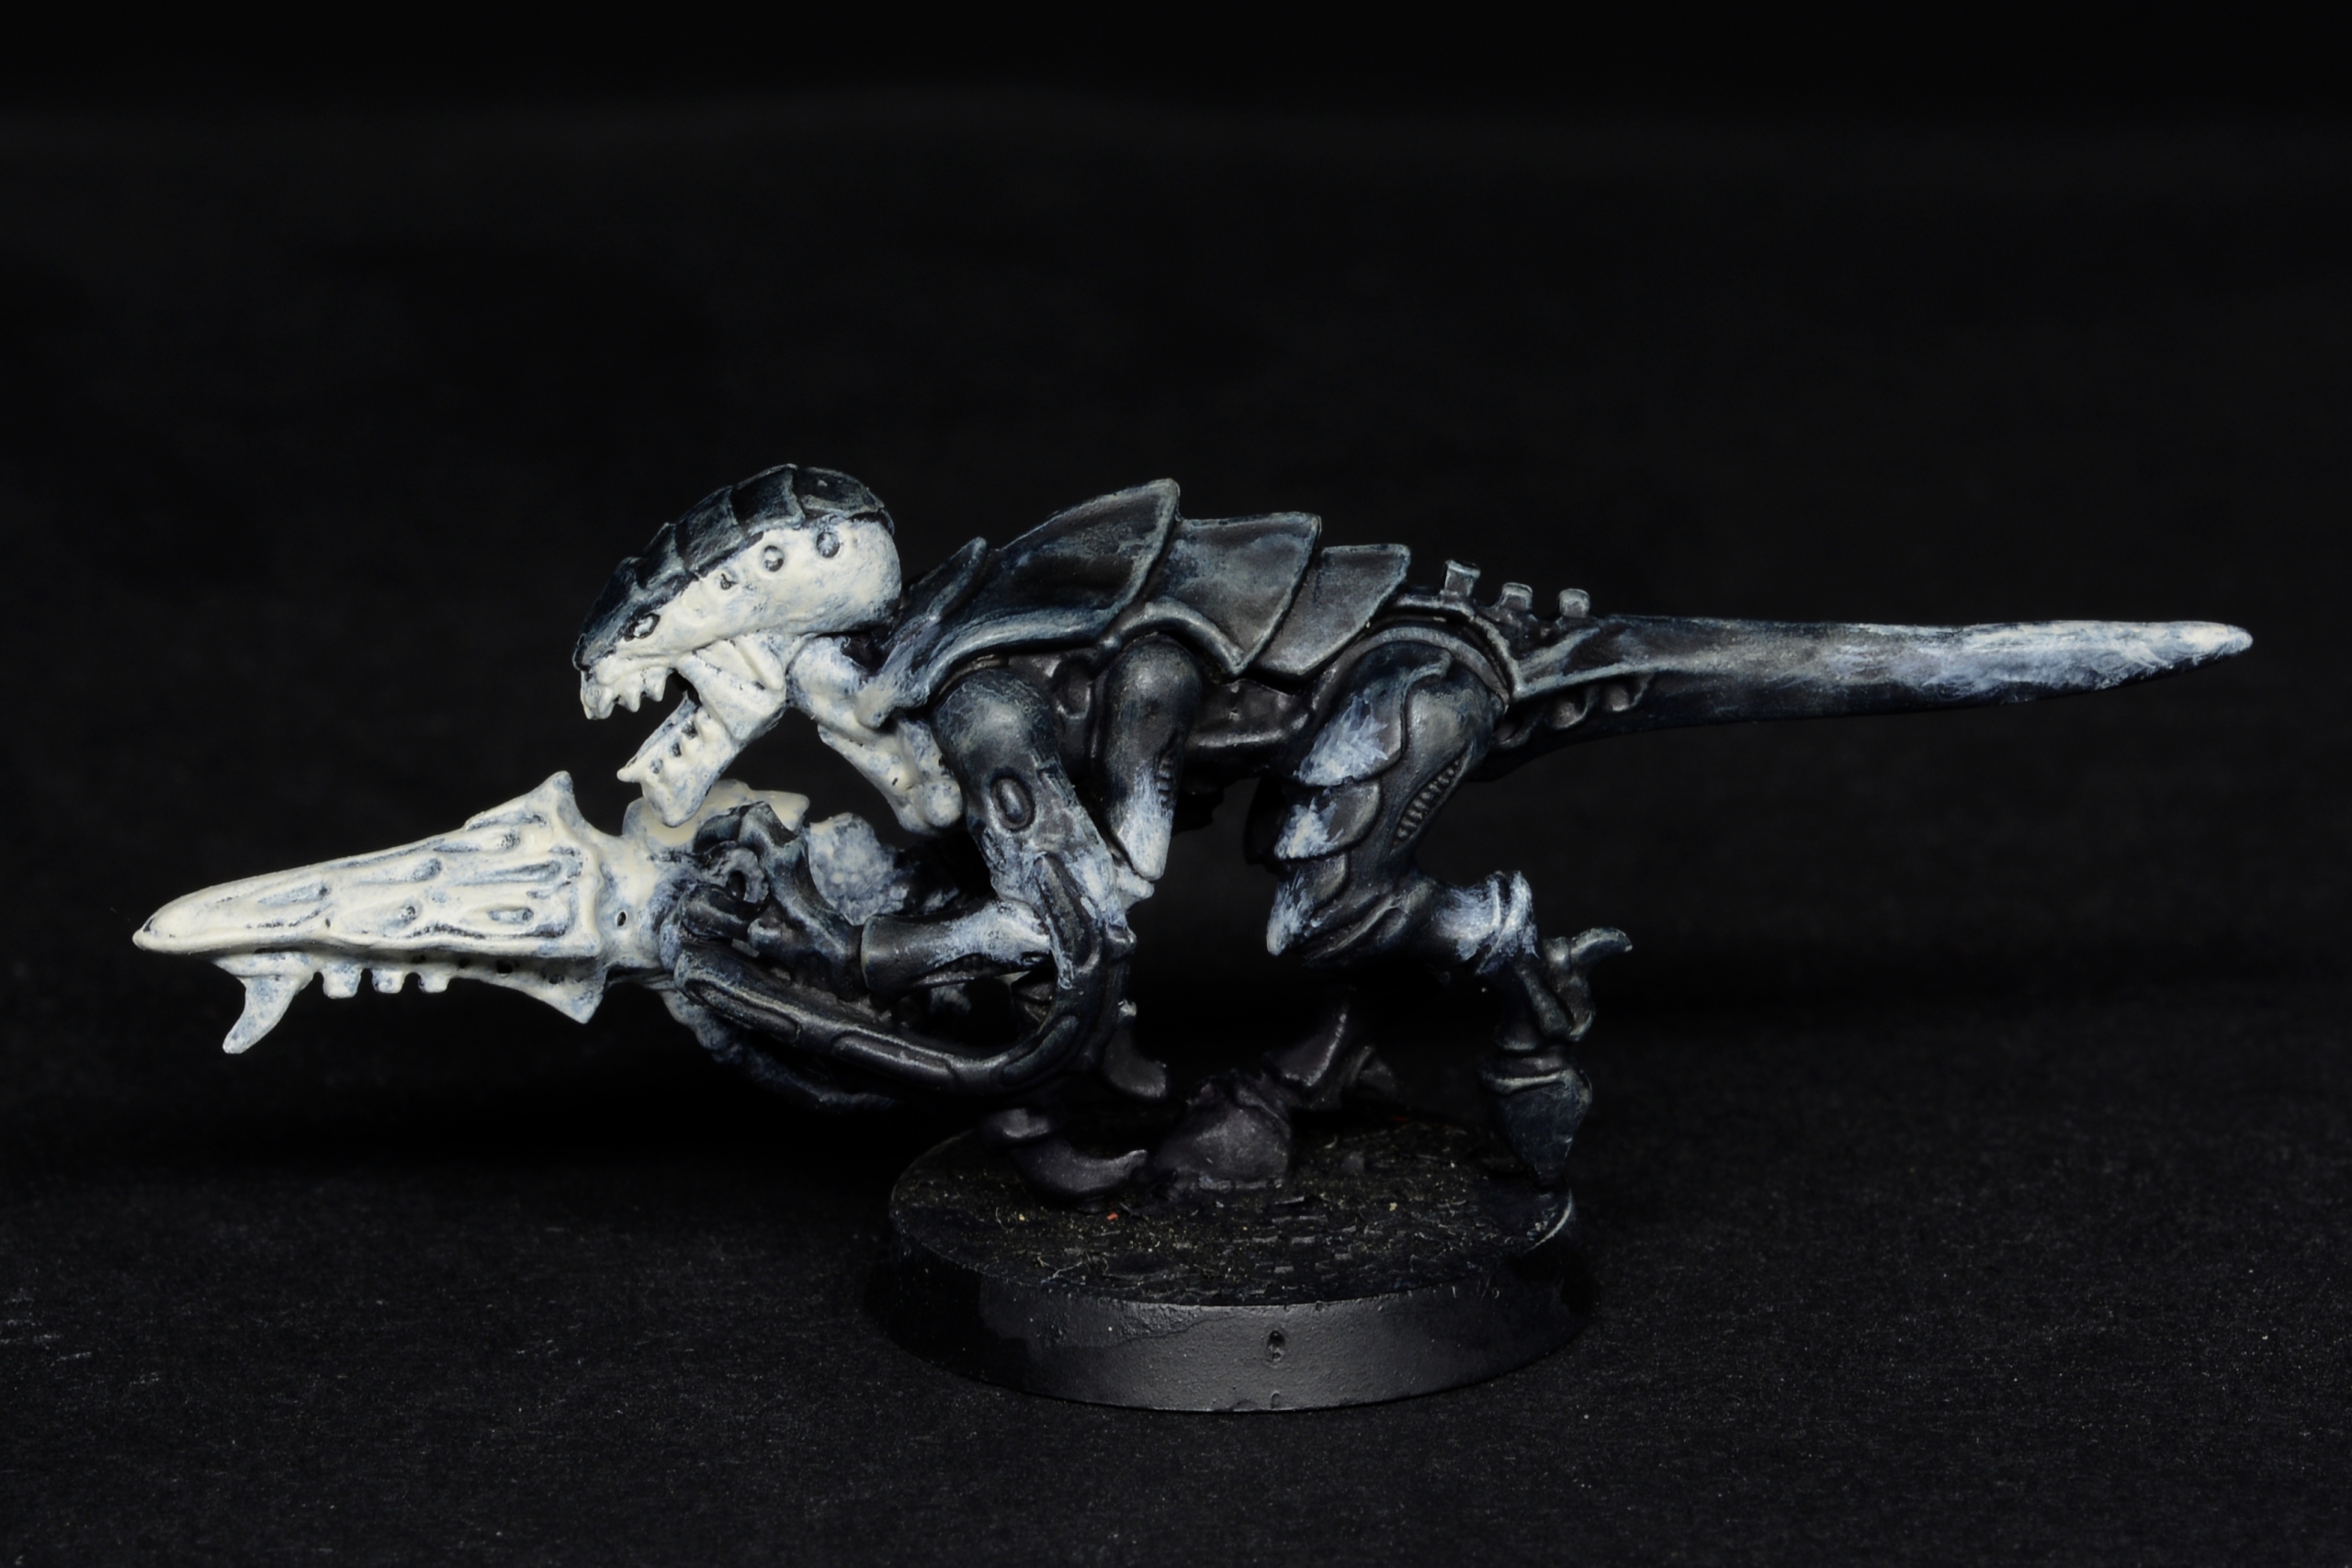
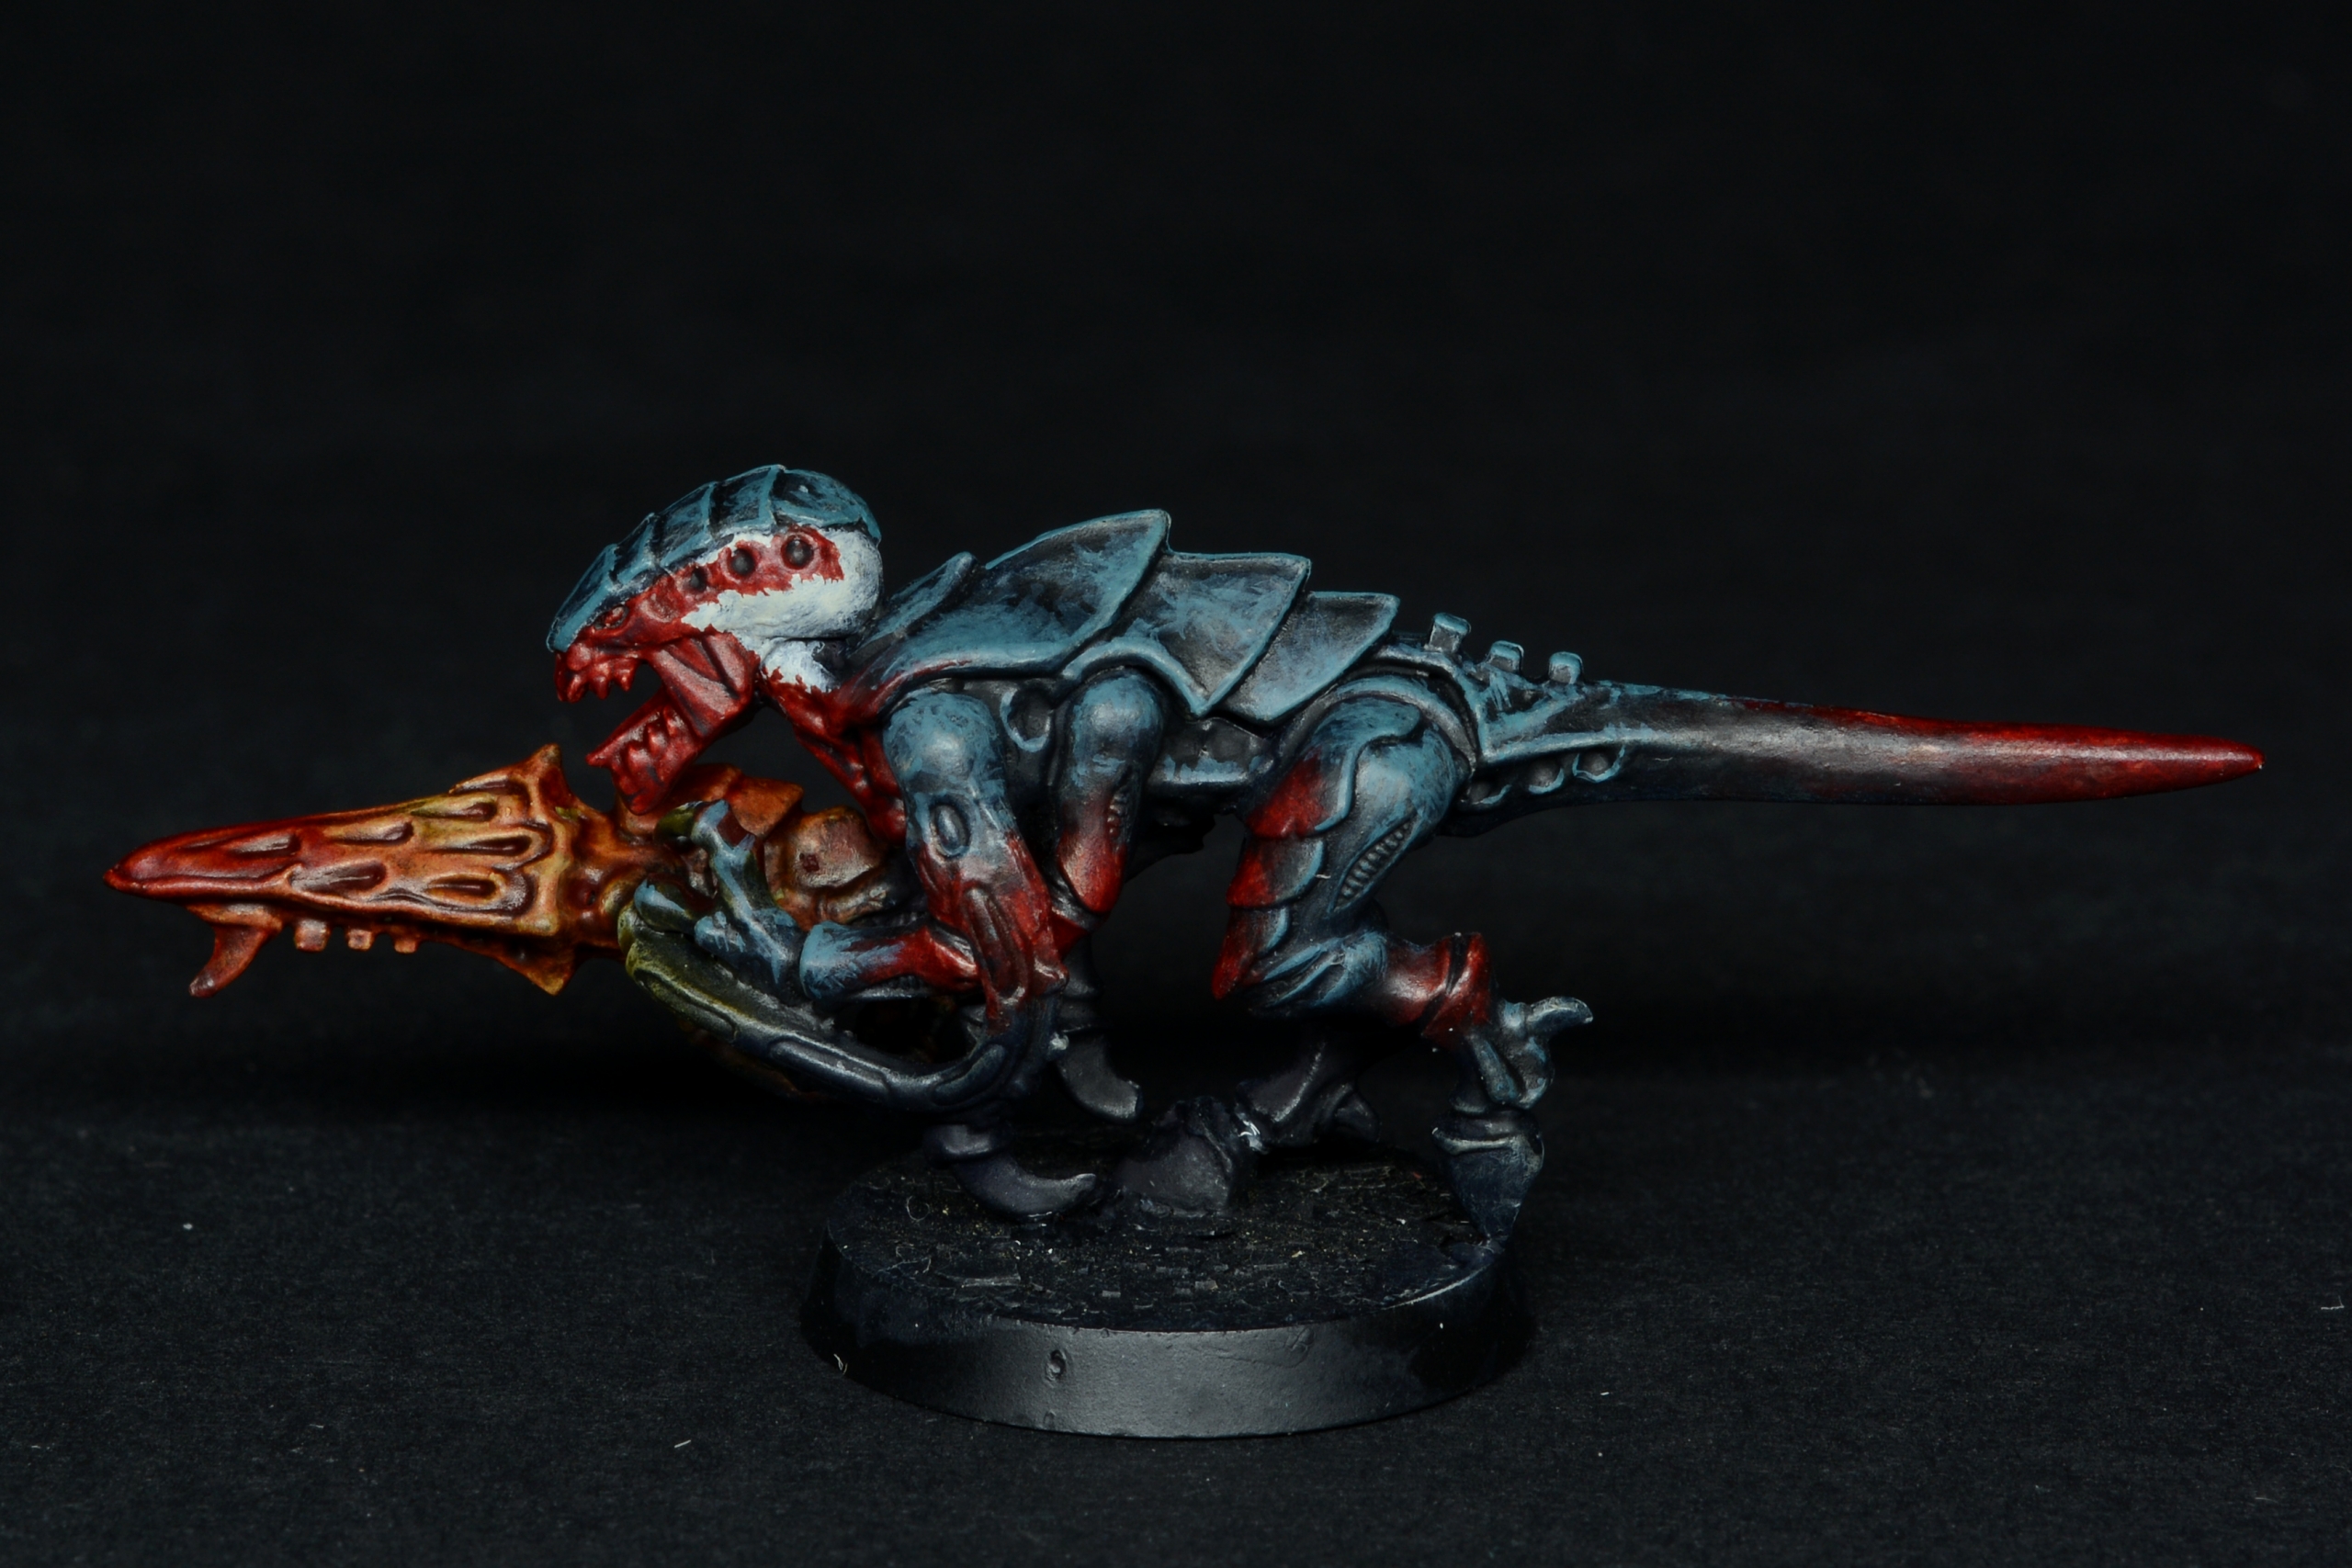
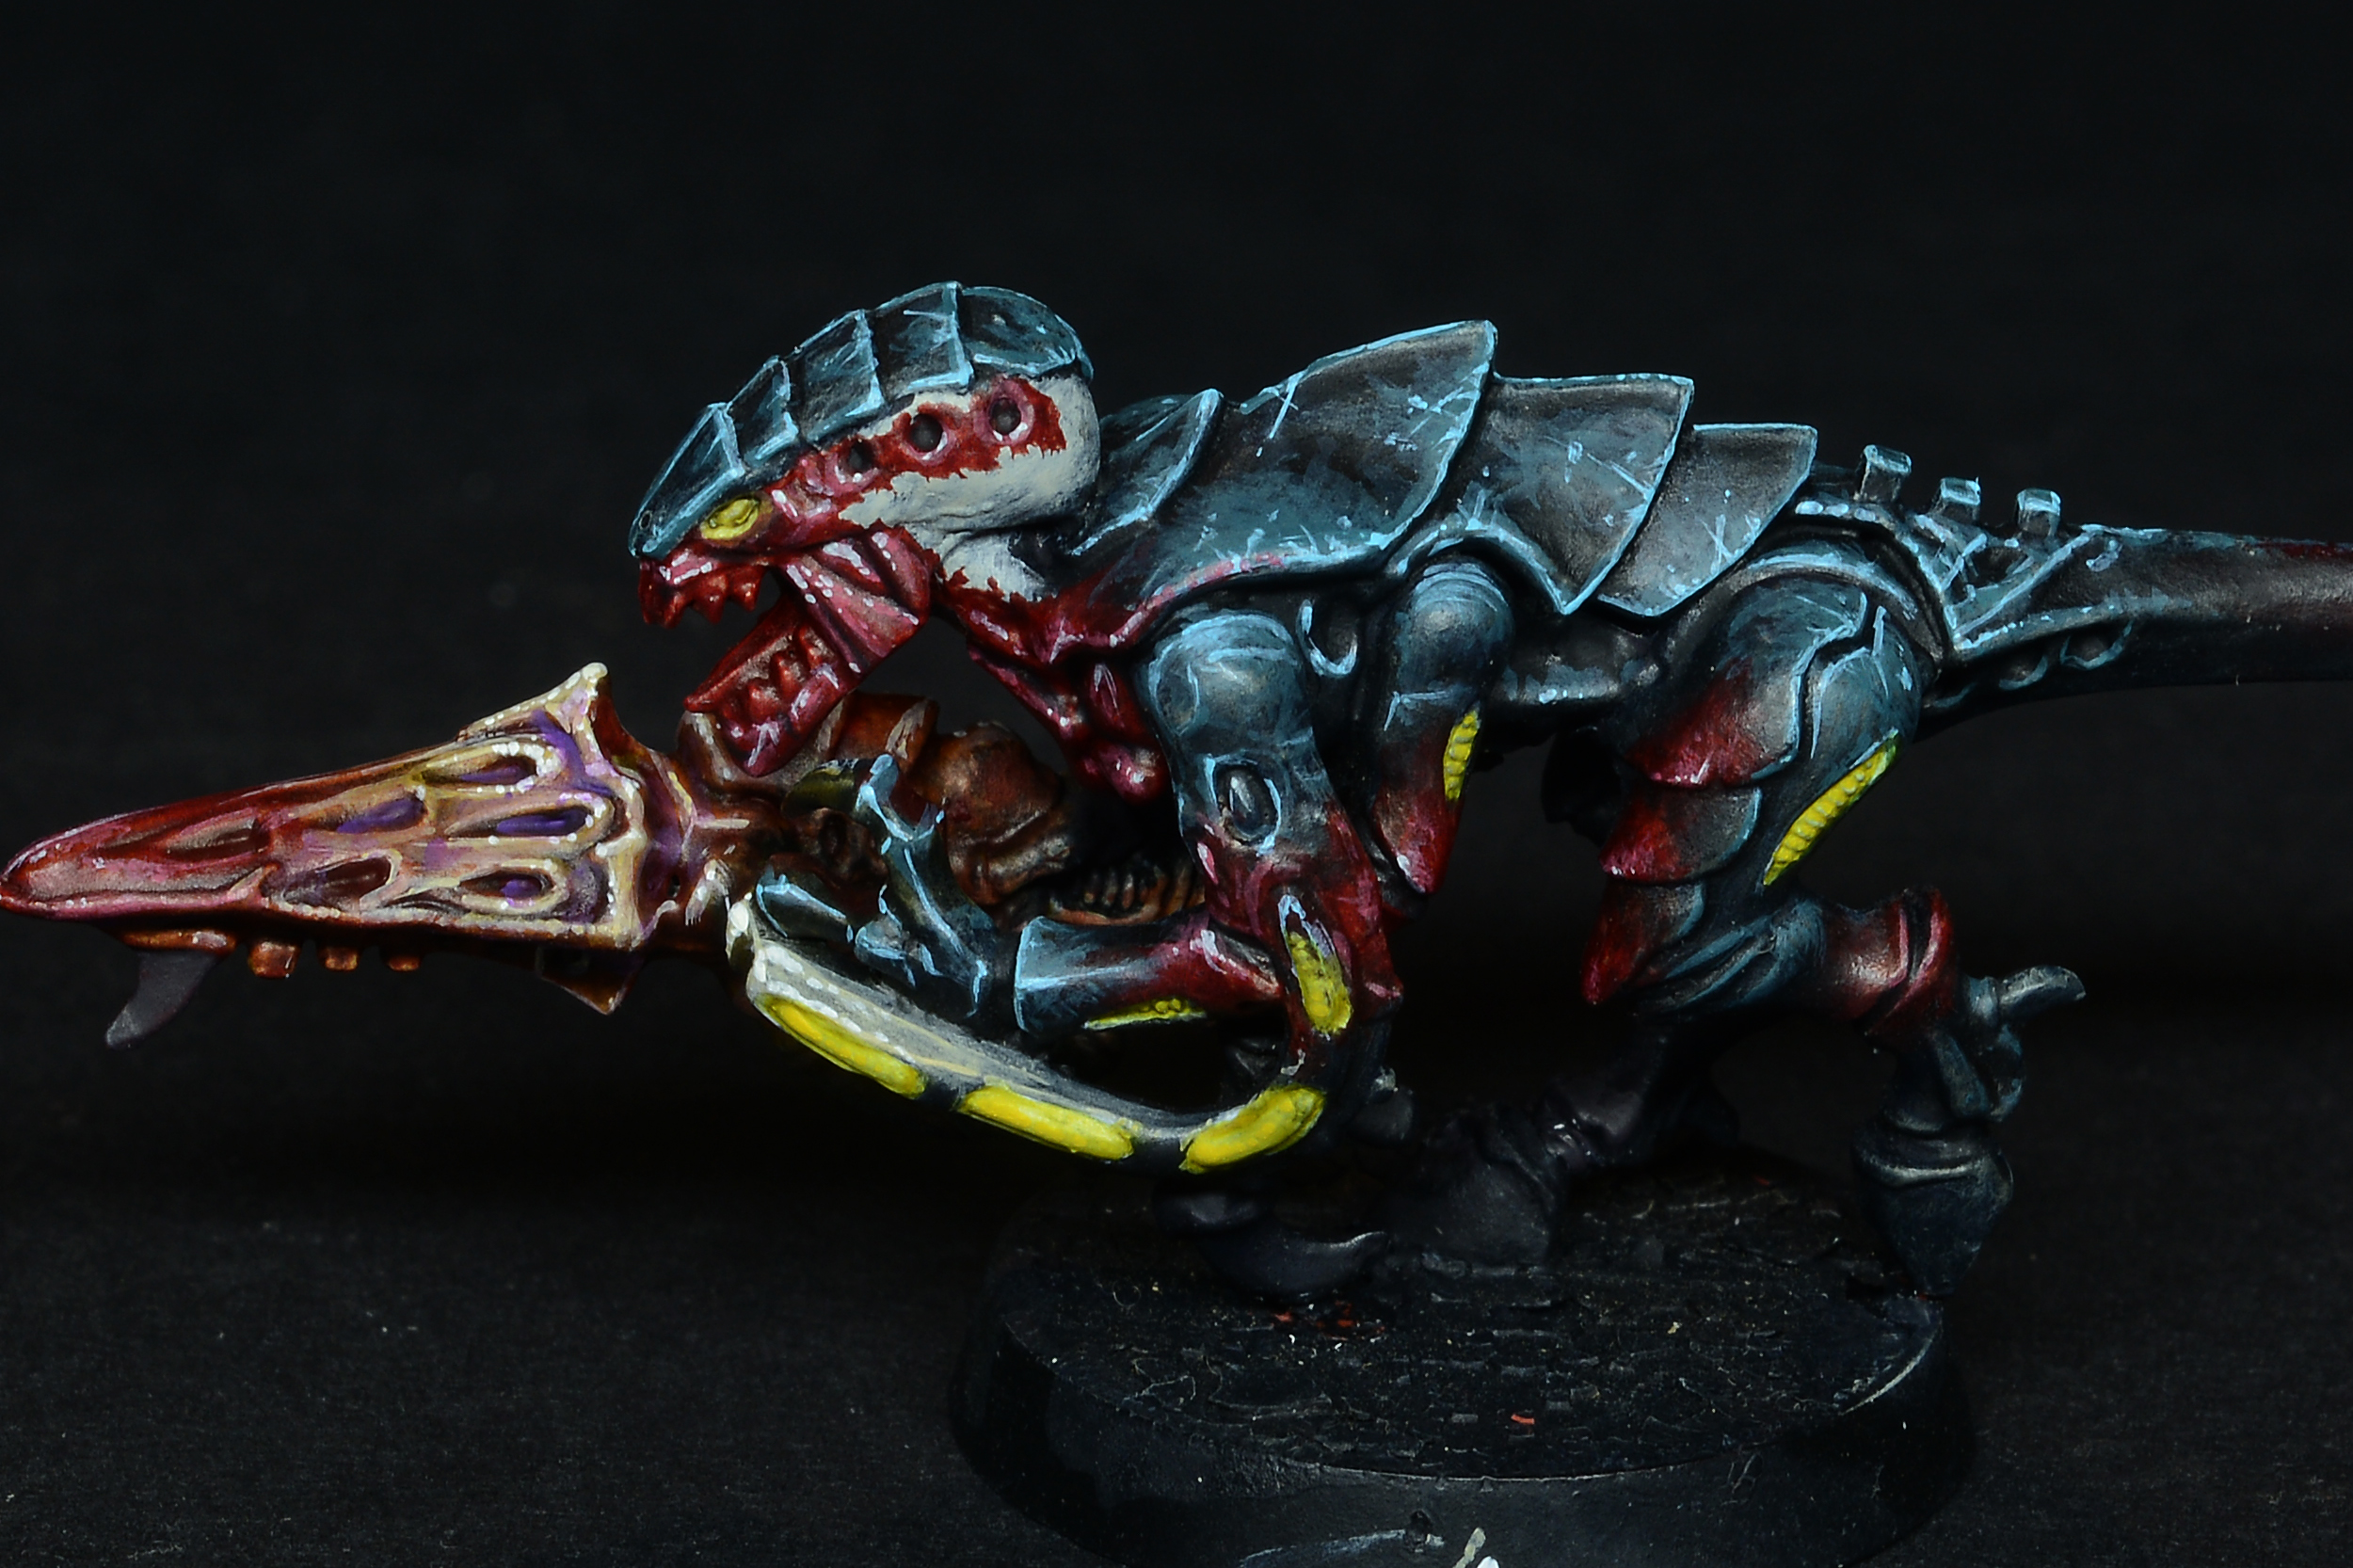
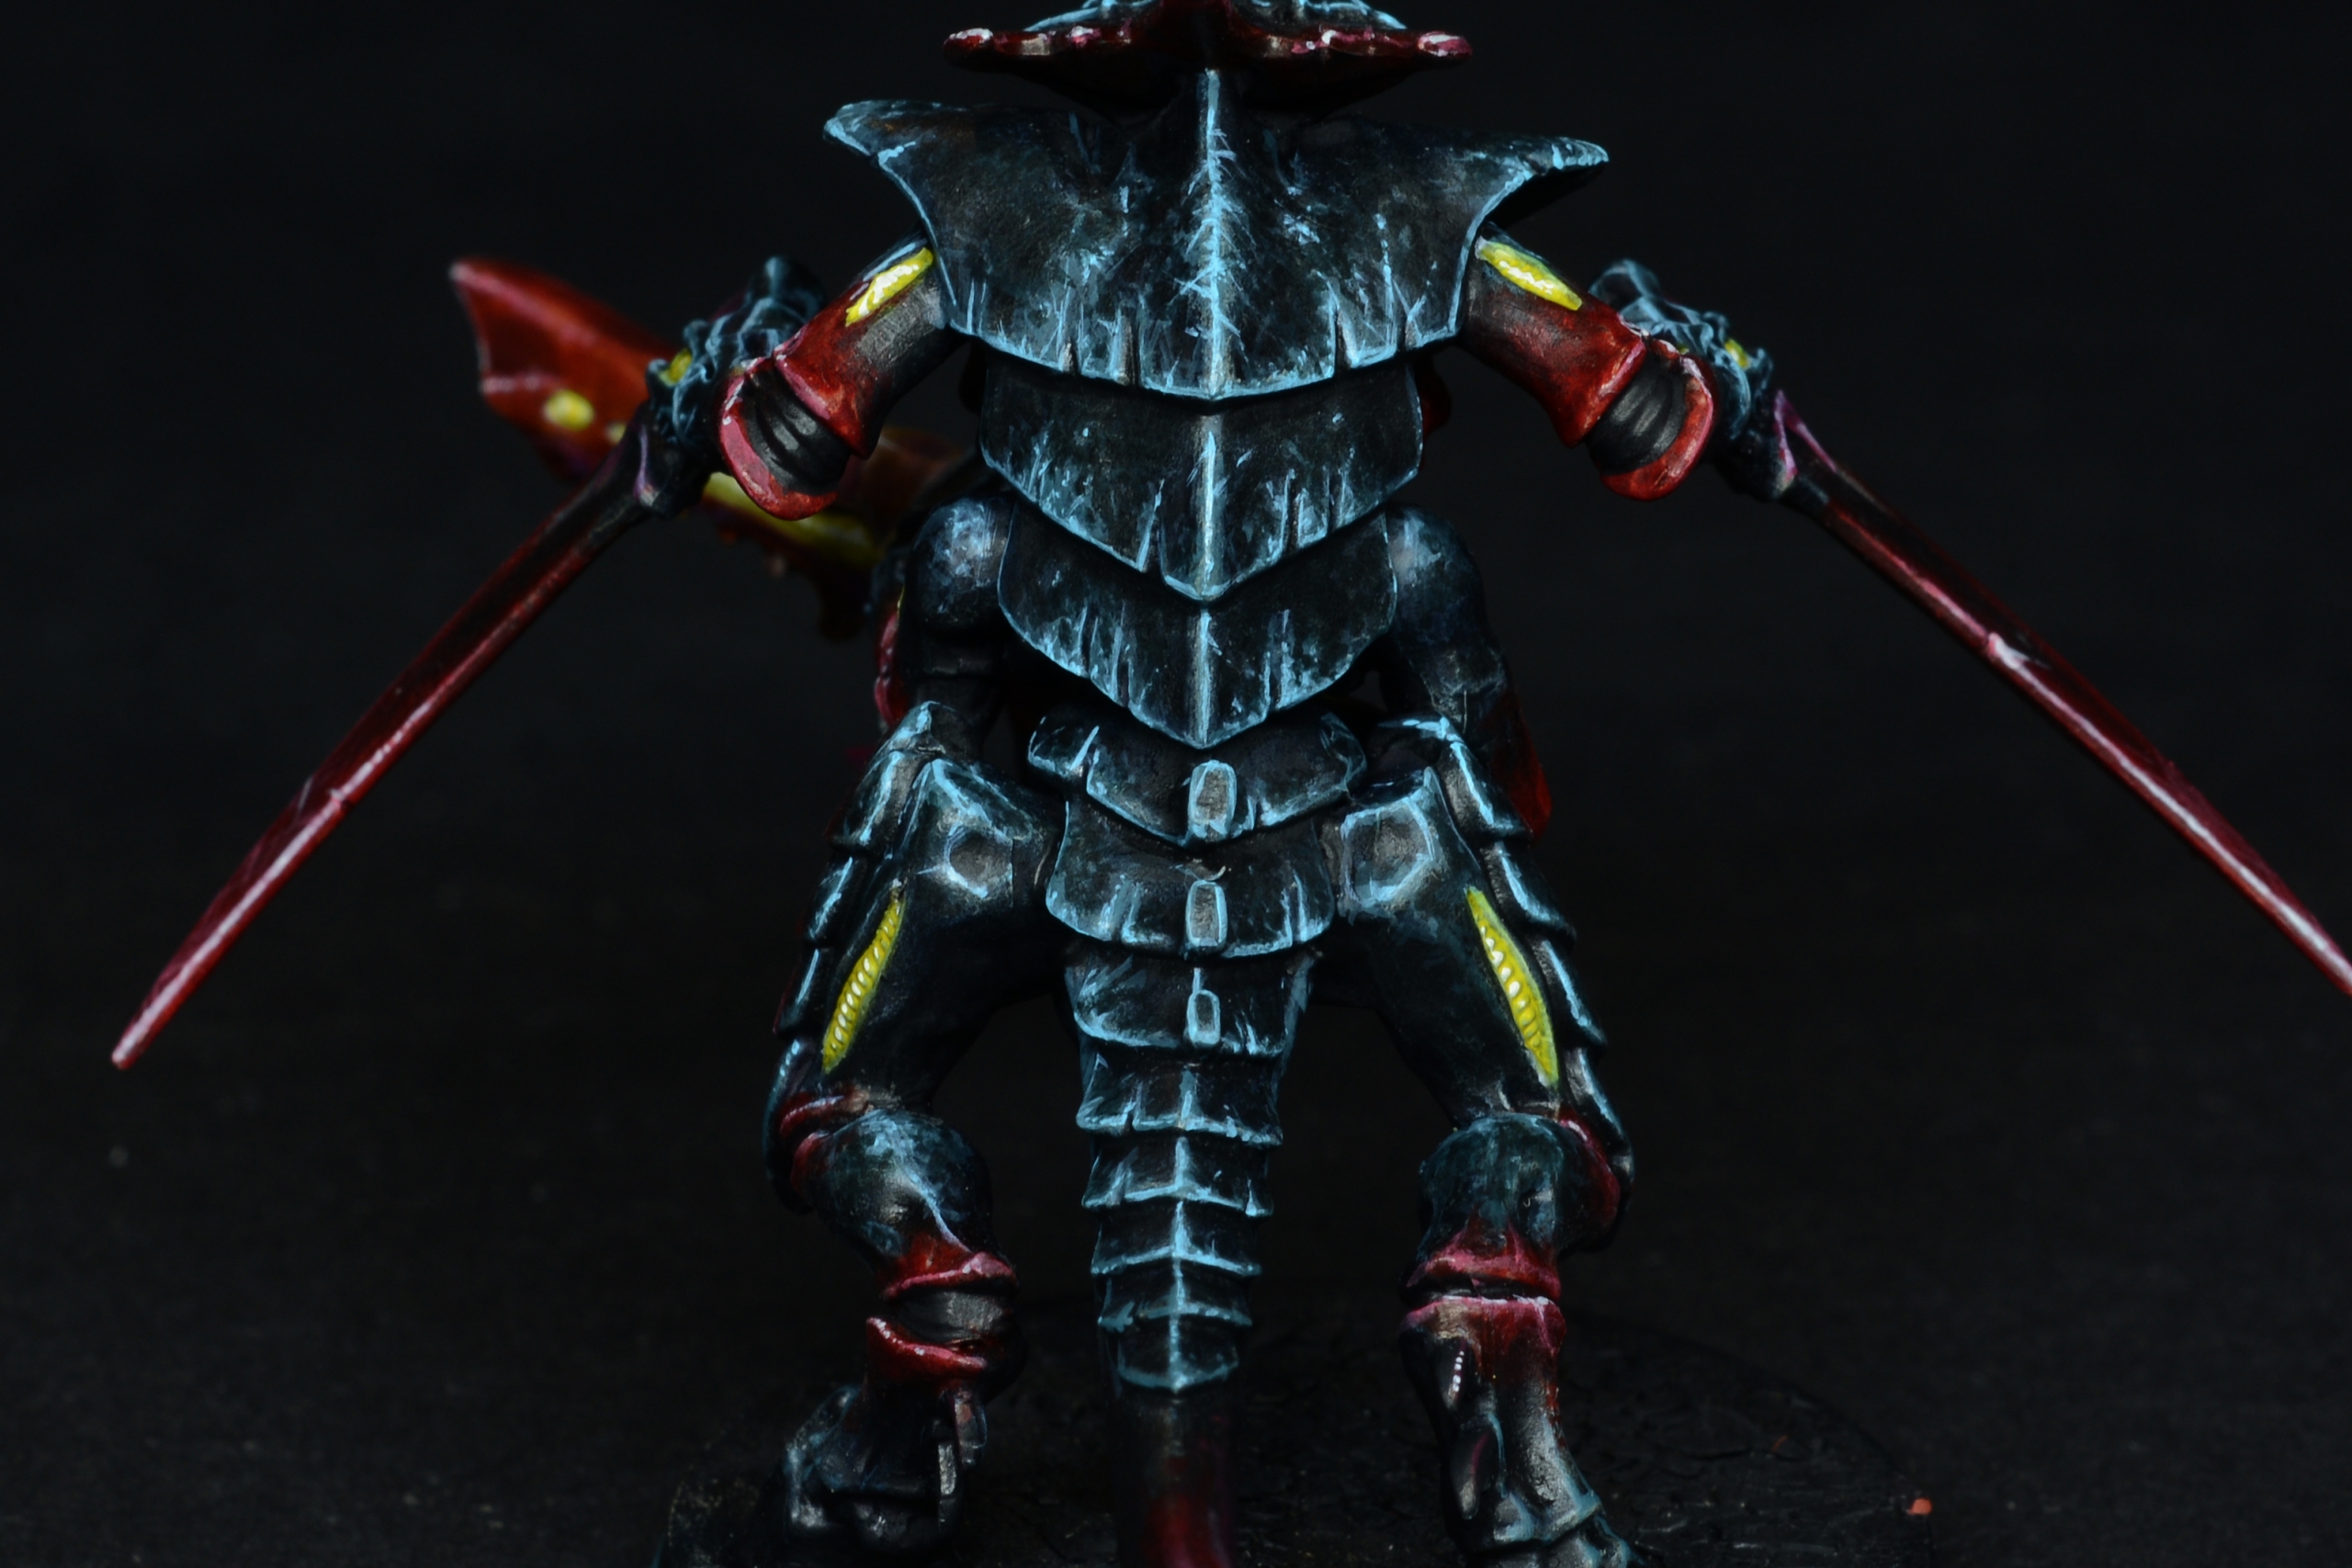
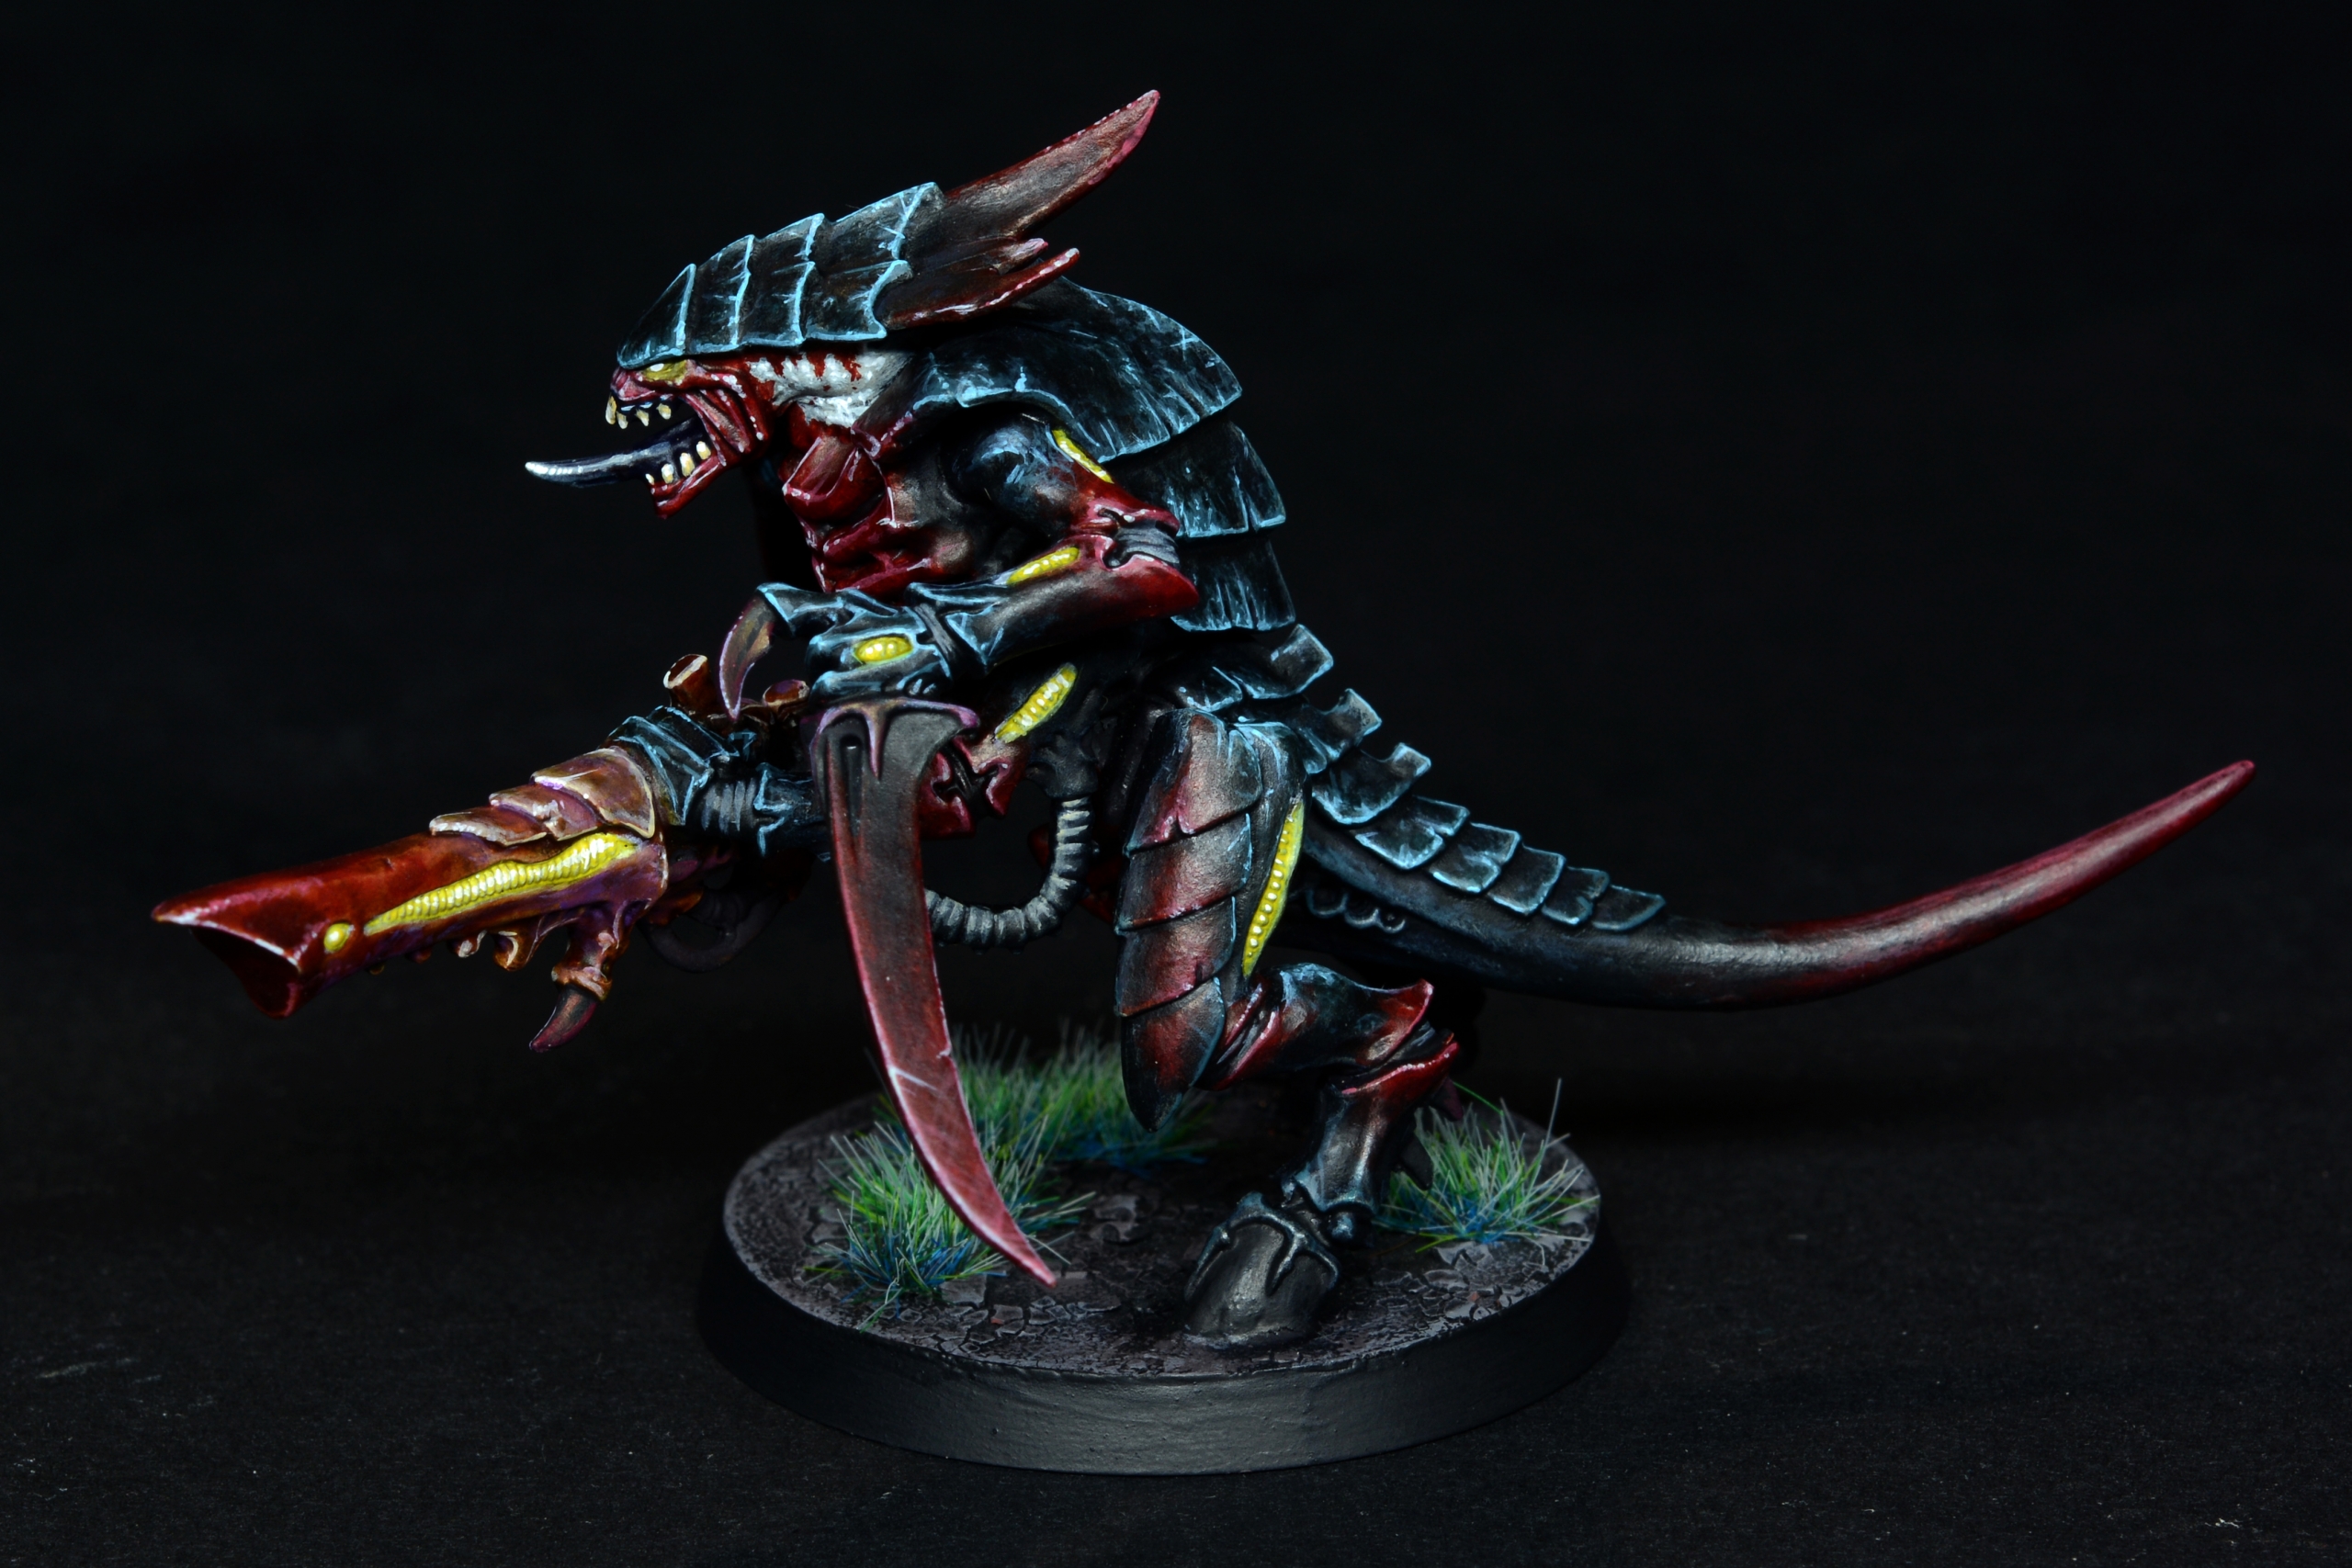
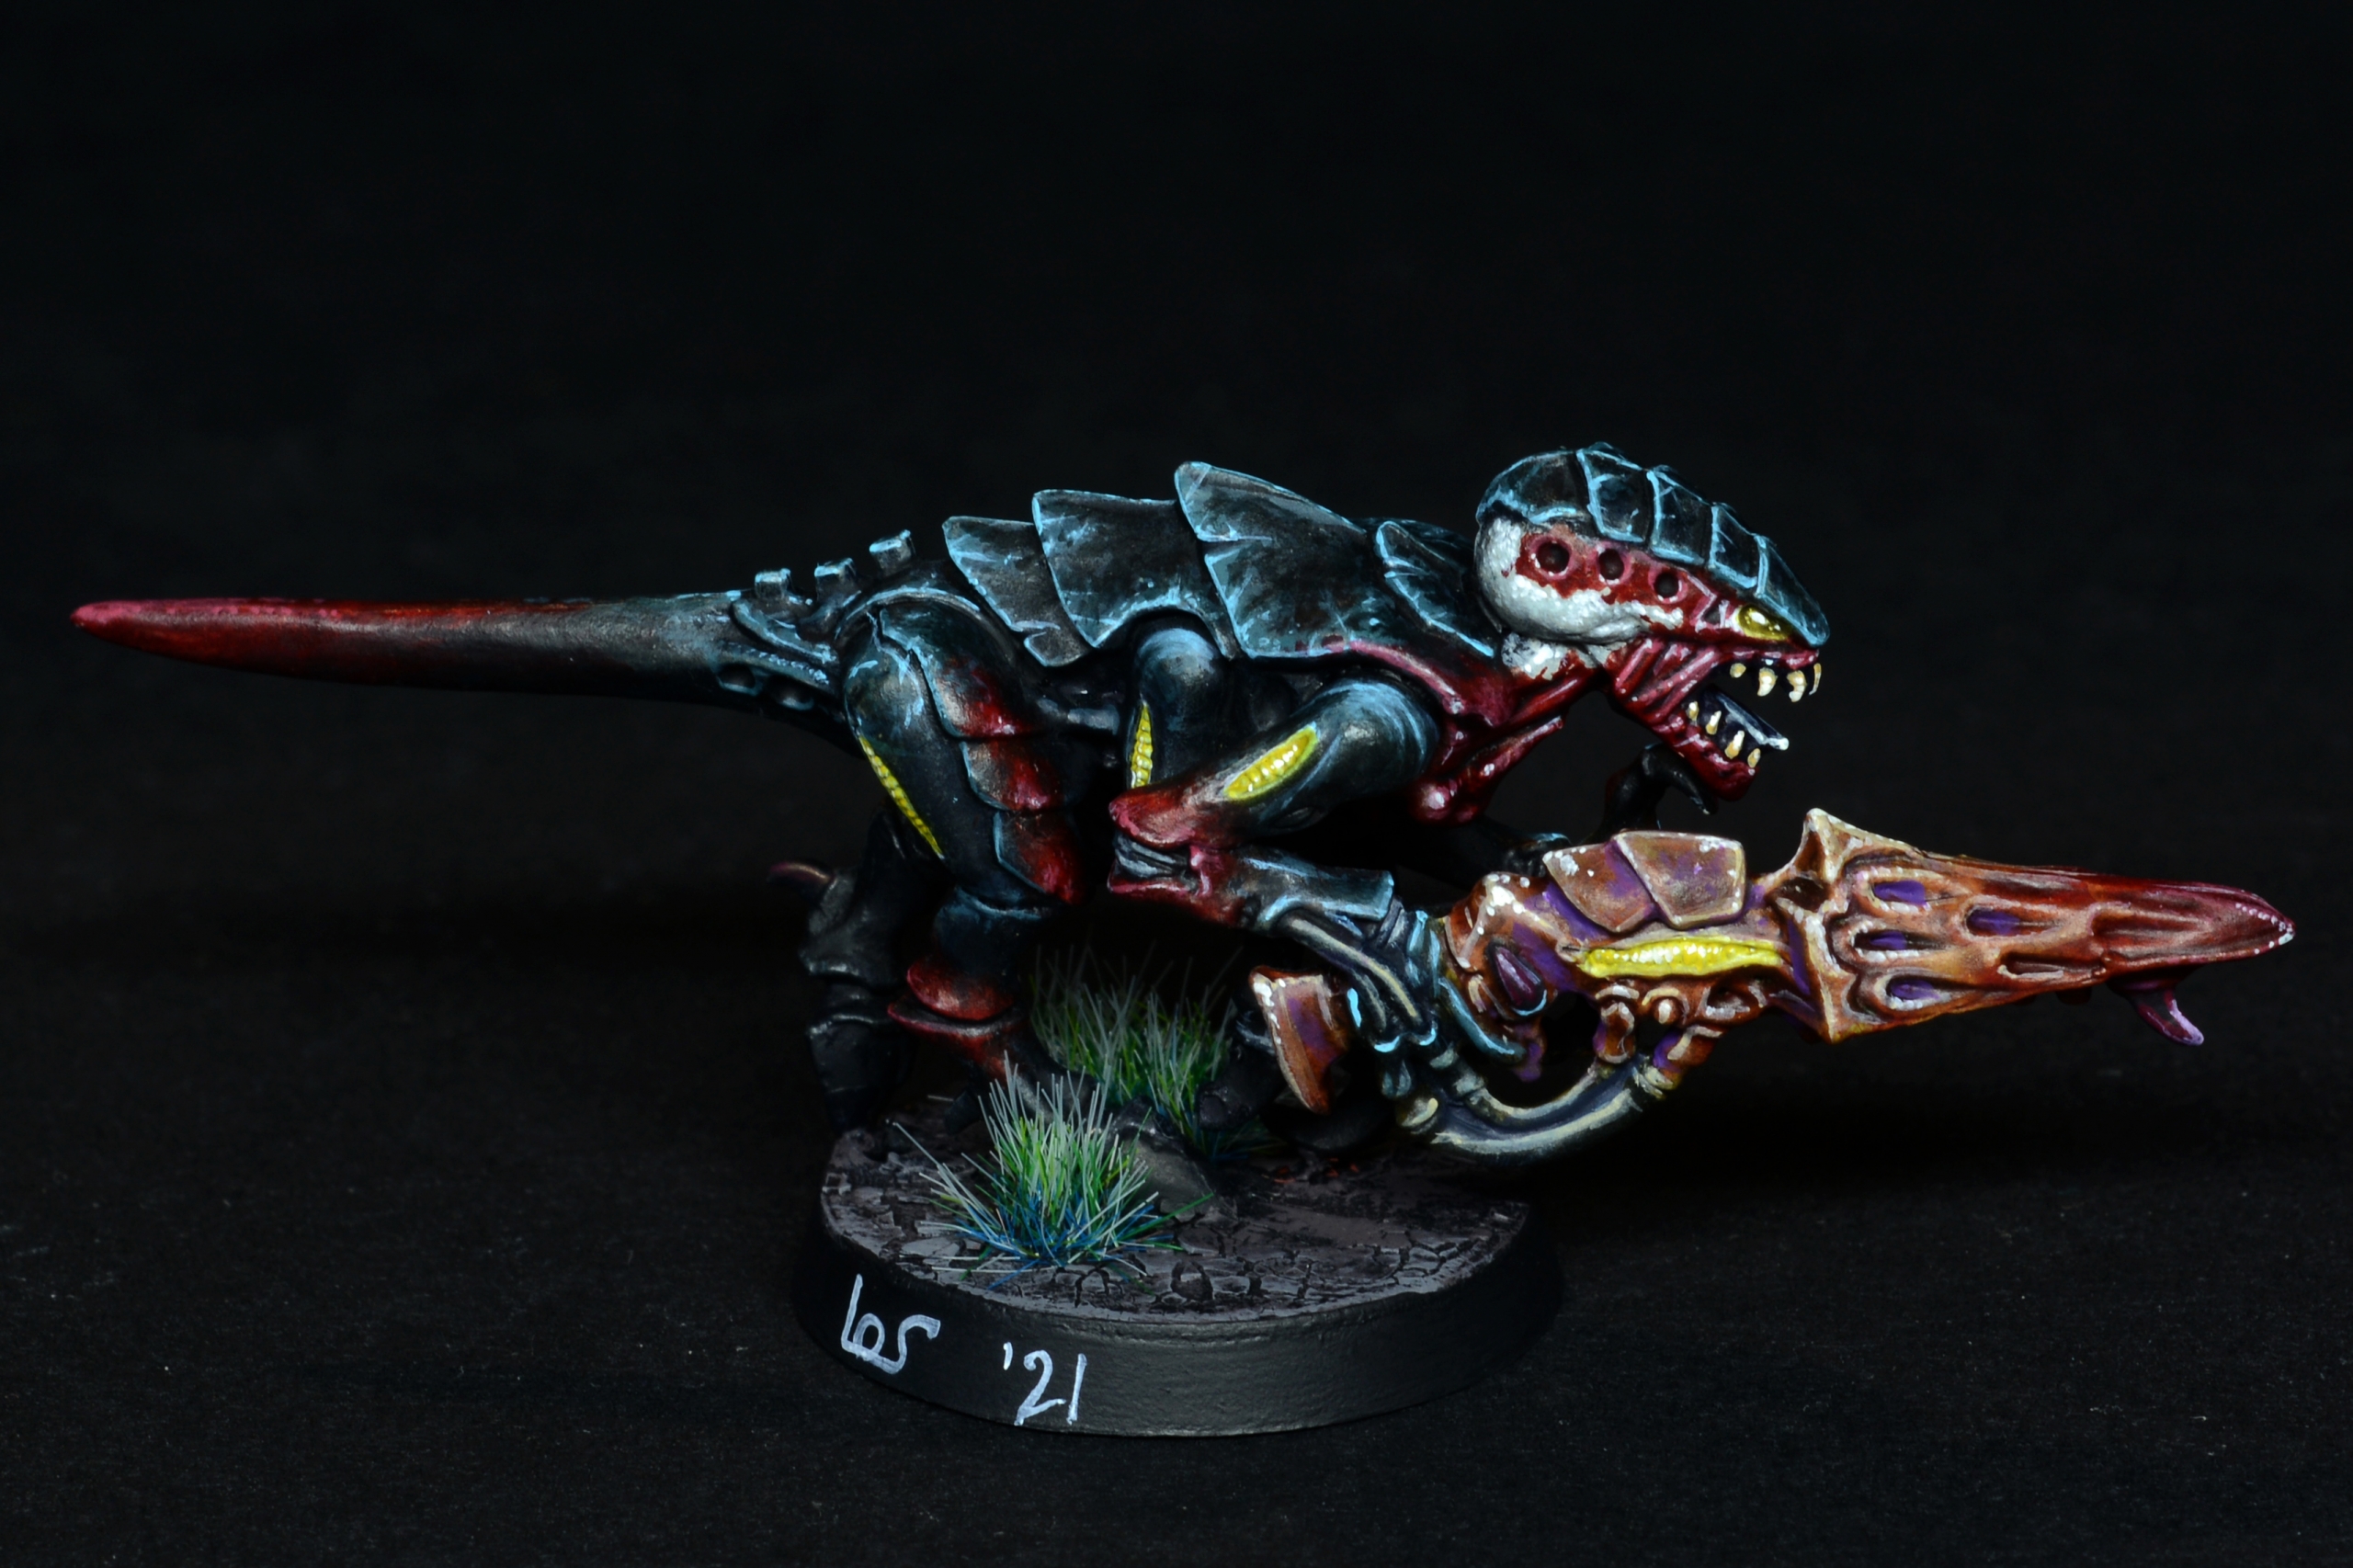
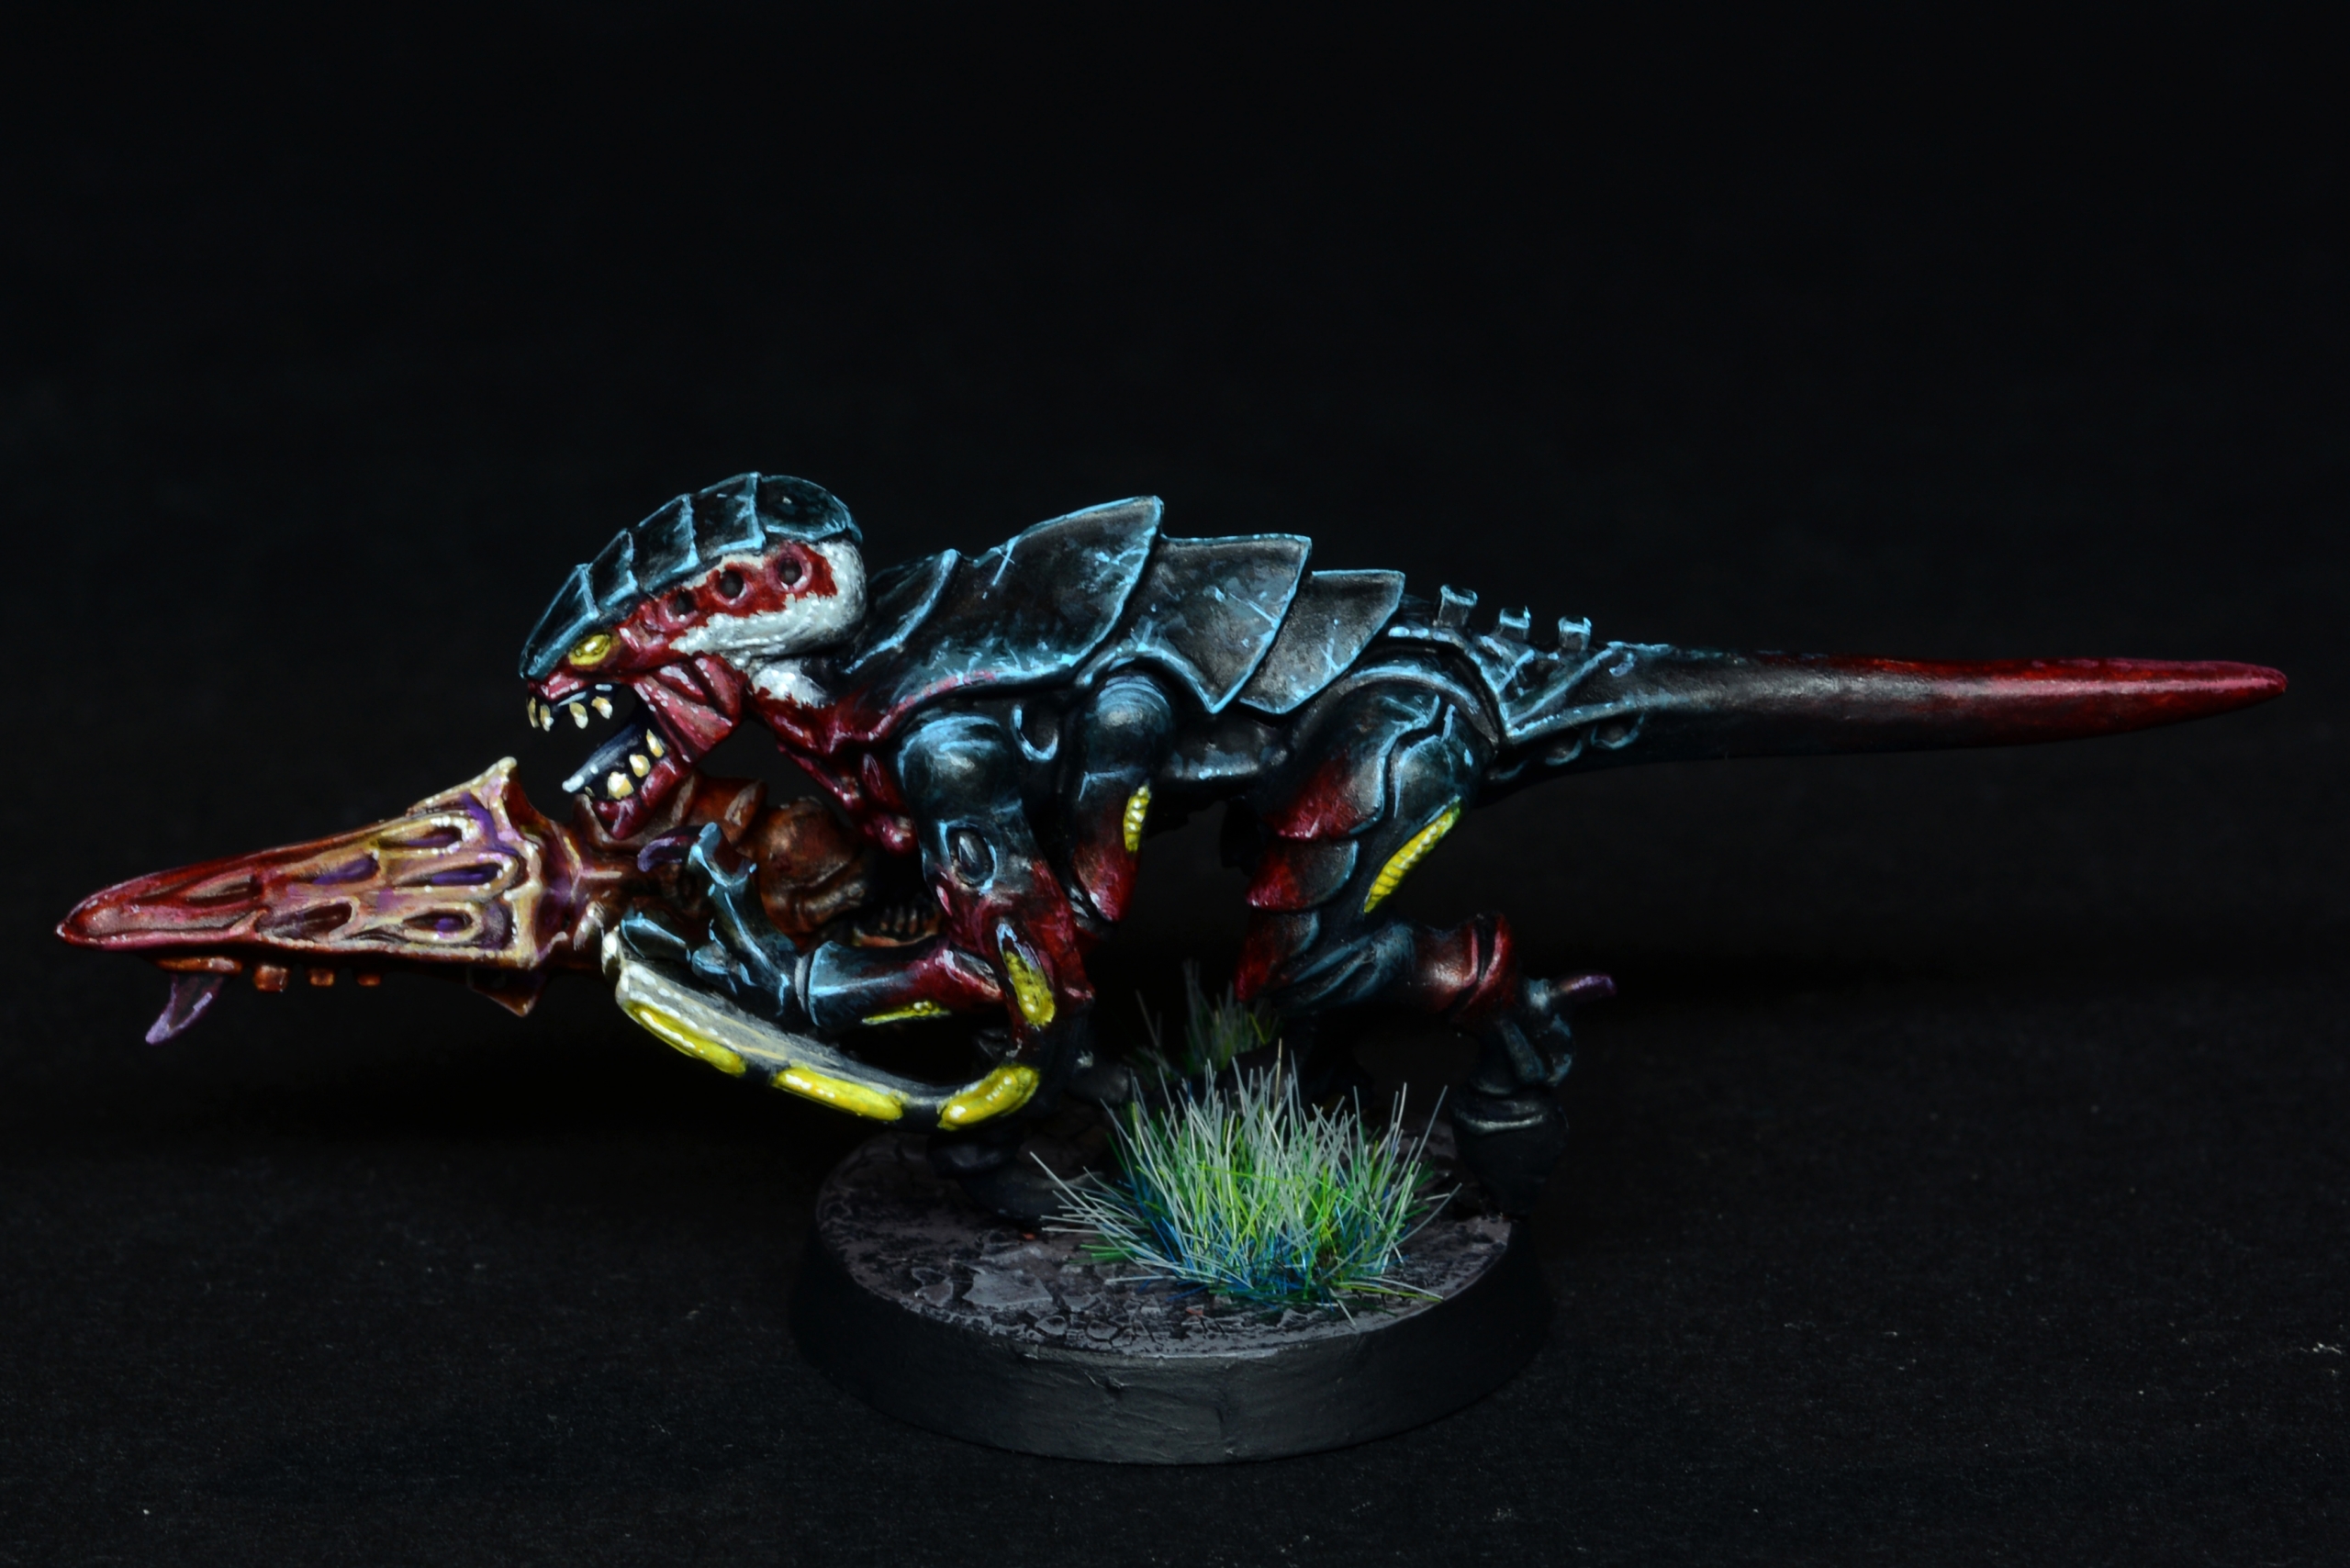
The second batch of miniatures consists of a Warrior and a Termagaunt armed with devourer. They were assembled, based with GW Martian Ironheart, then spray primed with Gw Chaos Black and later brushed black all over again (i’m using AK Intense Black in this tutorial) to avoid differences in finish between primer-normal black.
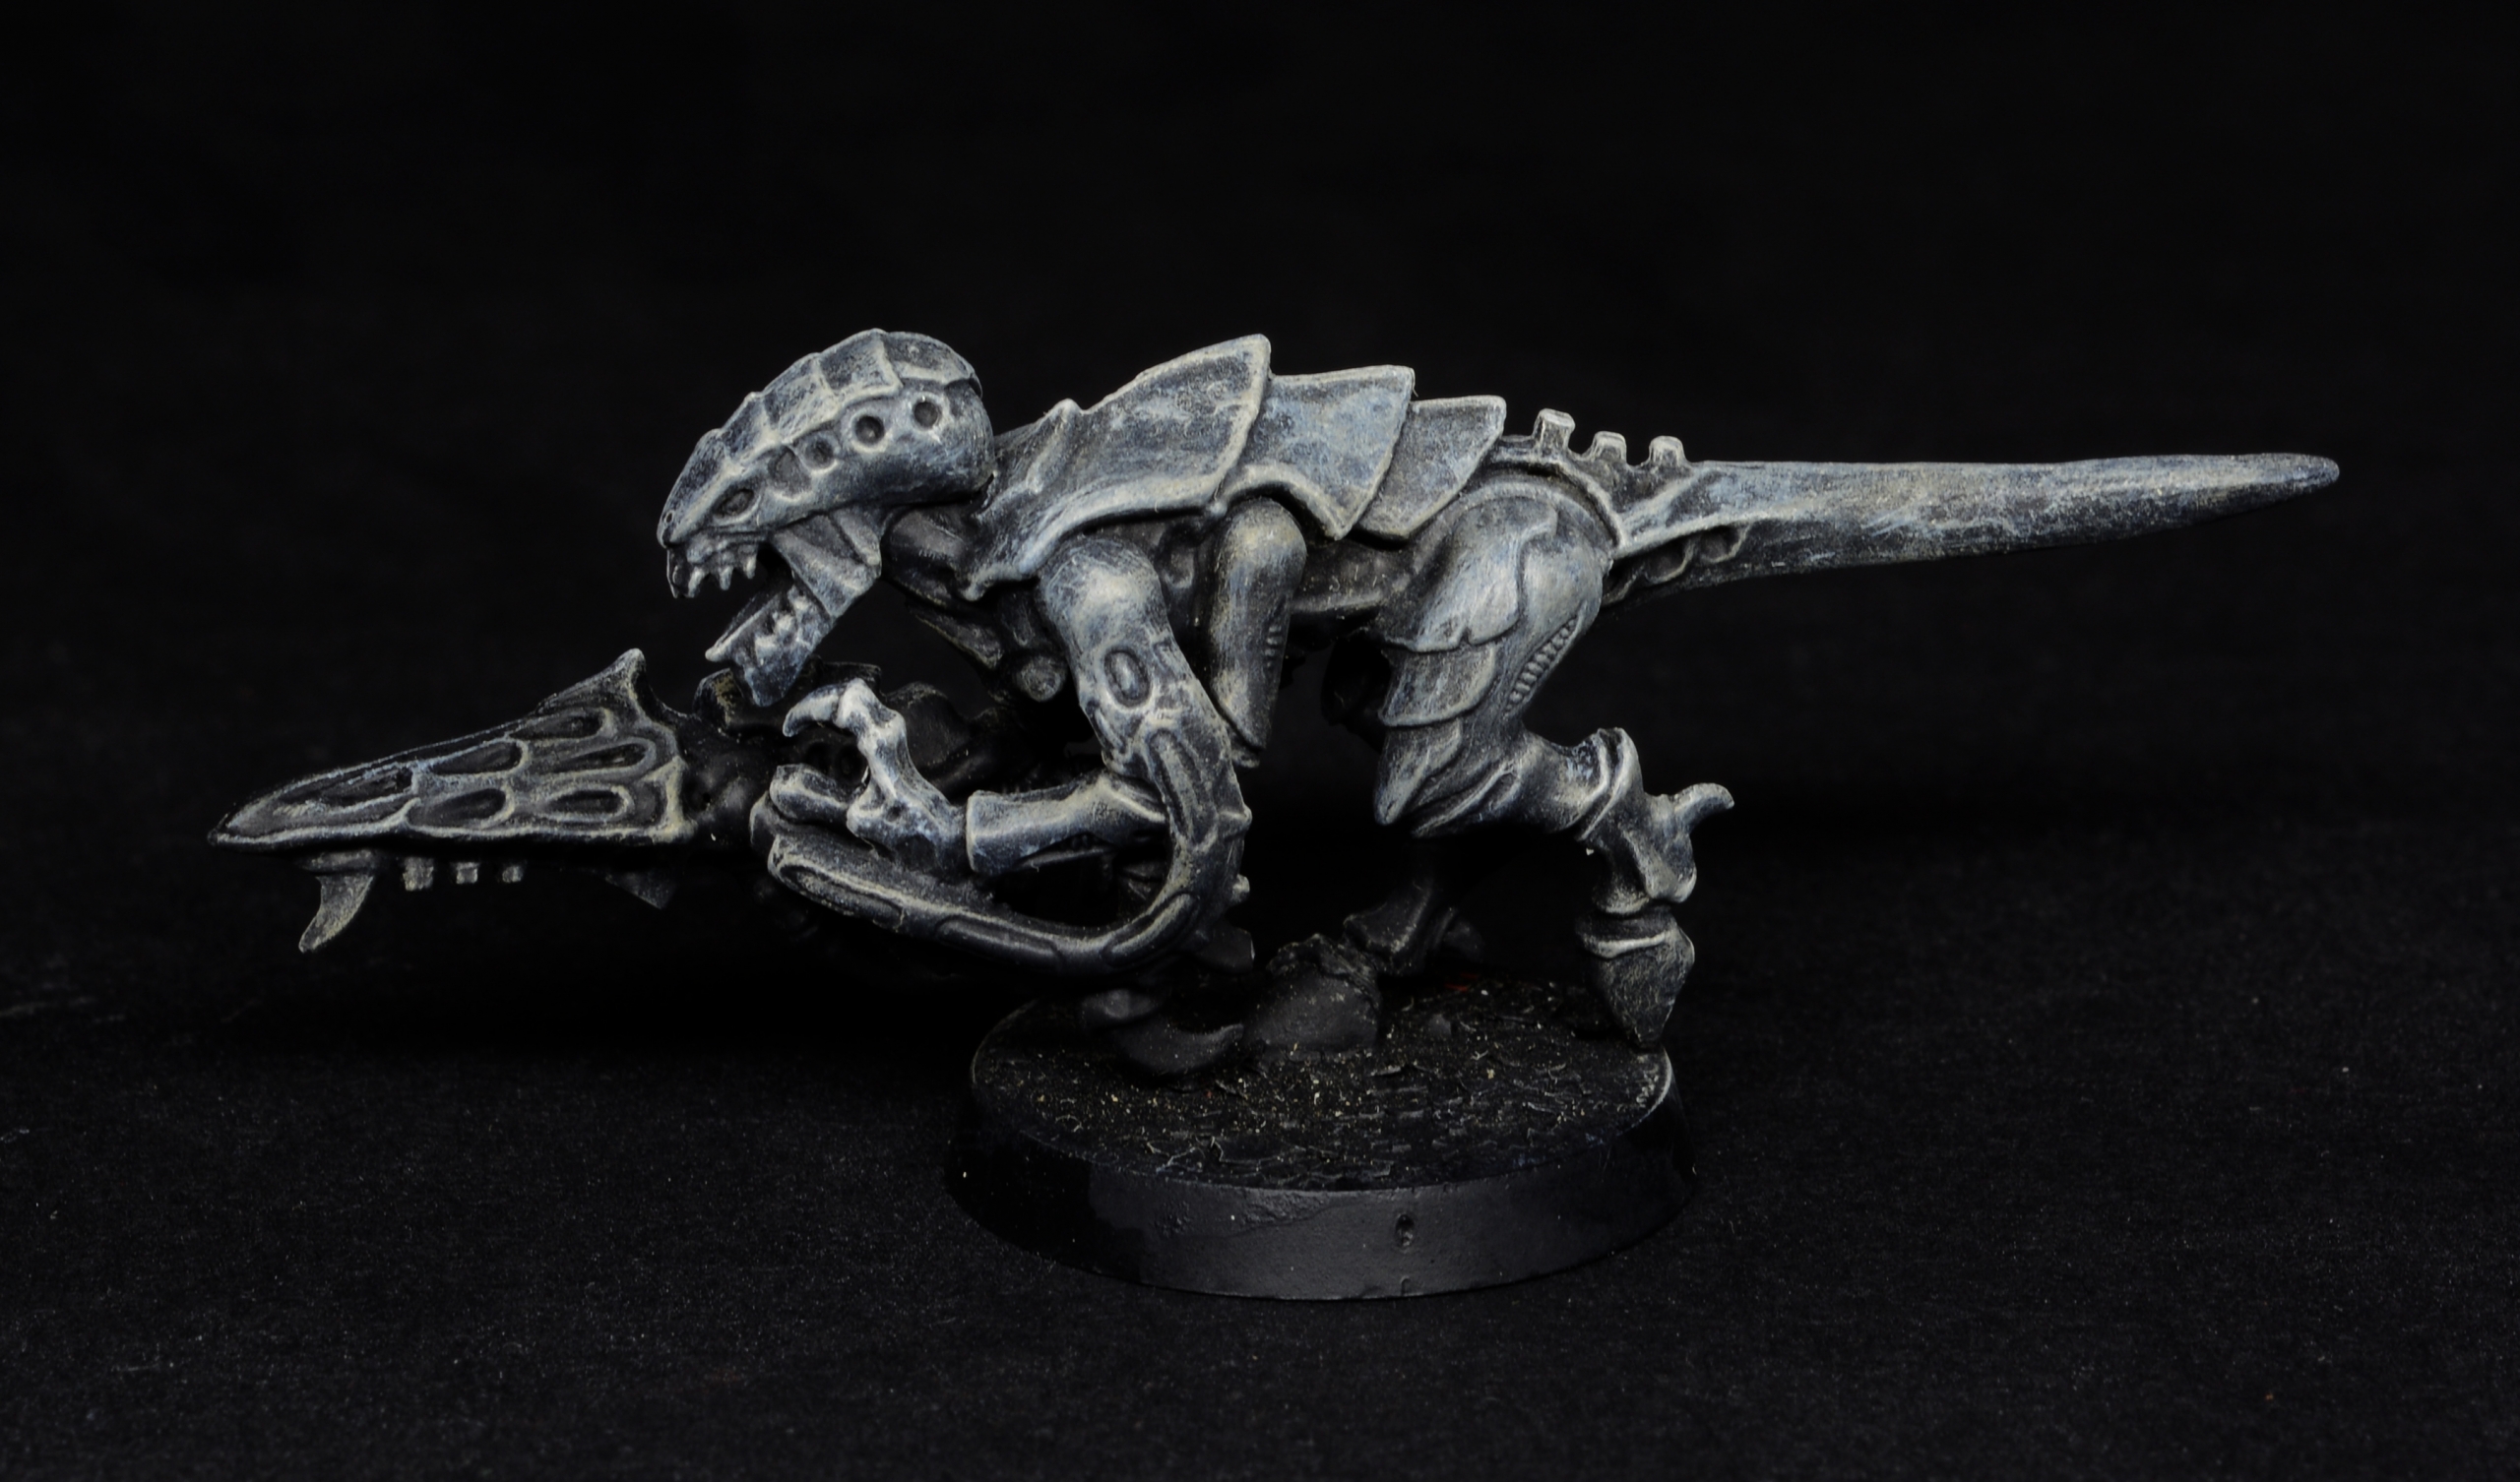
First step was a zenithal drybrush using VMC Khaki:
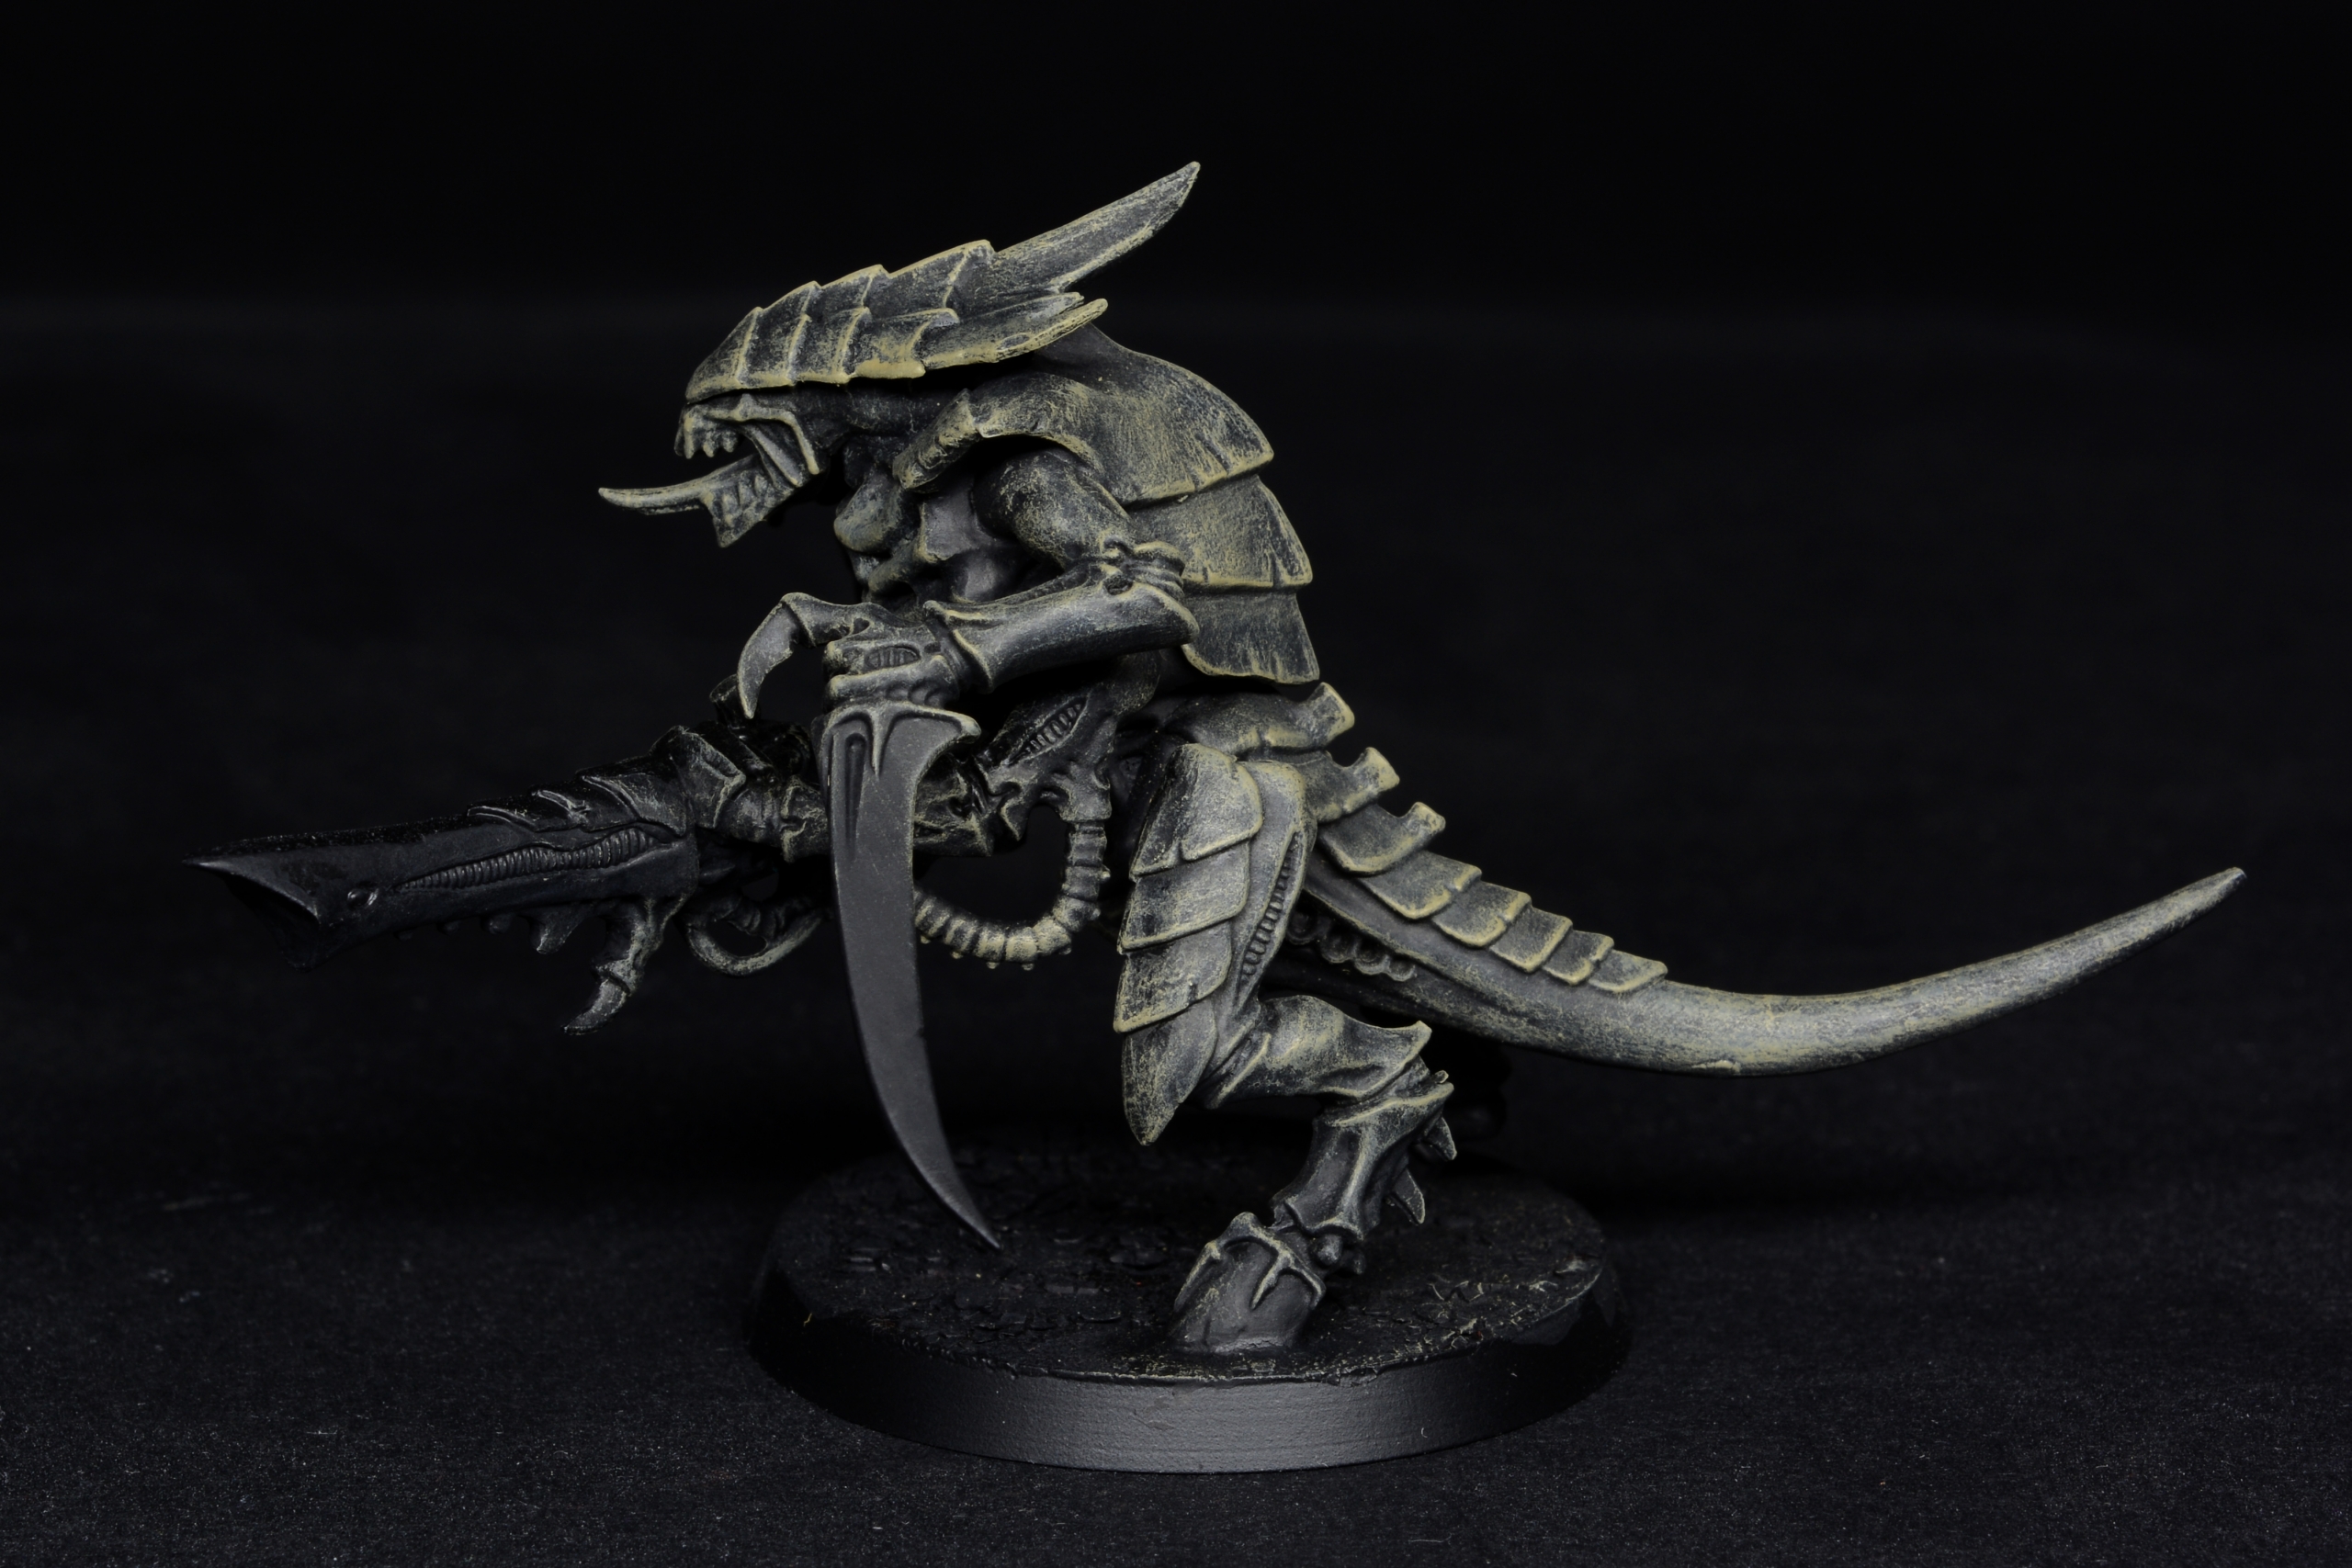
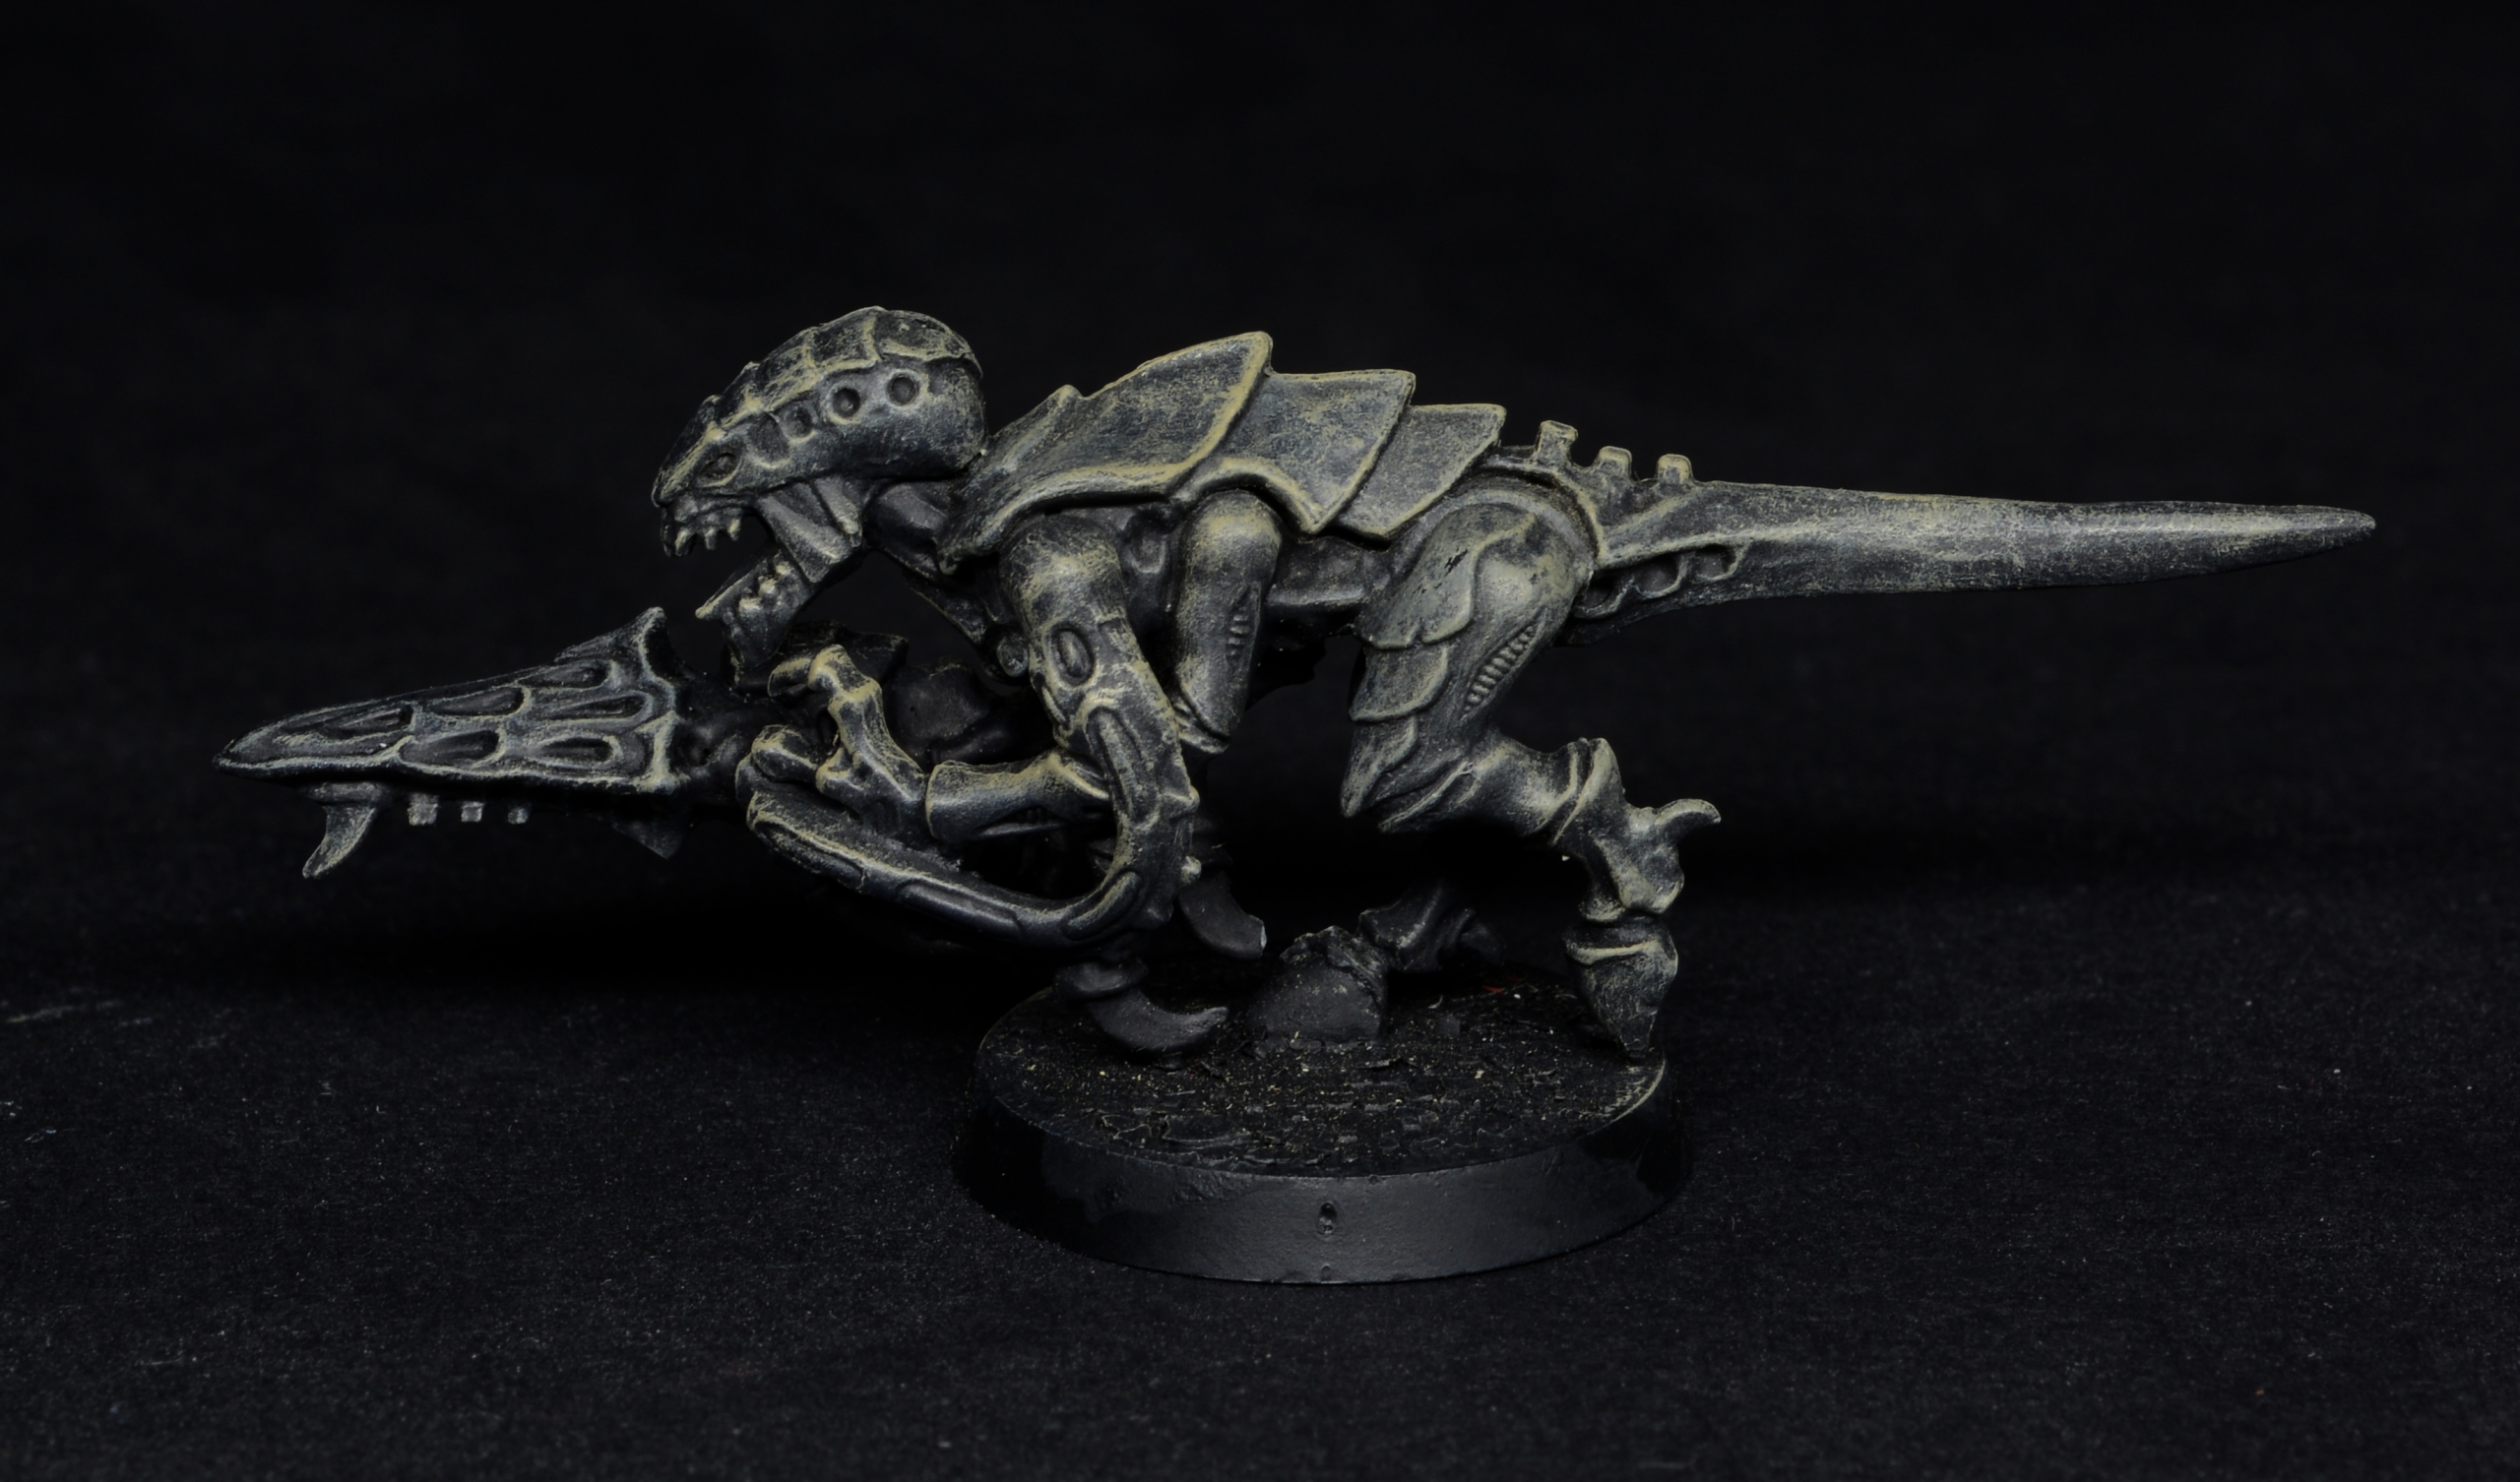
Followed by another zenithal drybrush of AK Rock Grey:
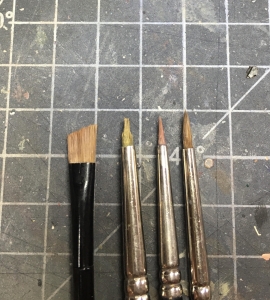
As per the first part, i will post a picture showing some of the brushes i use for this technique: first one is a flat, cheap makeup brush and it’s the one i’ve actually used for this step.
Then we have a very worn W&N series7 miniature brush (i encourage you not to trash old brushes, they can be used as smudge brushes or for a lot of other purposes), a medium-worn W&N miniature brush and a Rosemary series 93 size 2.
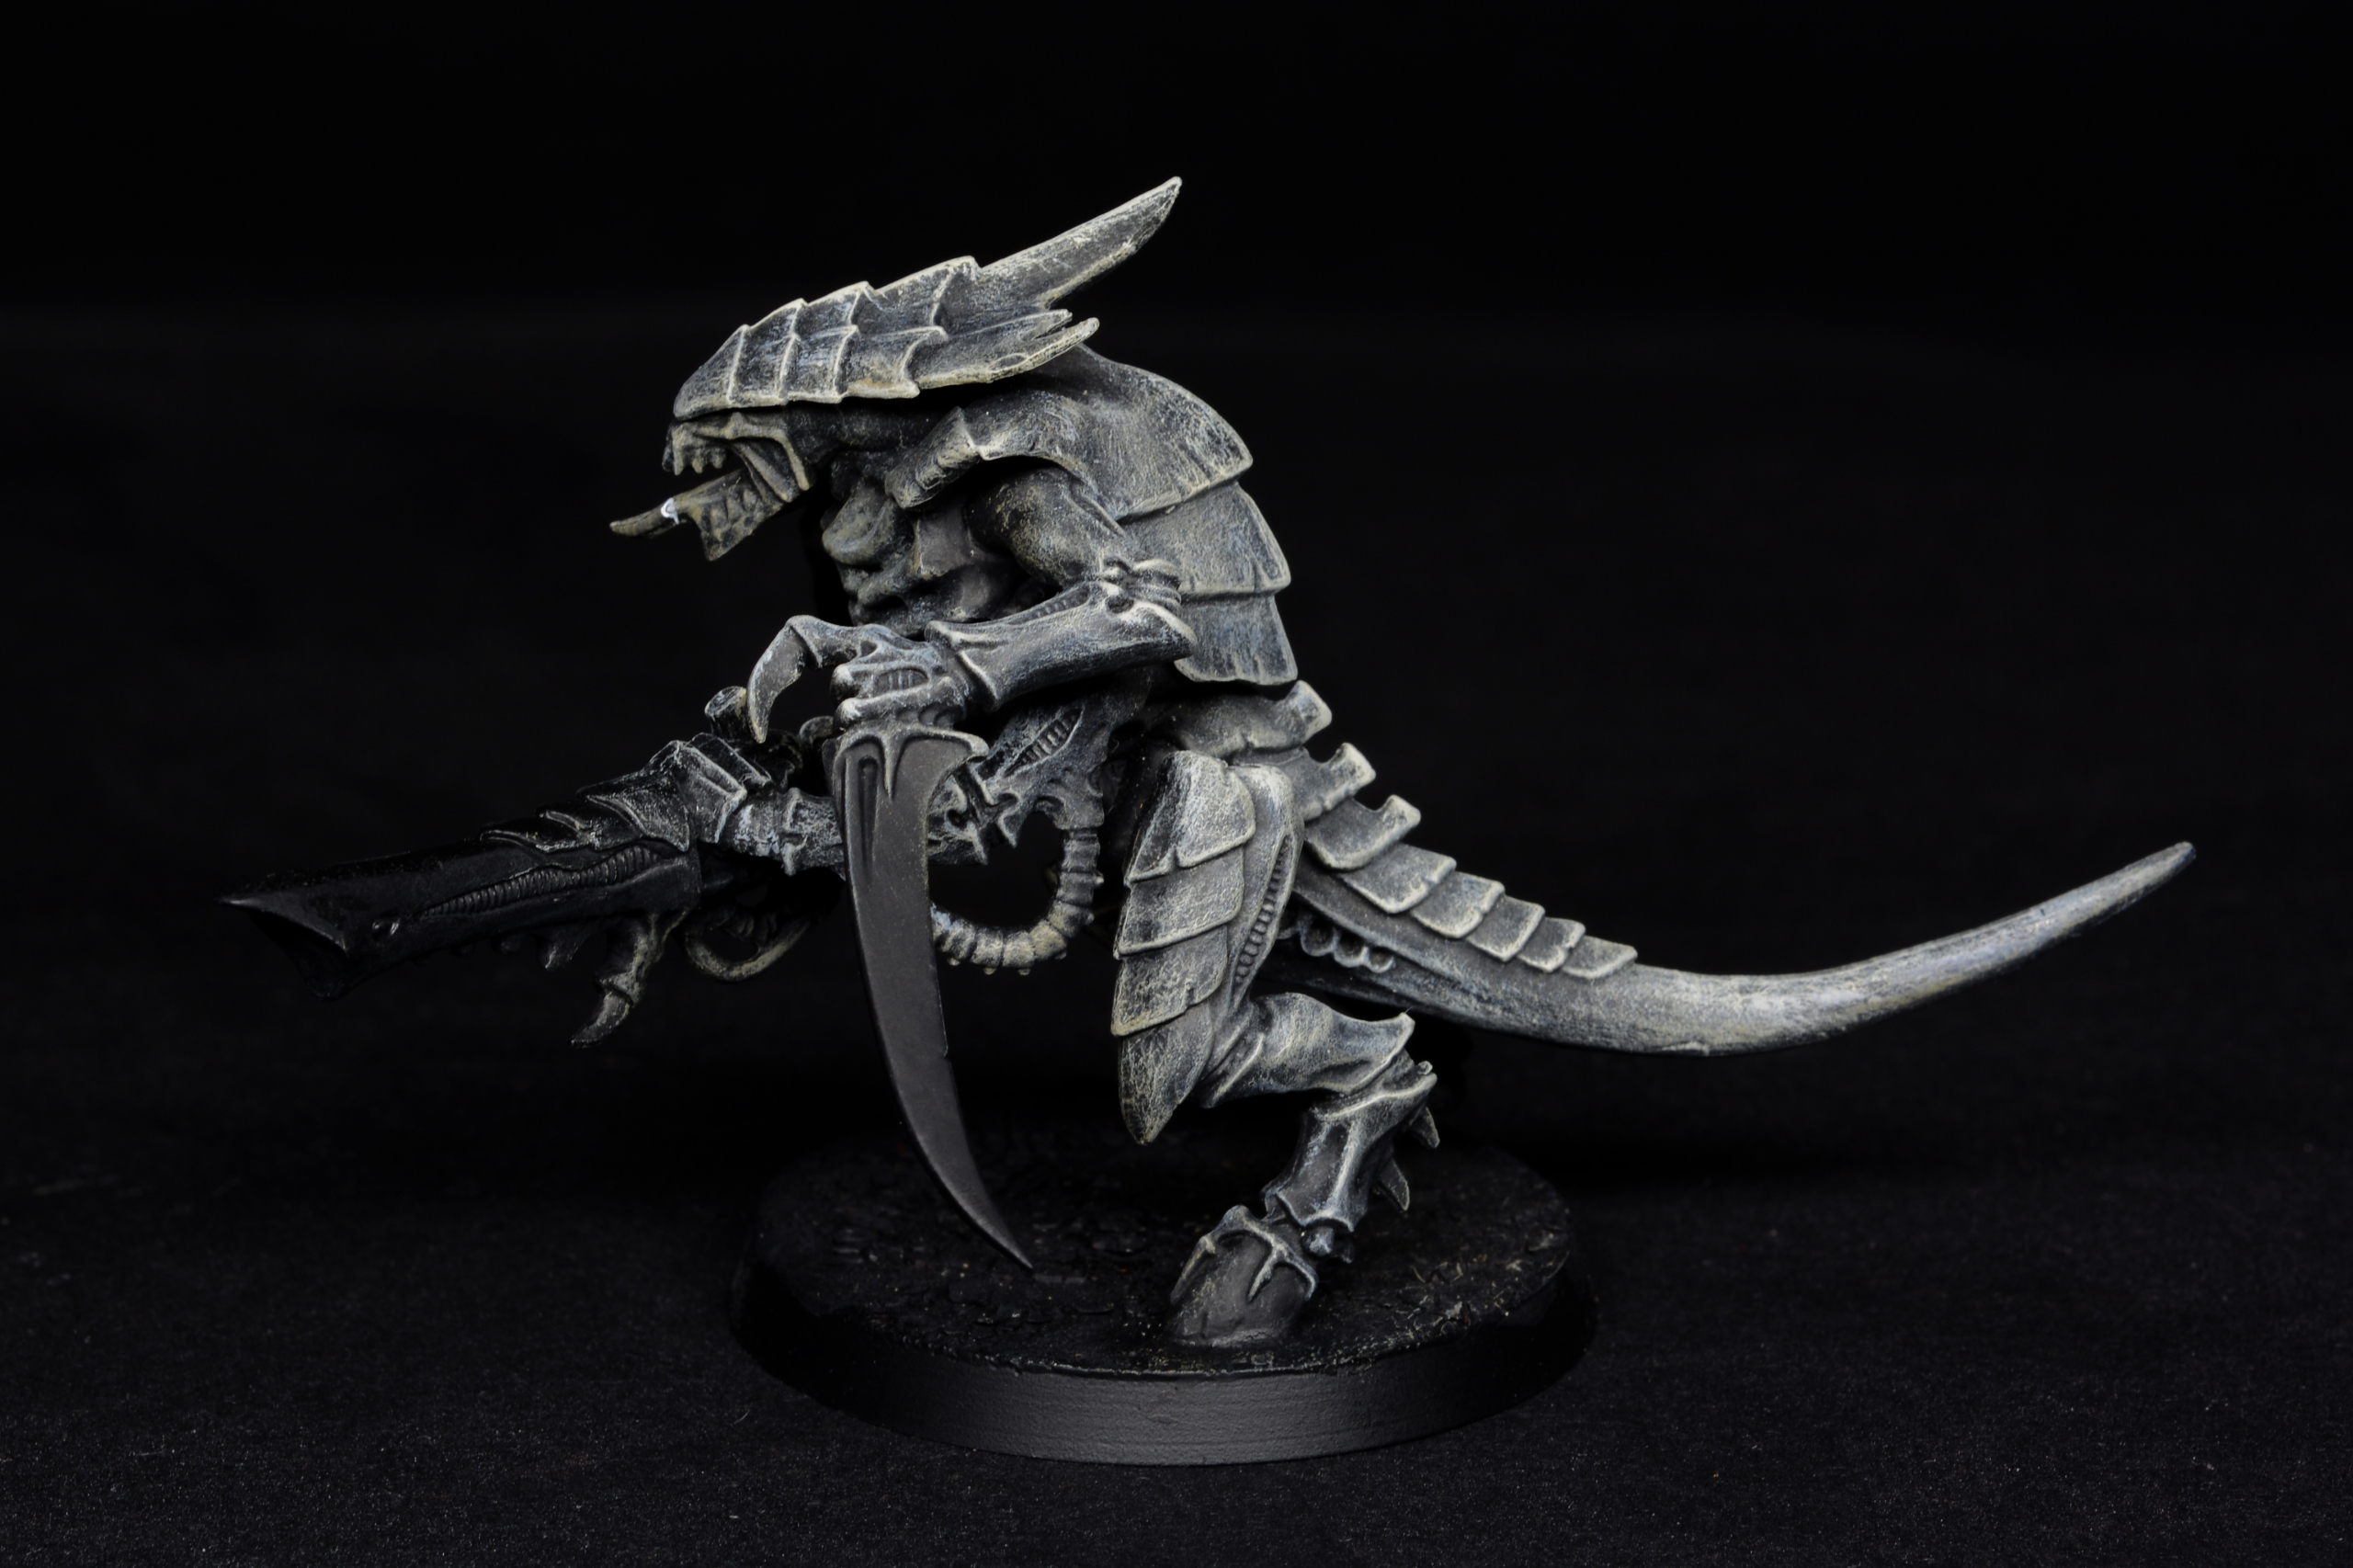
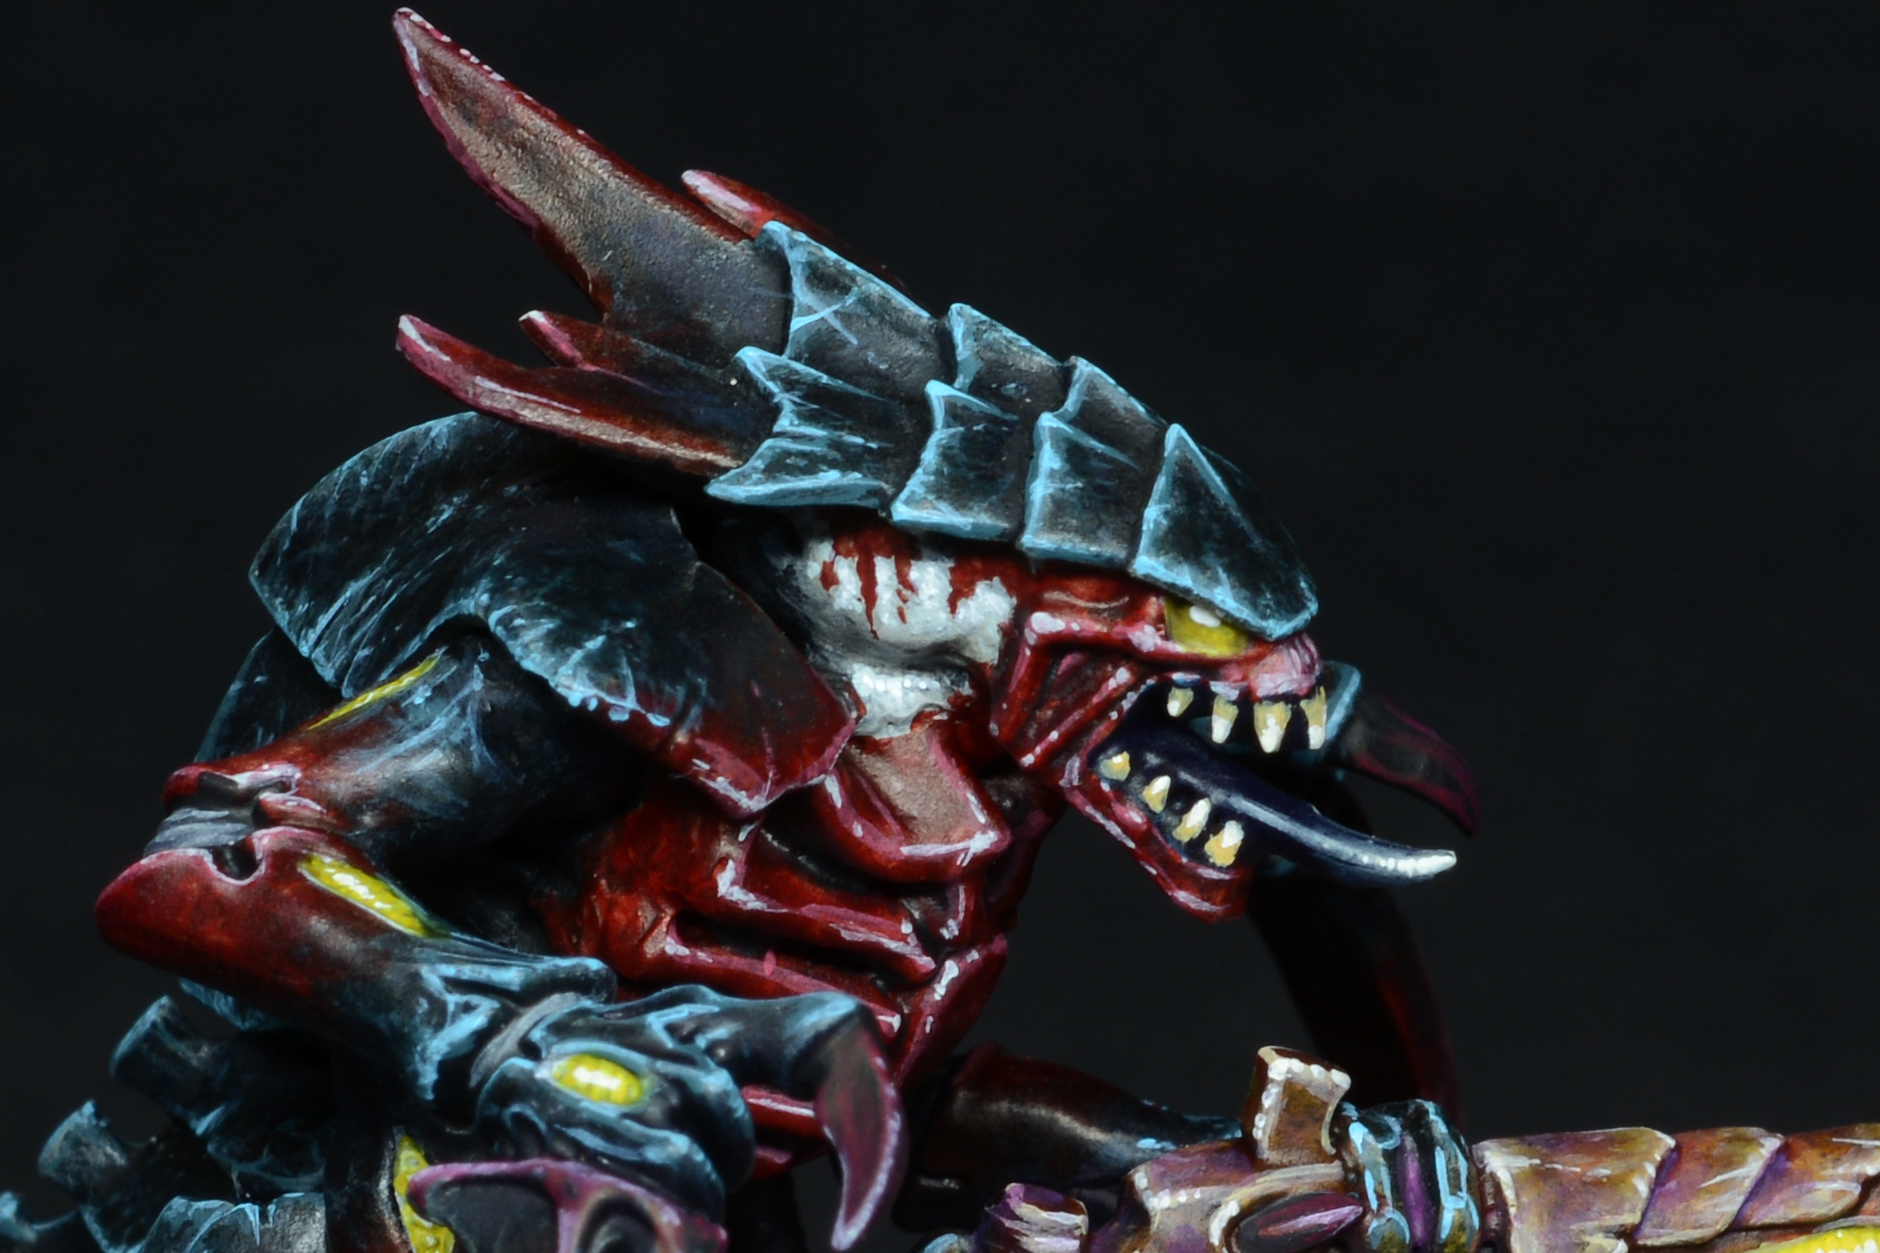
It was now time to tint the models, and to do so i completely washed them with Gw Drakenhof Nightshade (avoiding the heads):
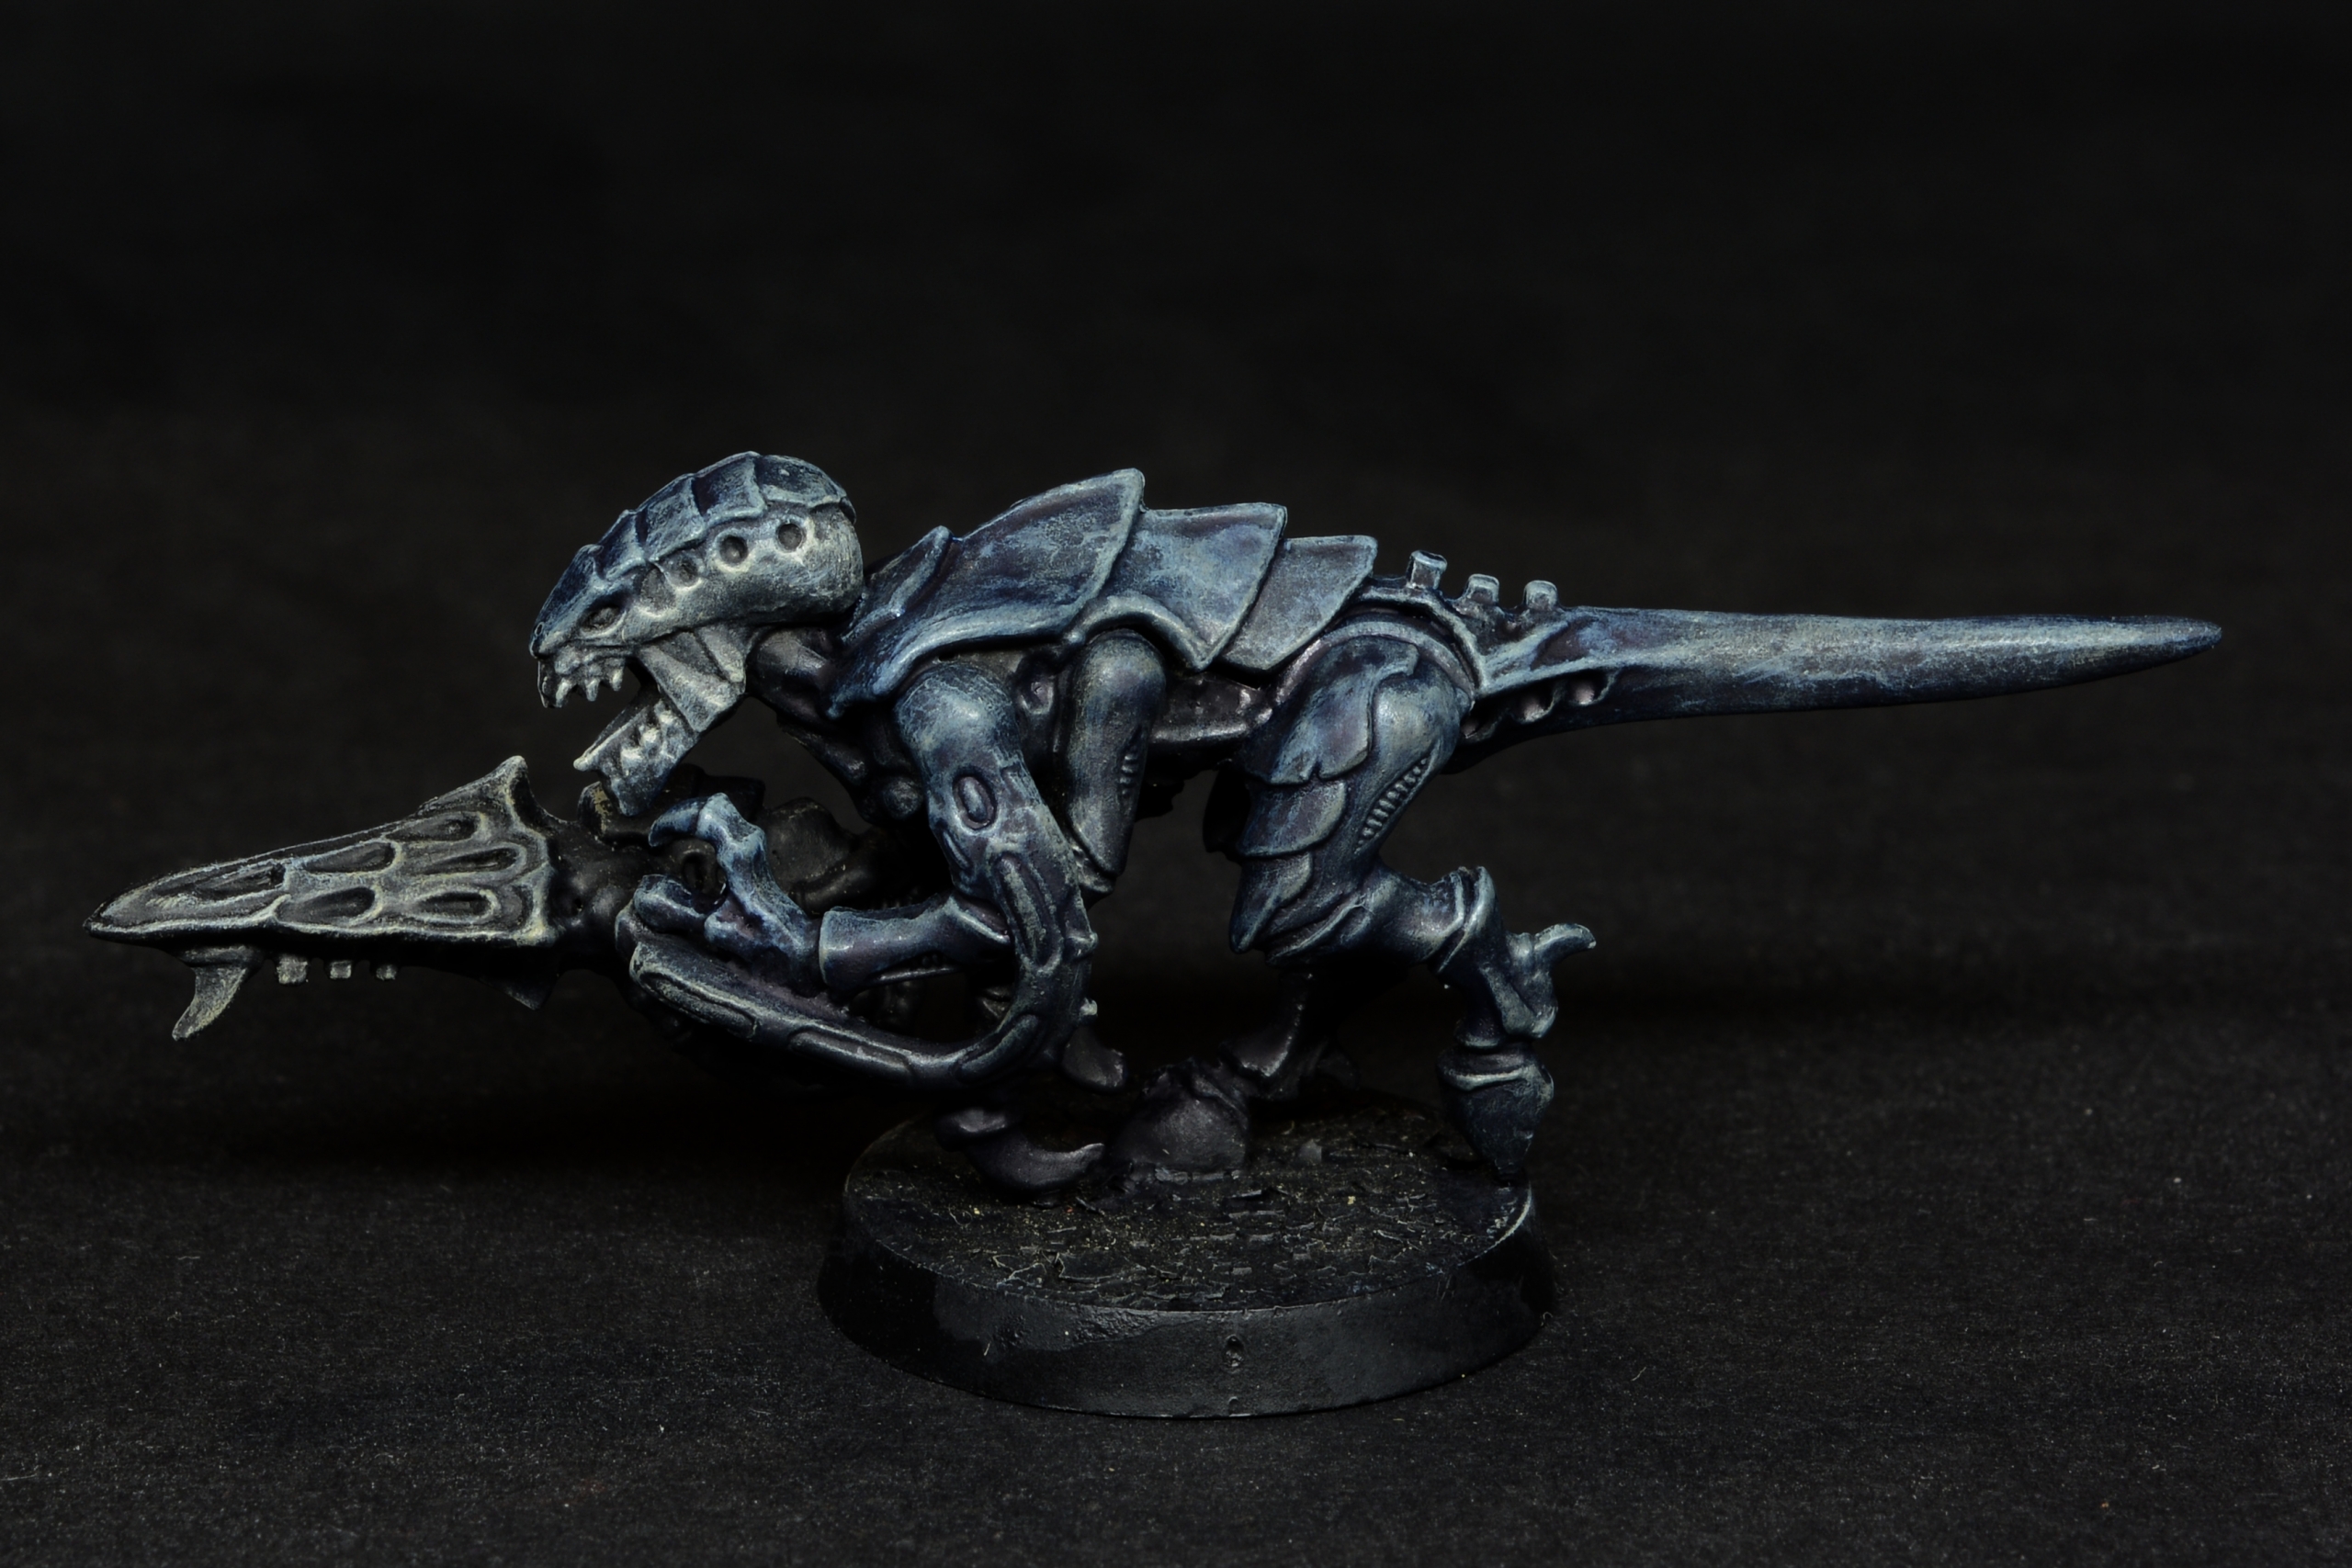
This was followed by another wash of GW Nuln Oil + a small quantity(5% or even less) of Ak black , concentrating more on the insides of the shapes, and again leaving out the heads:

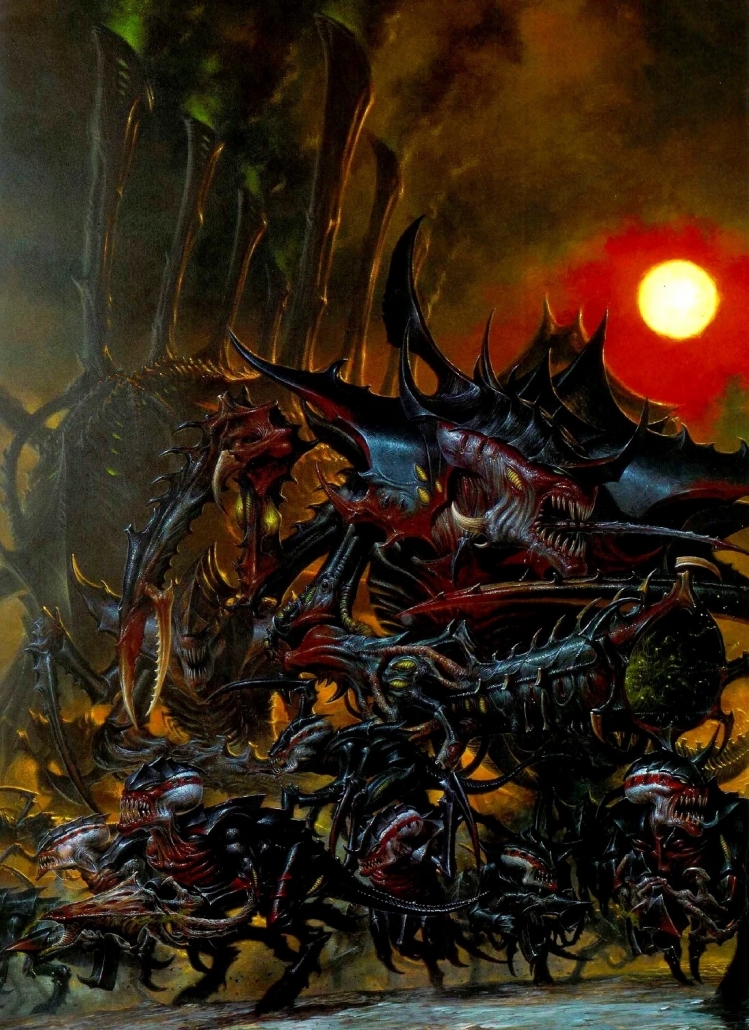
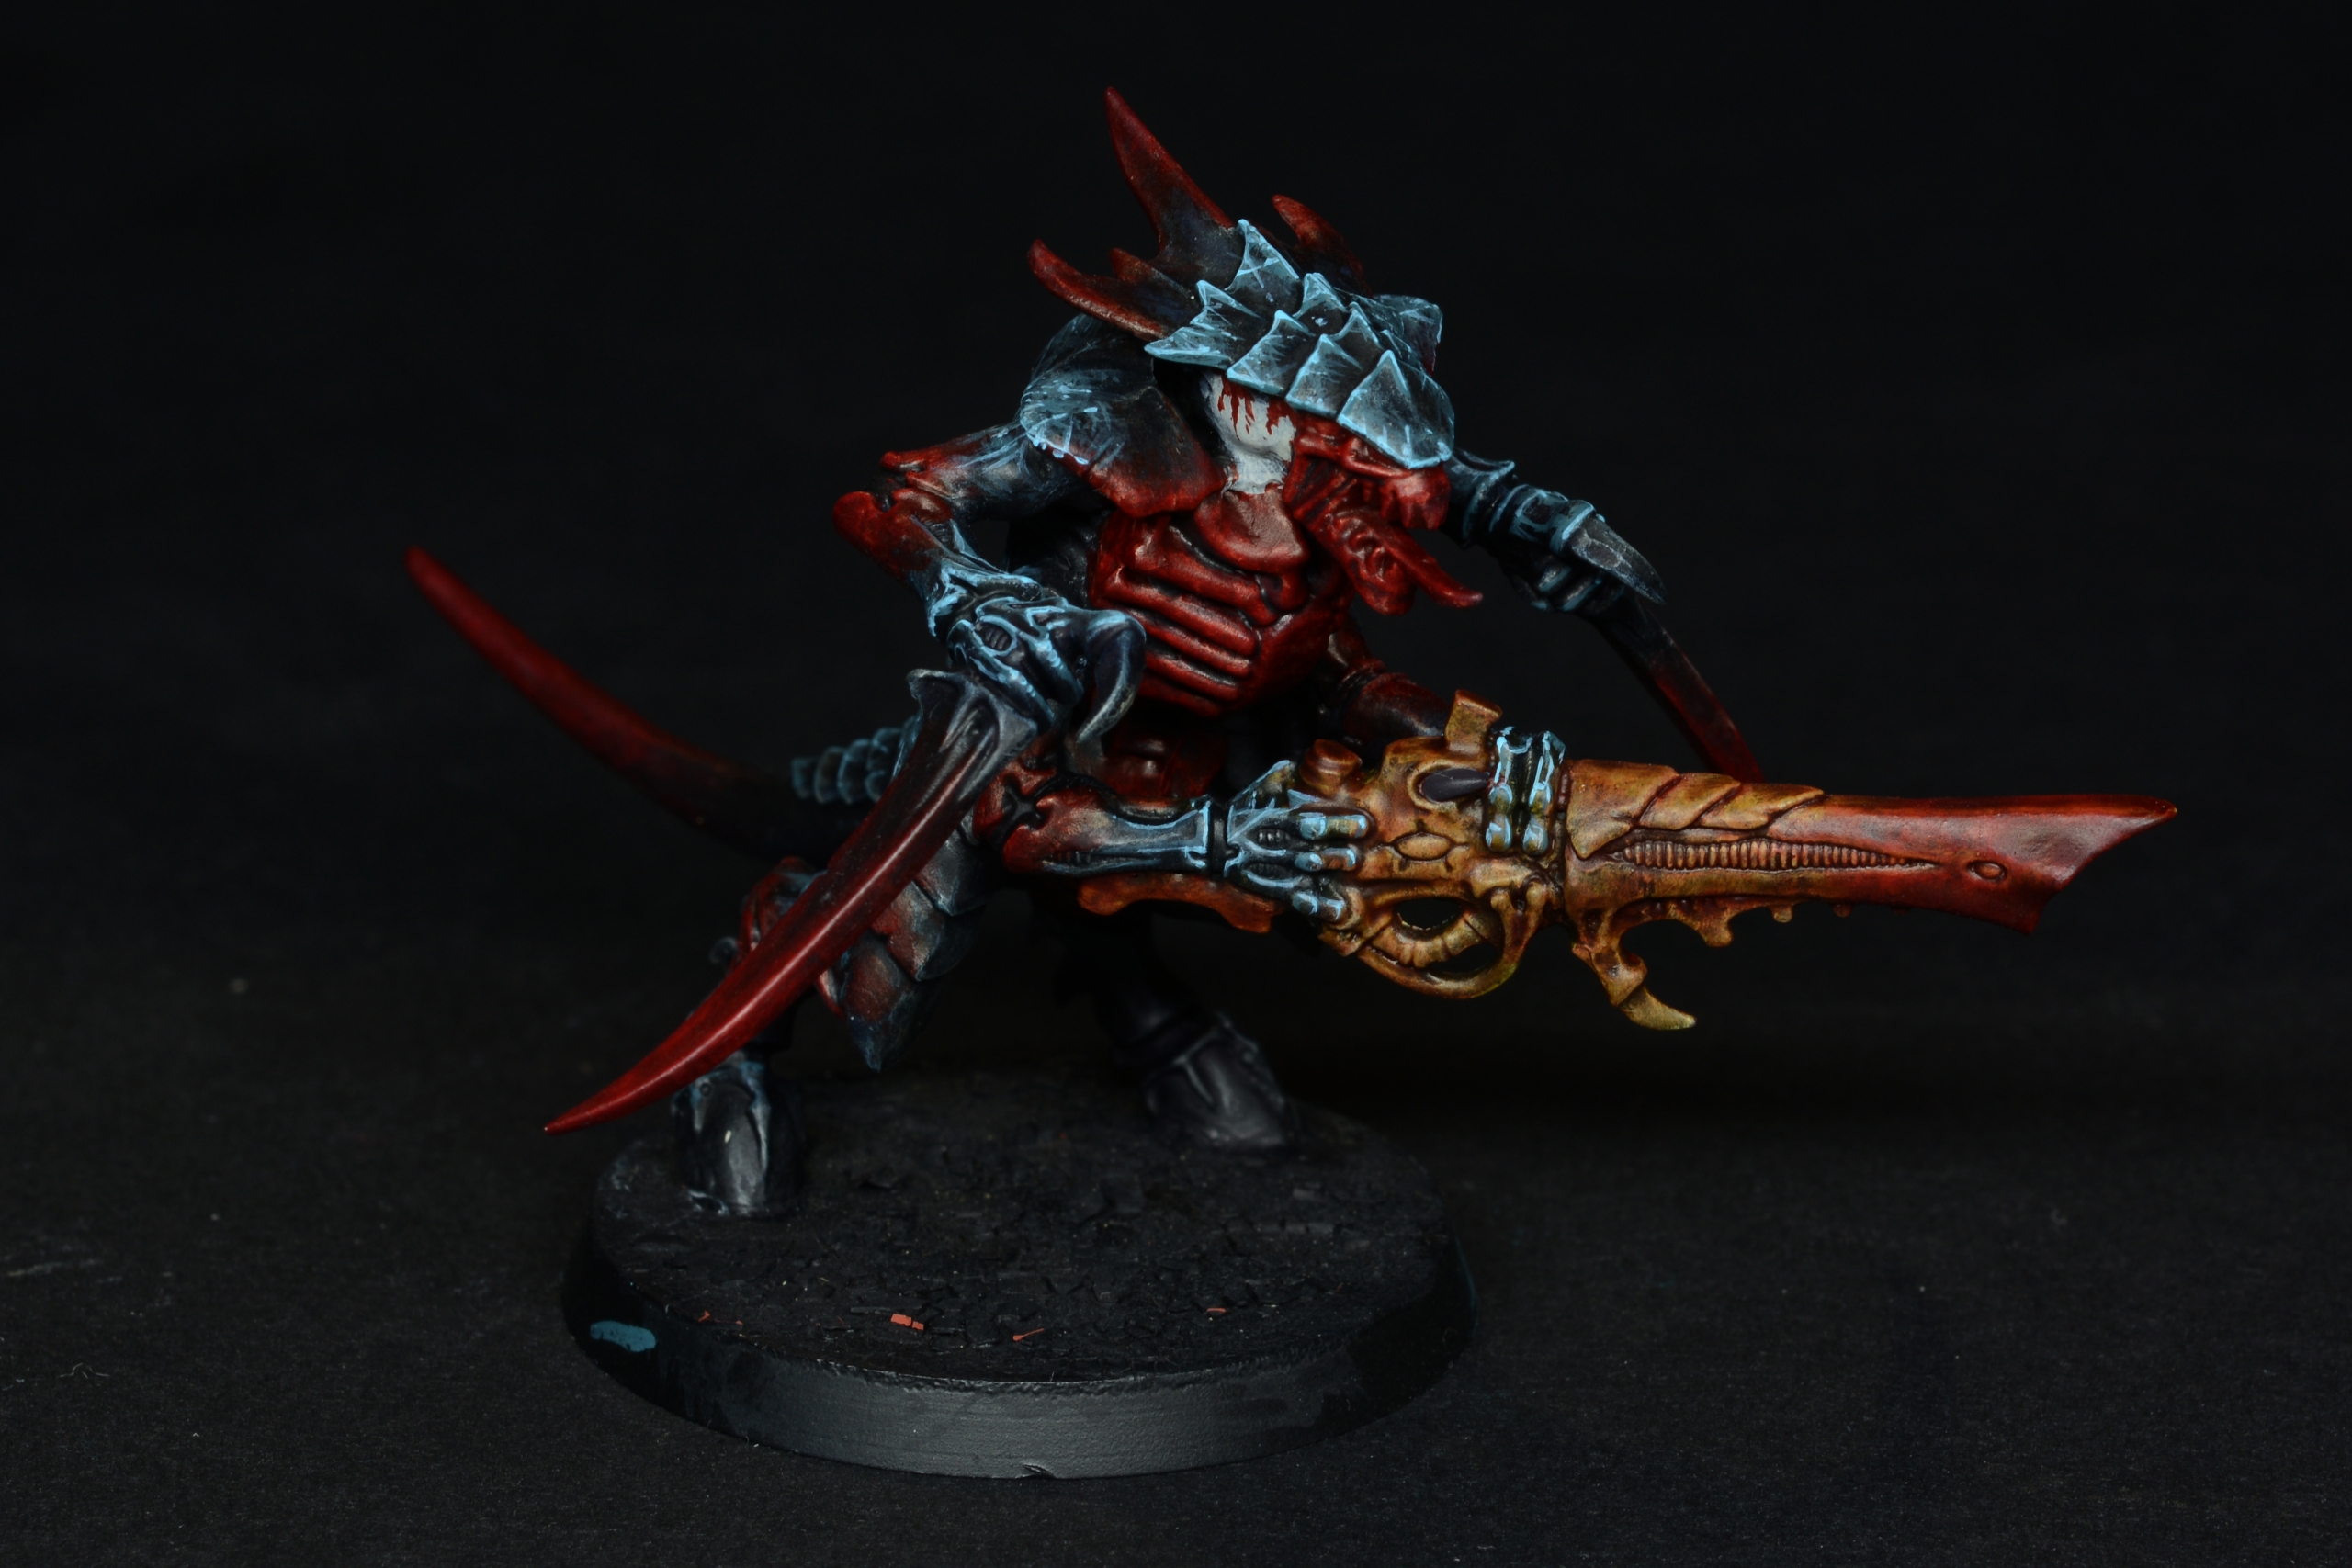
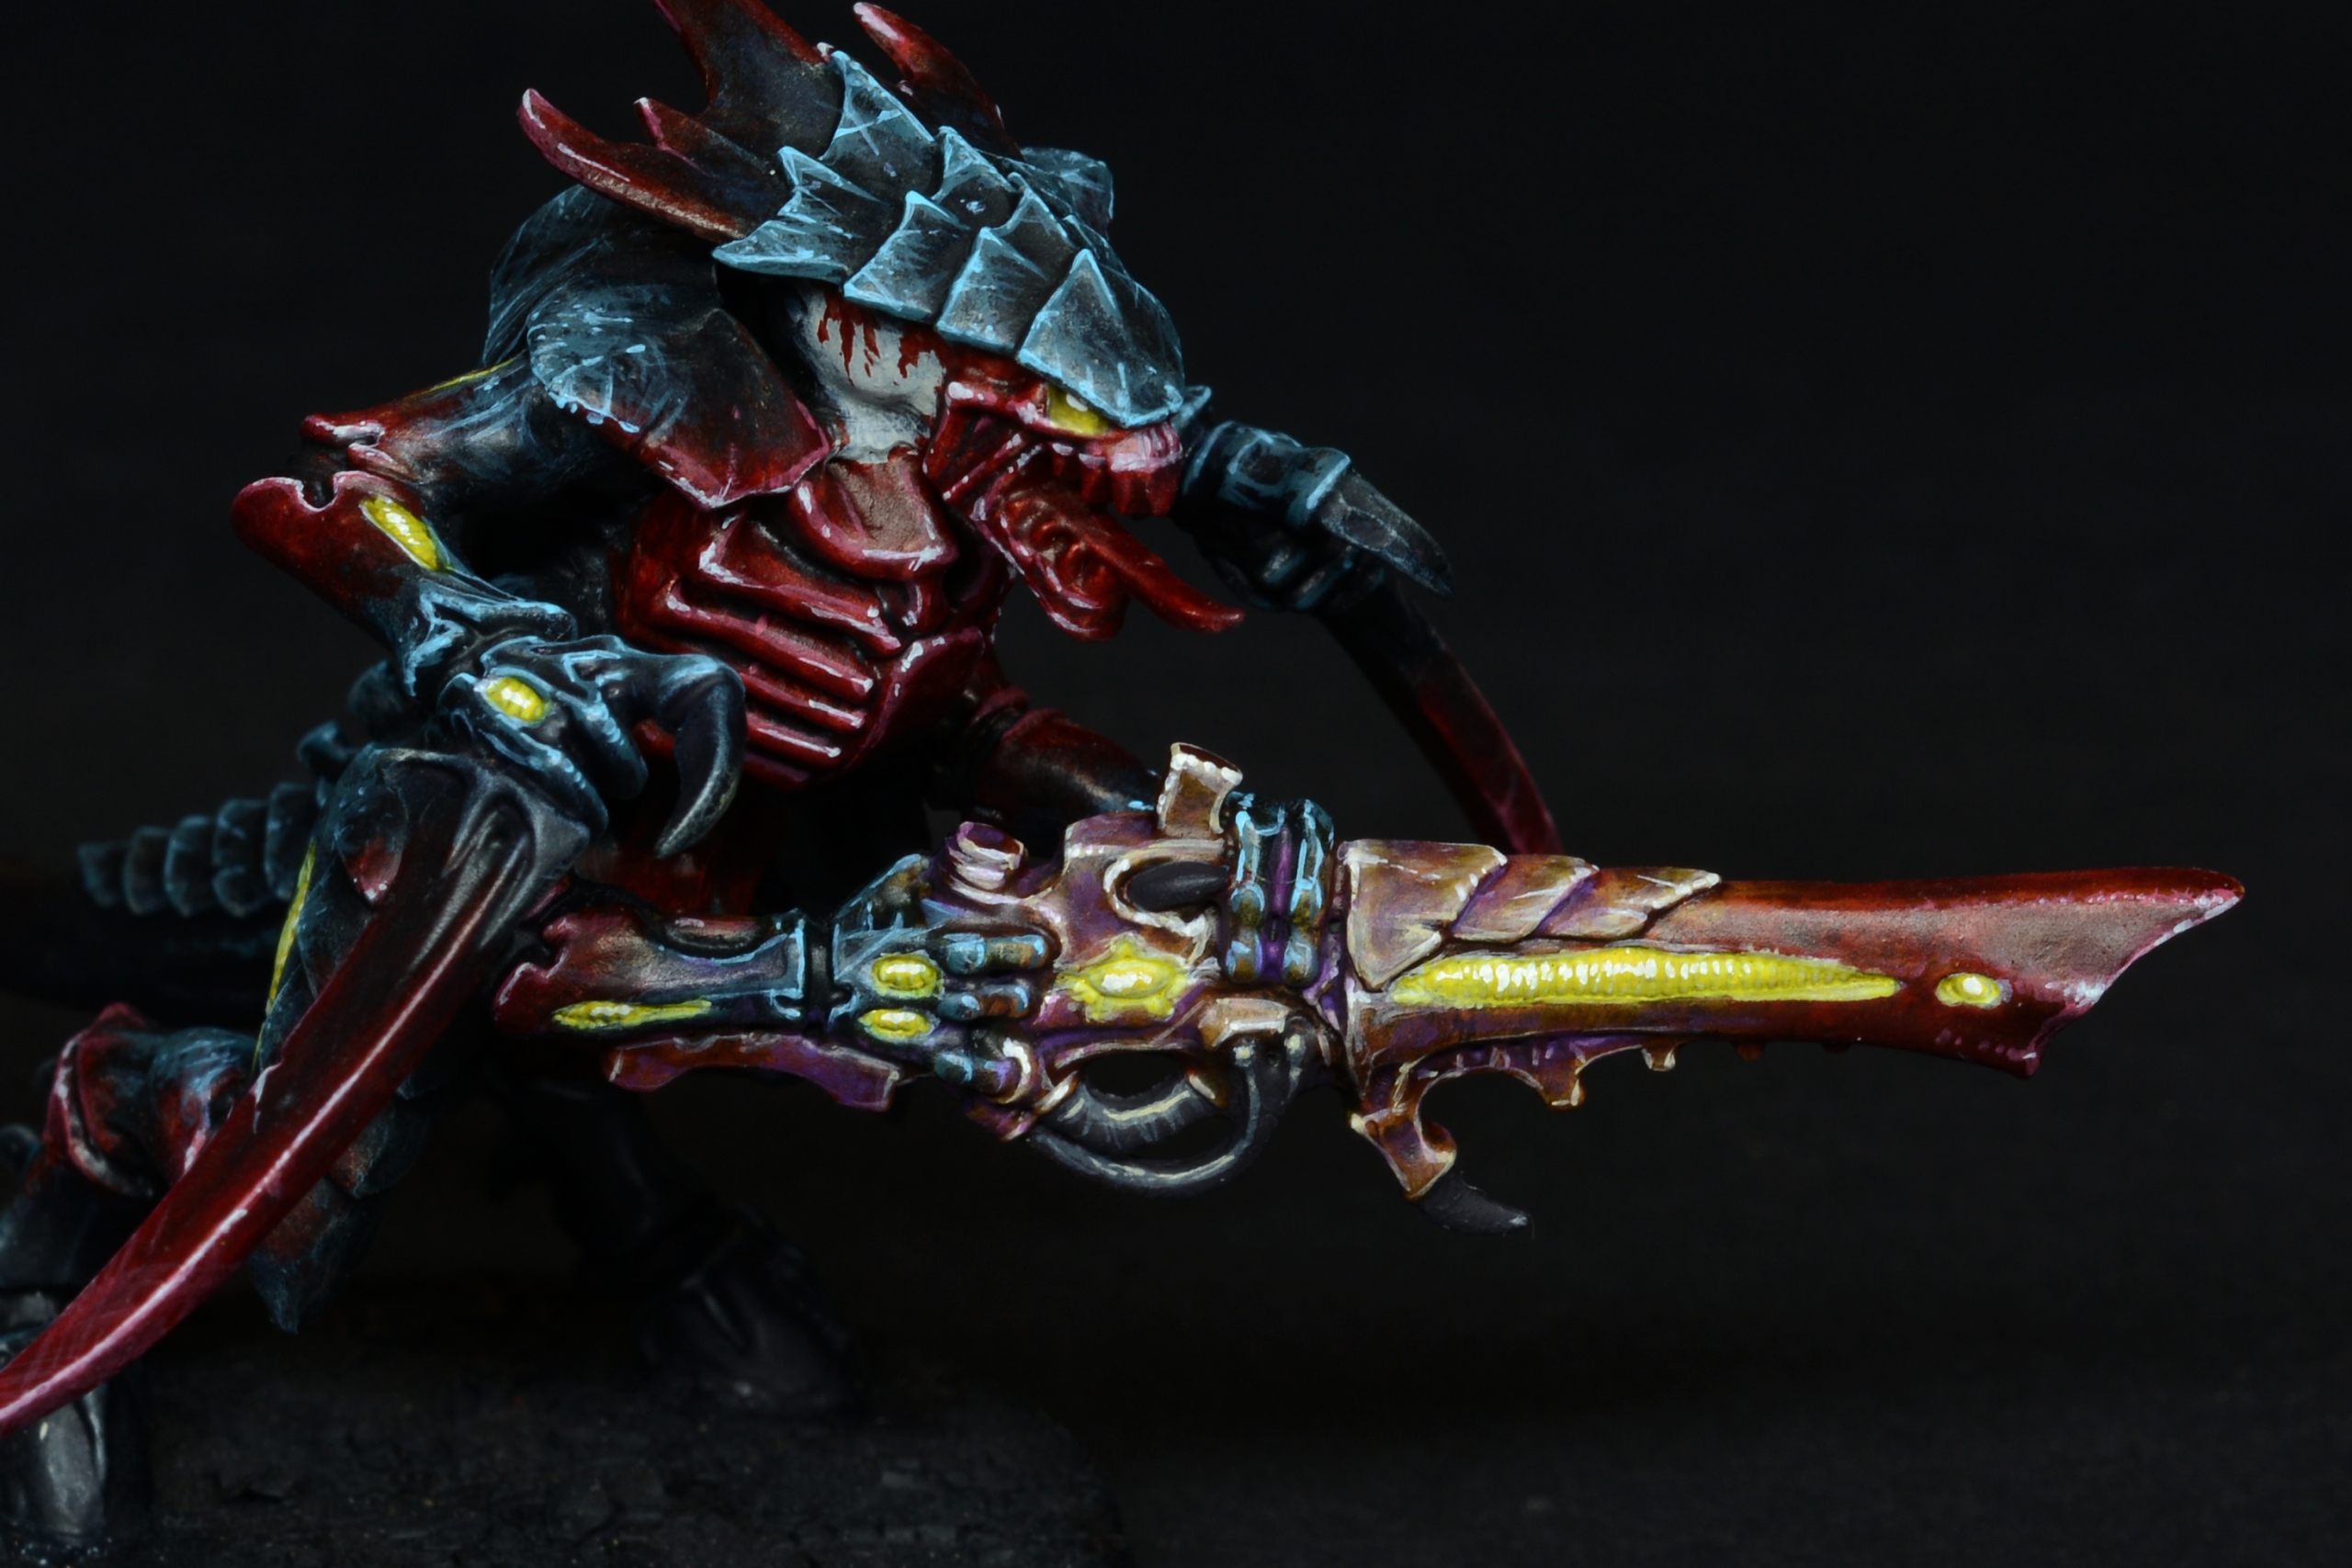
Next step was to create the foundation of all red areas (plus the head). Unlike the first tutorial, where the carapace was painted black and mostly edge-highlighted with grey-blue, this time i wanted to follow closely the original artwork and create all the red transitions on the armour plates plus shoulder, elbows, thighs etc
So i’ve applied a patchy layer of Ak Rock Grey. In doing this i’ve used one of my old and worn brushes from W&N, stippling the paint on.
When the bristles are almost completely consumed they act as smudge brushes, and this will create a sort of gradient (best example: blades, tails) that later will be furtherly smoothed using Contrast paint to tint the areas.
For the tinting i used Gw Flesh Teares Red. The contrast paint will work only on the pale areas leaving almost untouched the black-blue, hence creating a nice transition. As you can see, i left out the weapon and, on the heads, i followed the 3rd edition artwork by drawing patterns on the sides. To do so, use a fine pointed brush and load it with a small quantity of paint: otherwise it will be difficult to be precise, as Contrast colors are very liquid.
In the next step you will see 2 changes:
- a heavy layer of Gw Skeleton Horde was applied to the weapons
- i wasn’t happy with some red-black transitions and decided to clean them applying by stippling a mix of Gw Nuln Oil + 3-5% of black. IIRC, it took 2-3 layers to “clean” the gradients. Notice how i also worked inside the Warrior’s blades.

The weapons then received a patchy, diluted coat of Gw Flesh Tearers Red. Once dry, a couple more layers were built towards the tips.
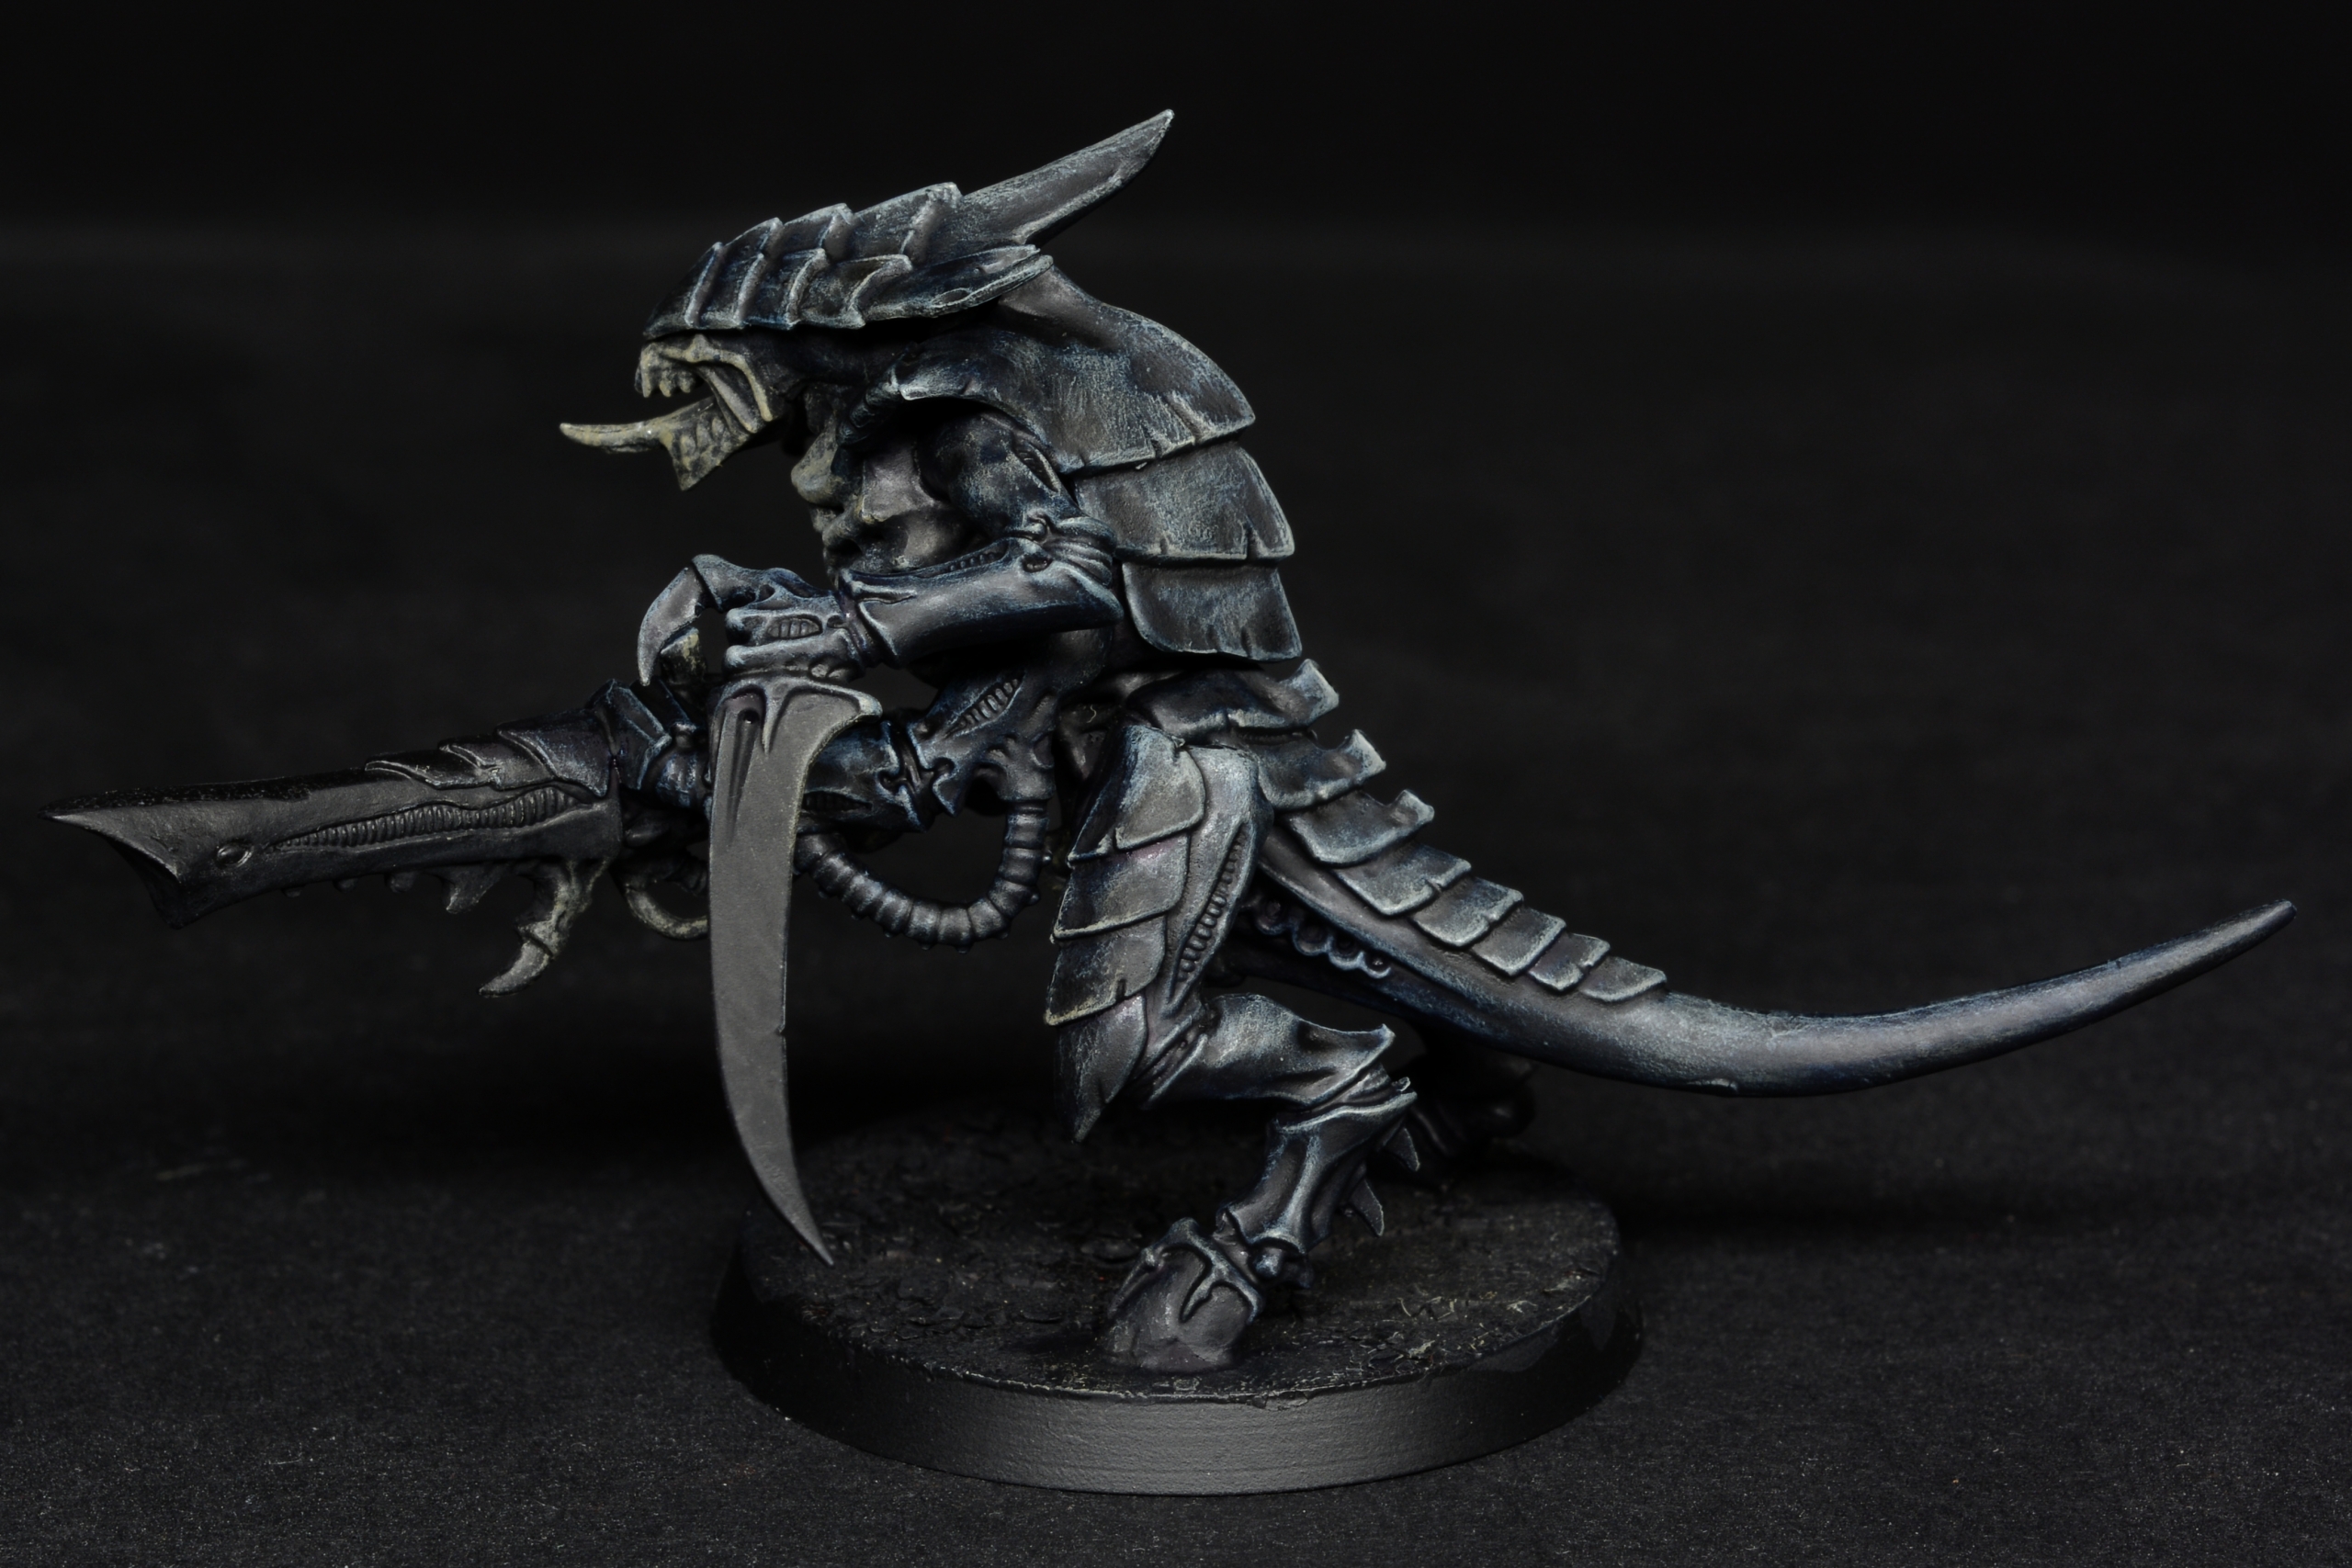
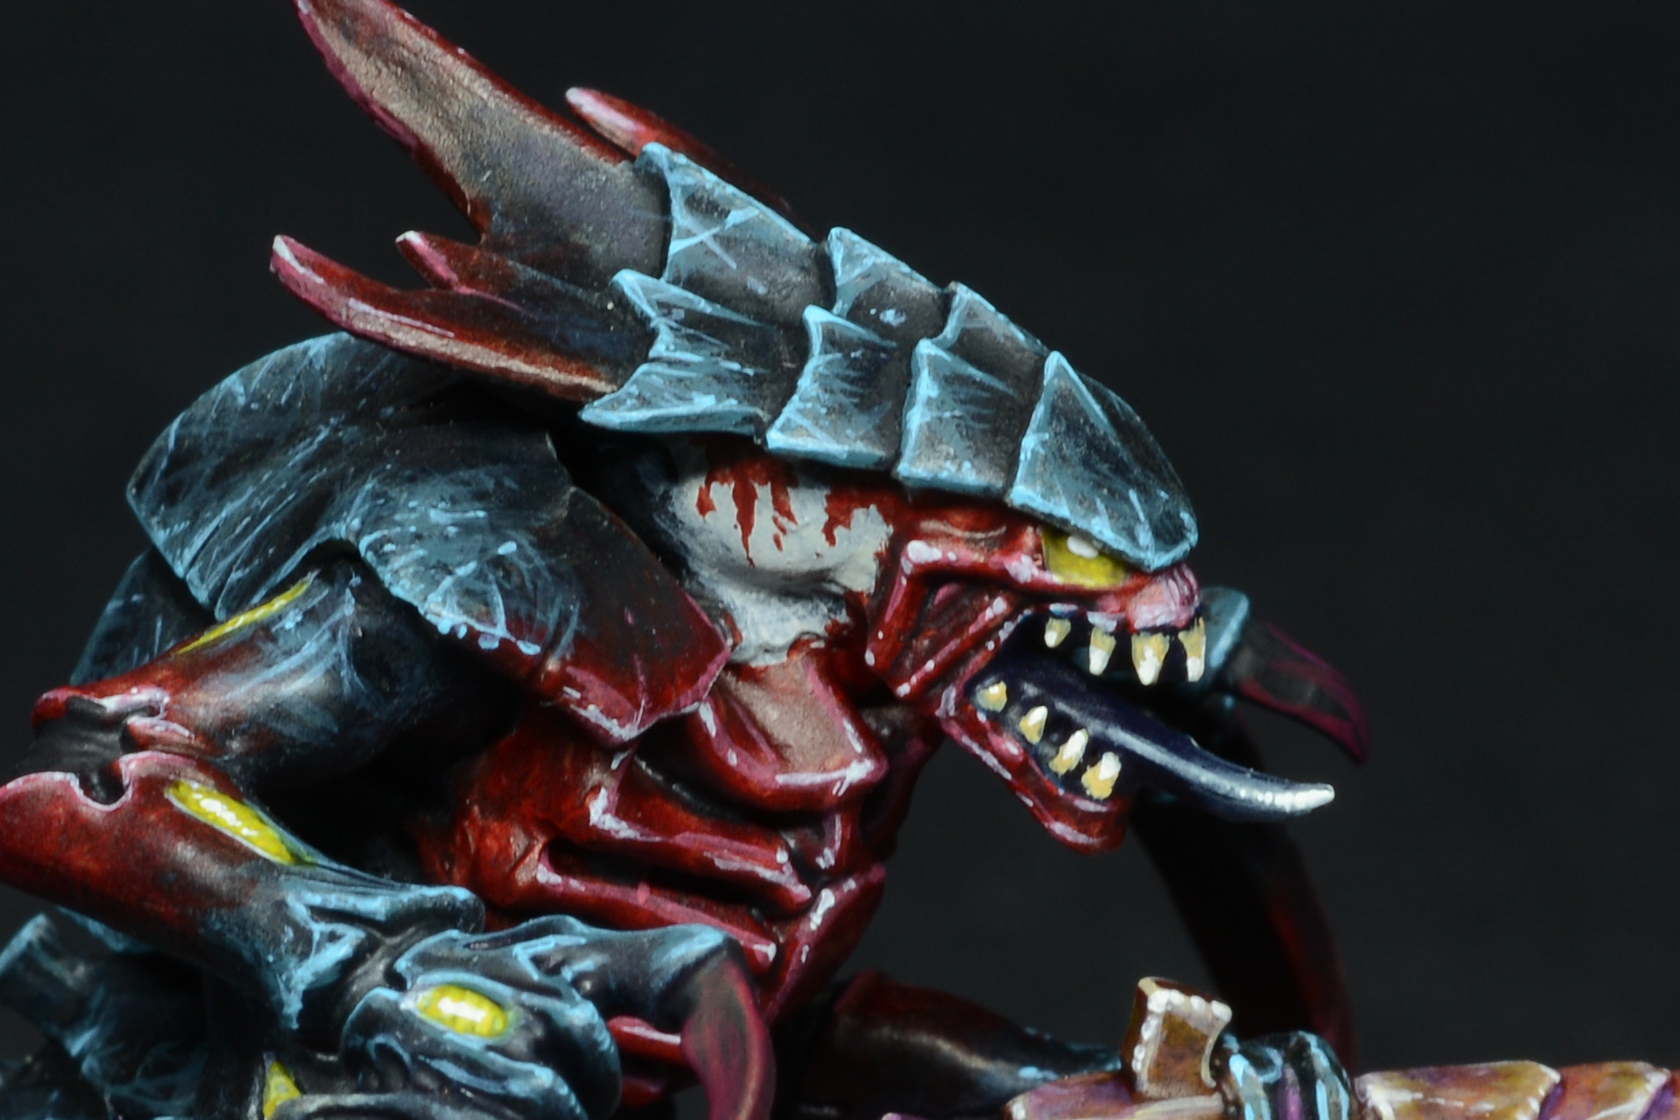
Then it was time to work on the carapace and flesh.
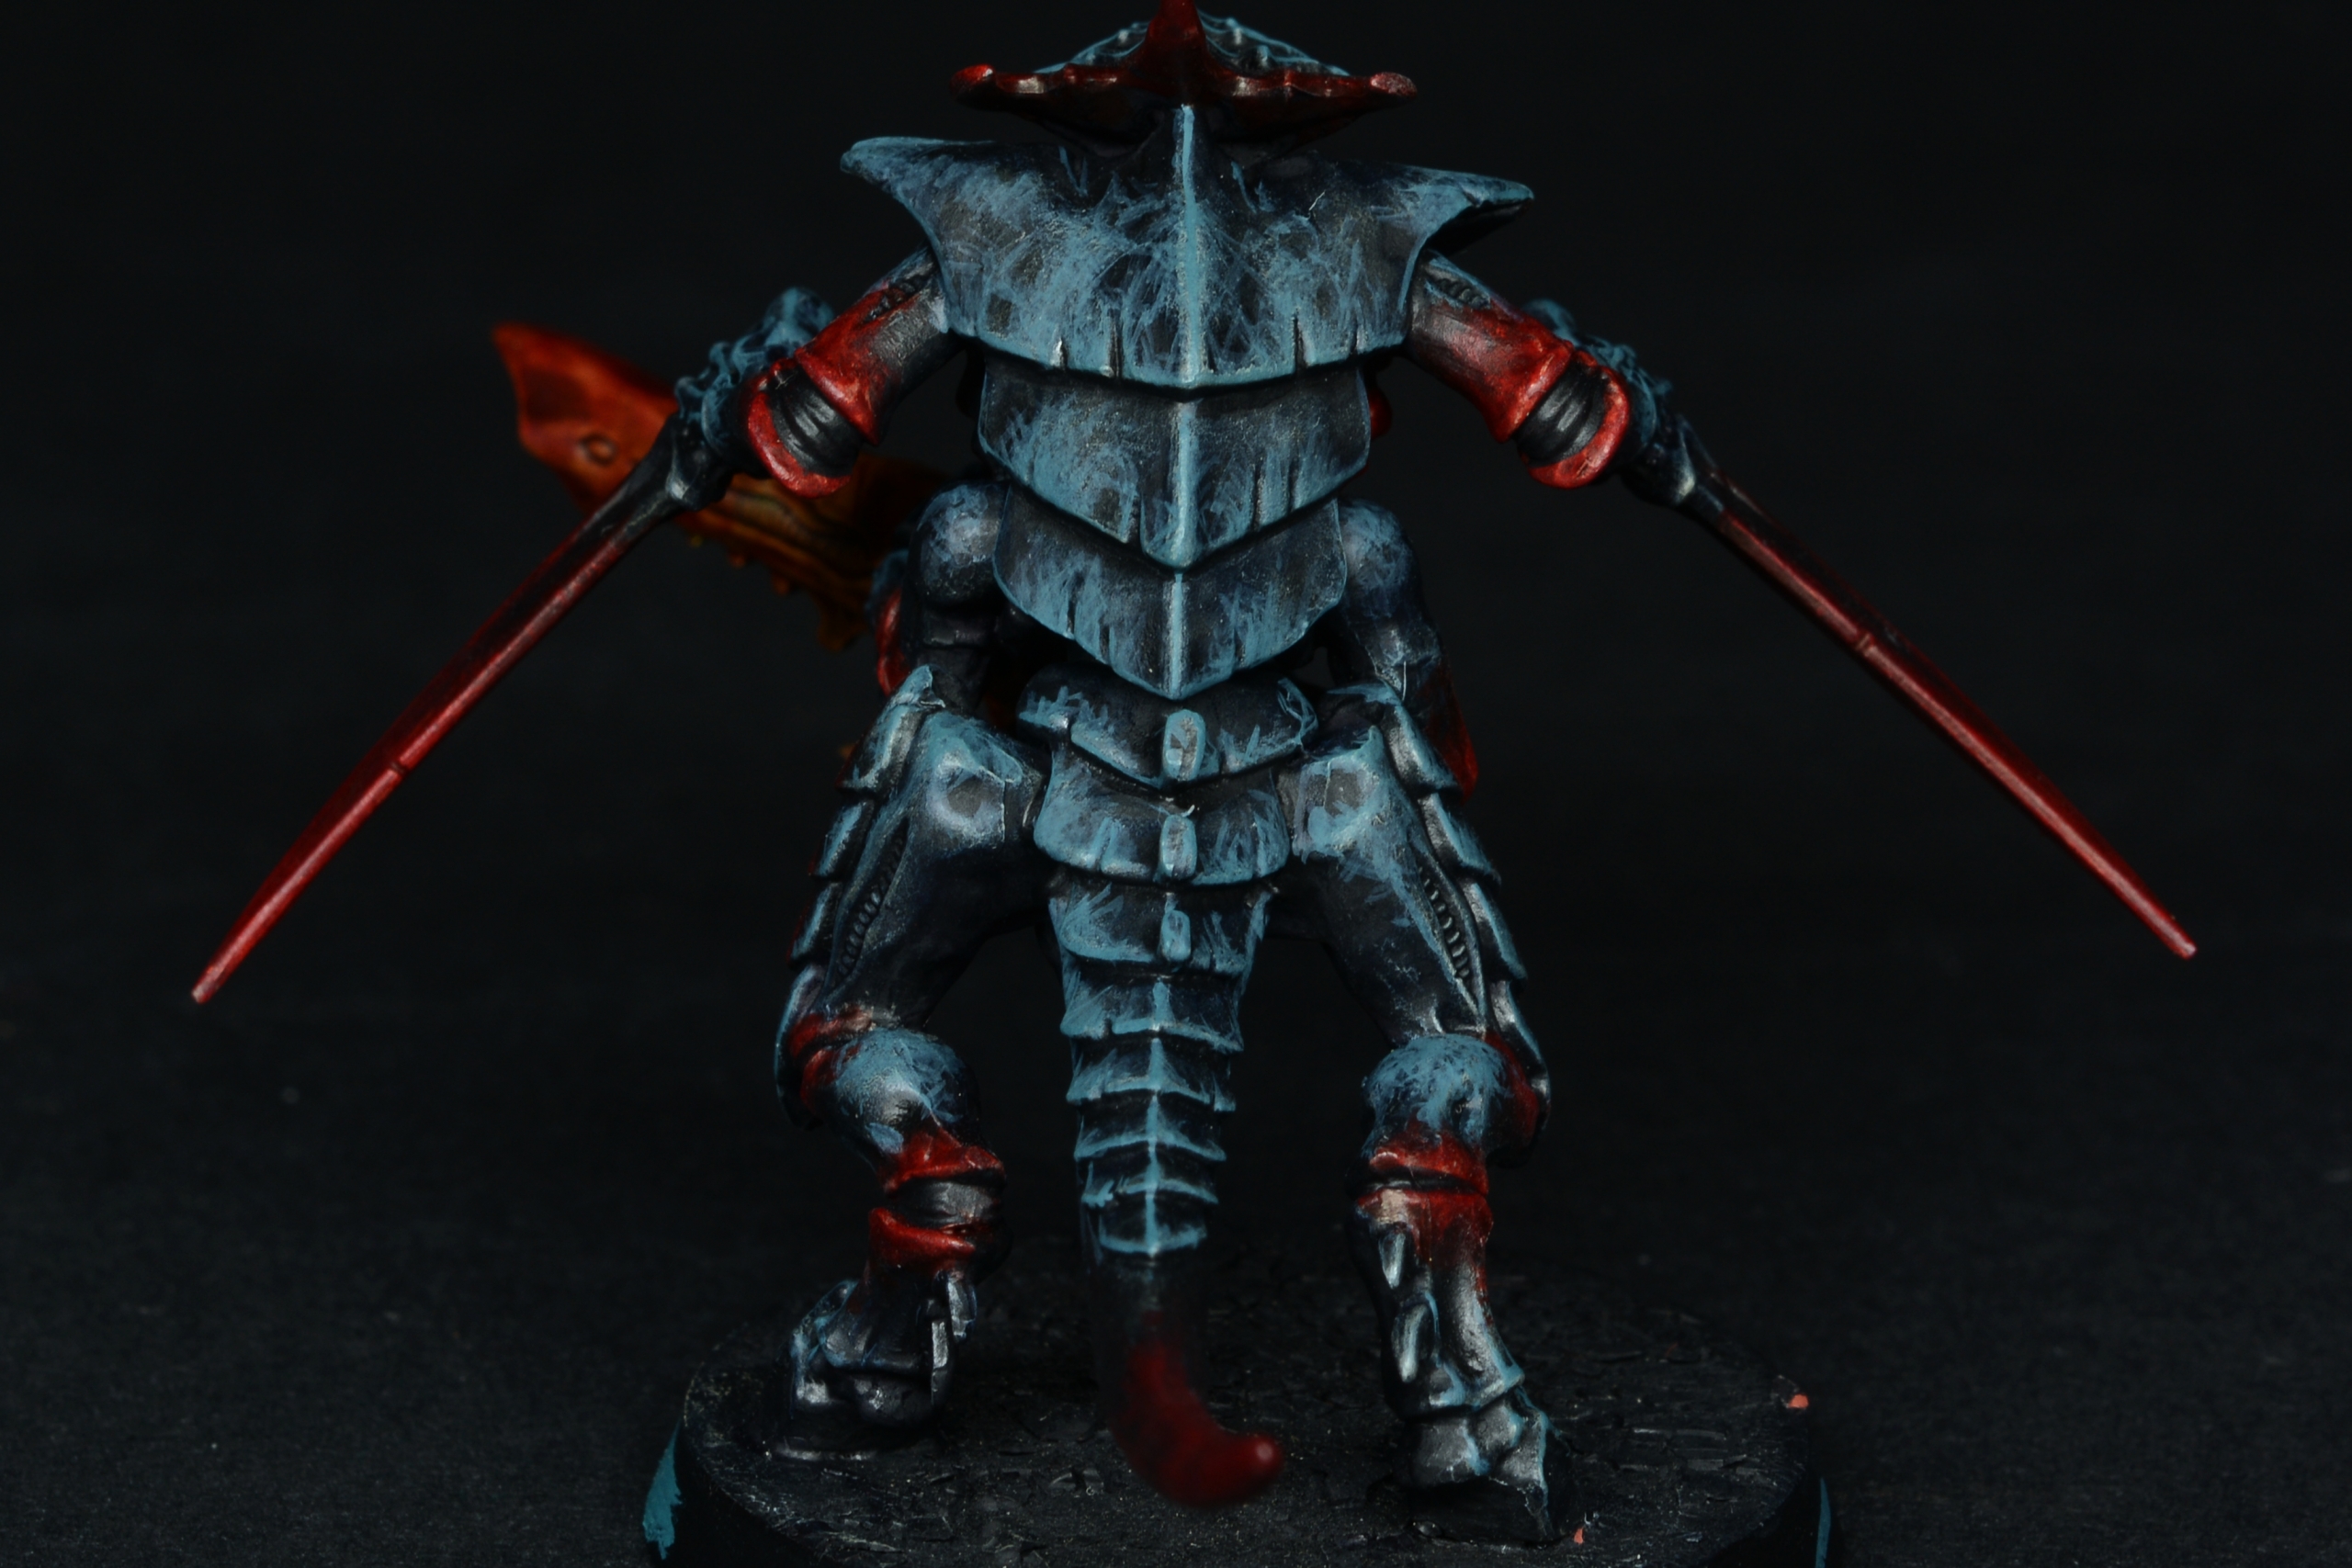
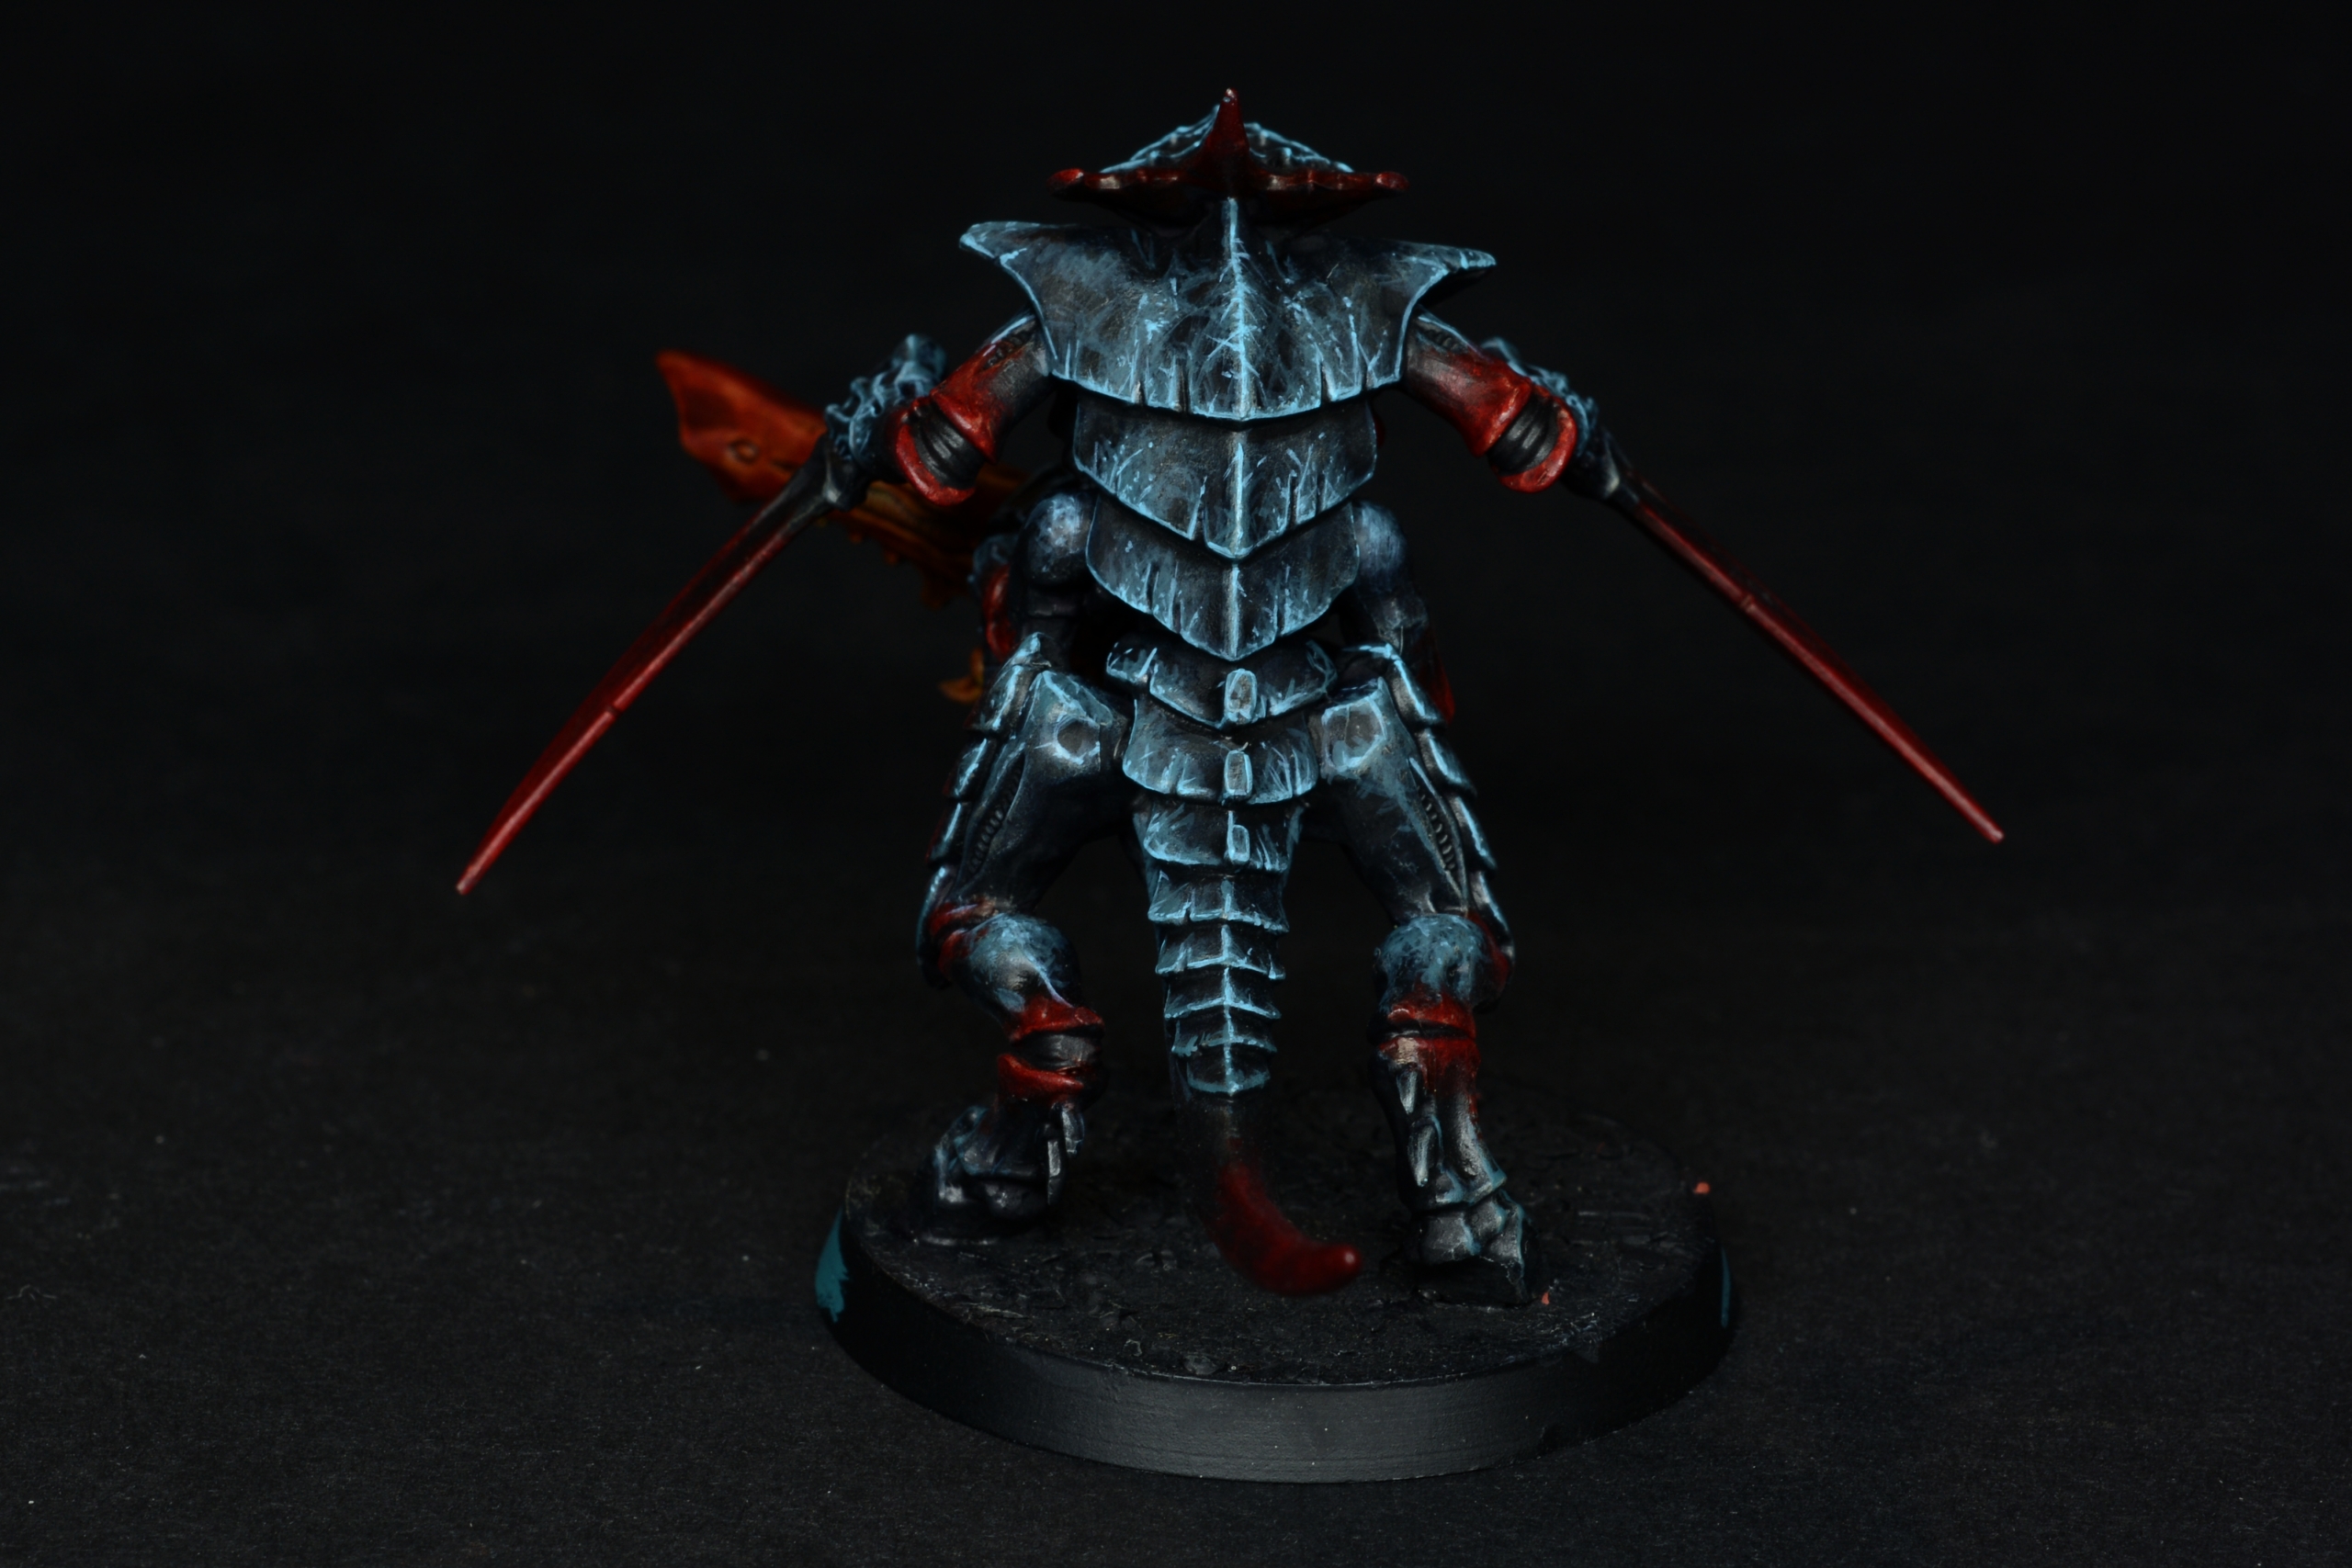
Important! Instead of simply edge-highlight the plates, i decided to create a texture. This is very time consuming and it’s probably overkill if you plan to paint a large batch of tyranids with this technique. For a good tabletop quality, 2-3 layers of edge highlight are probably enough.
So, i mixed blue-greens-grey etc until i obtained a color suitable for the first layer, something that could be similar to The Fang from GW.
Then i’ve applied it towards the edges with a mix of criss-cross strokes and stippling (this technique would require a video to be explained properly, which i plan to do in the future); this created the texture you can see in the pics. In most areas i followed the texture already present from the previous drybrush-tinting, and concentrated the color right there.
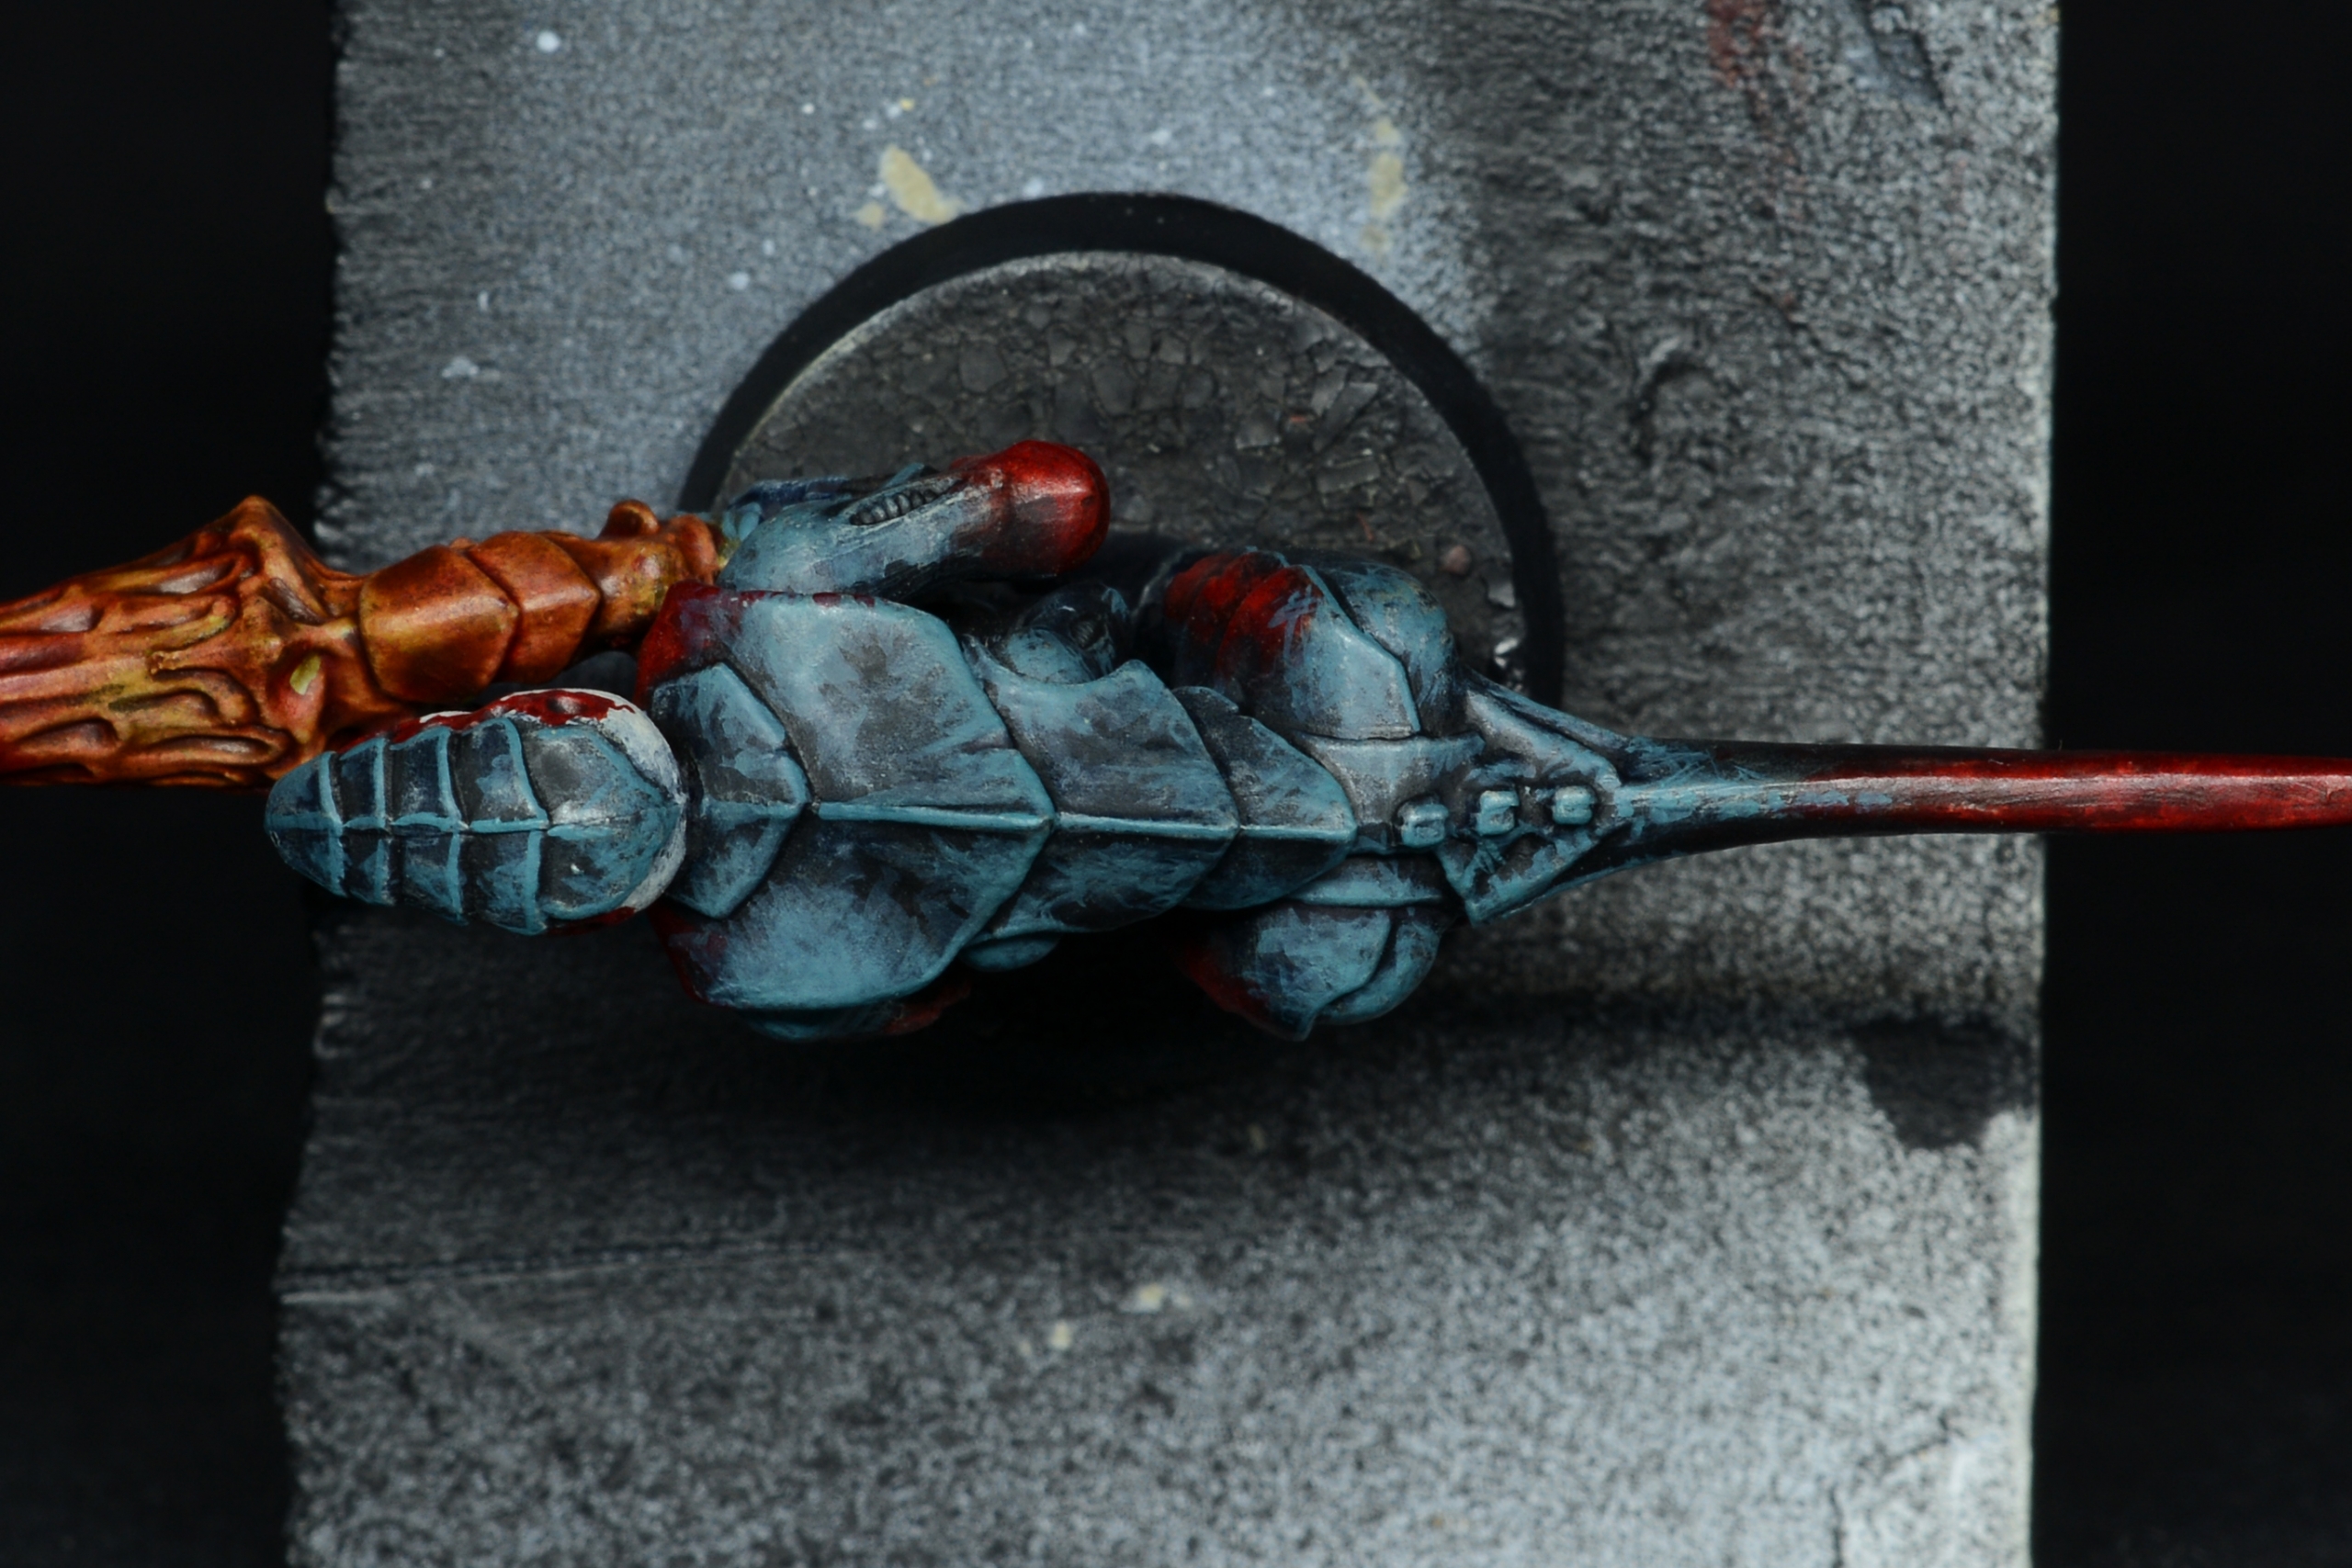
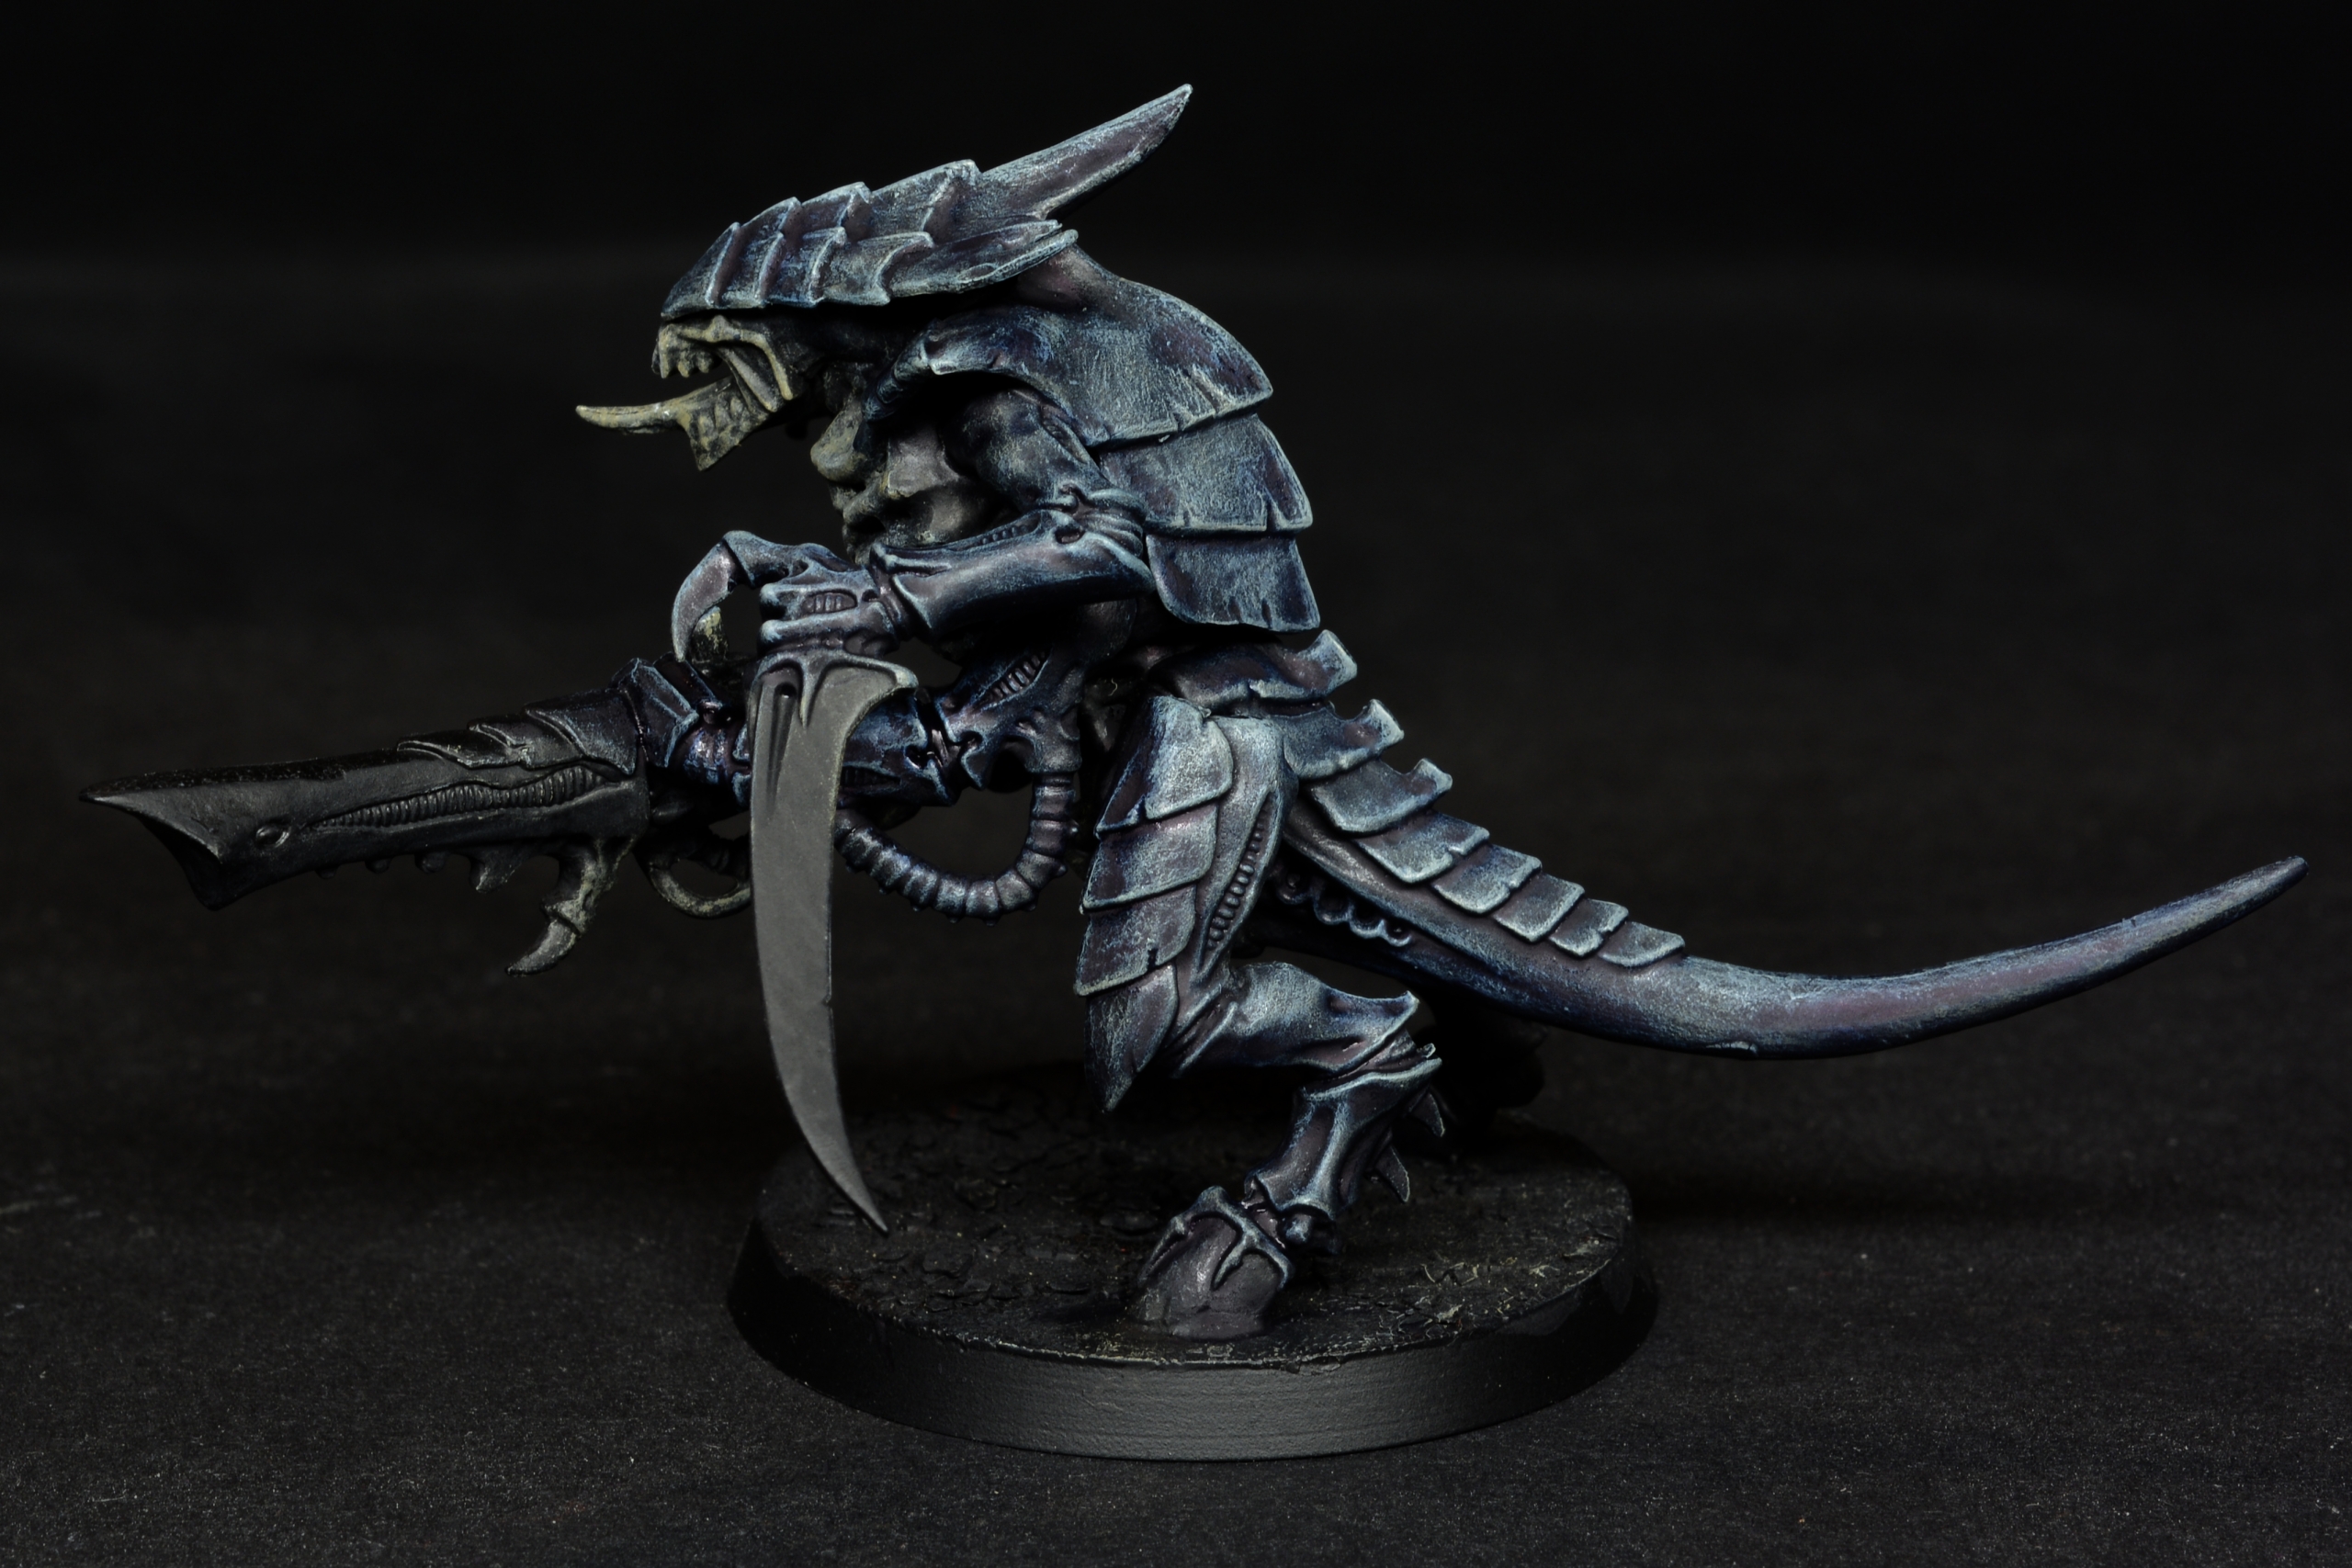
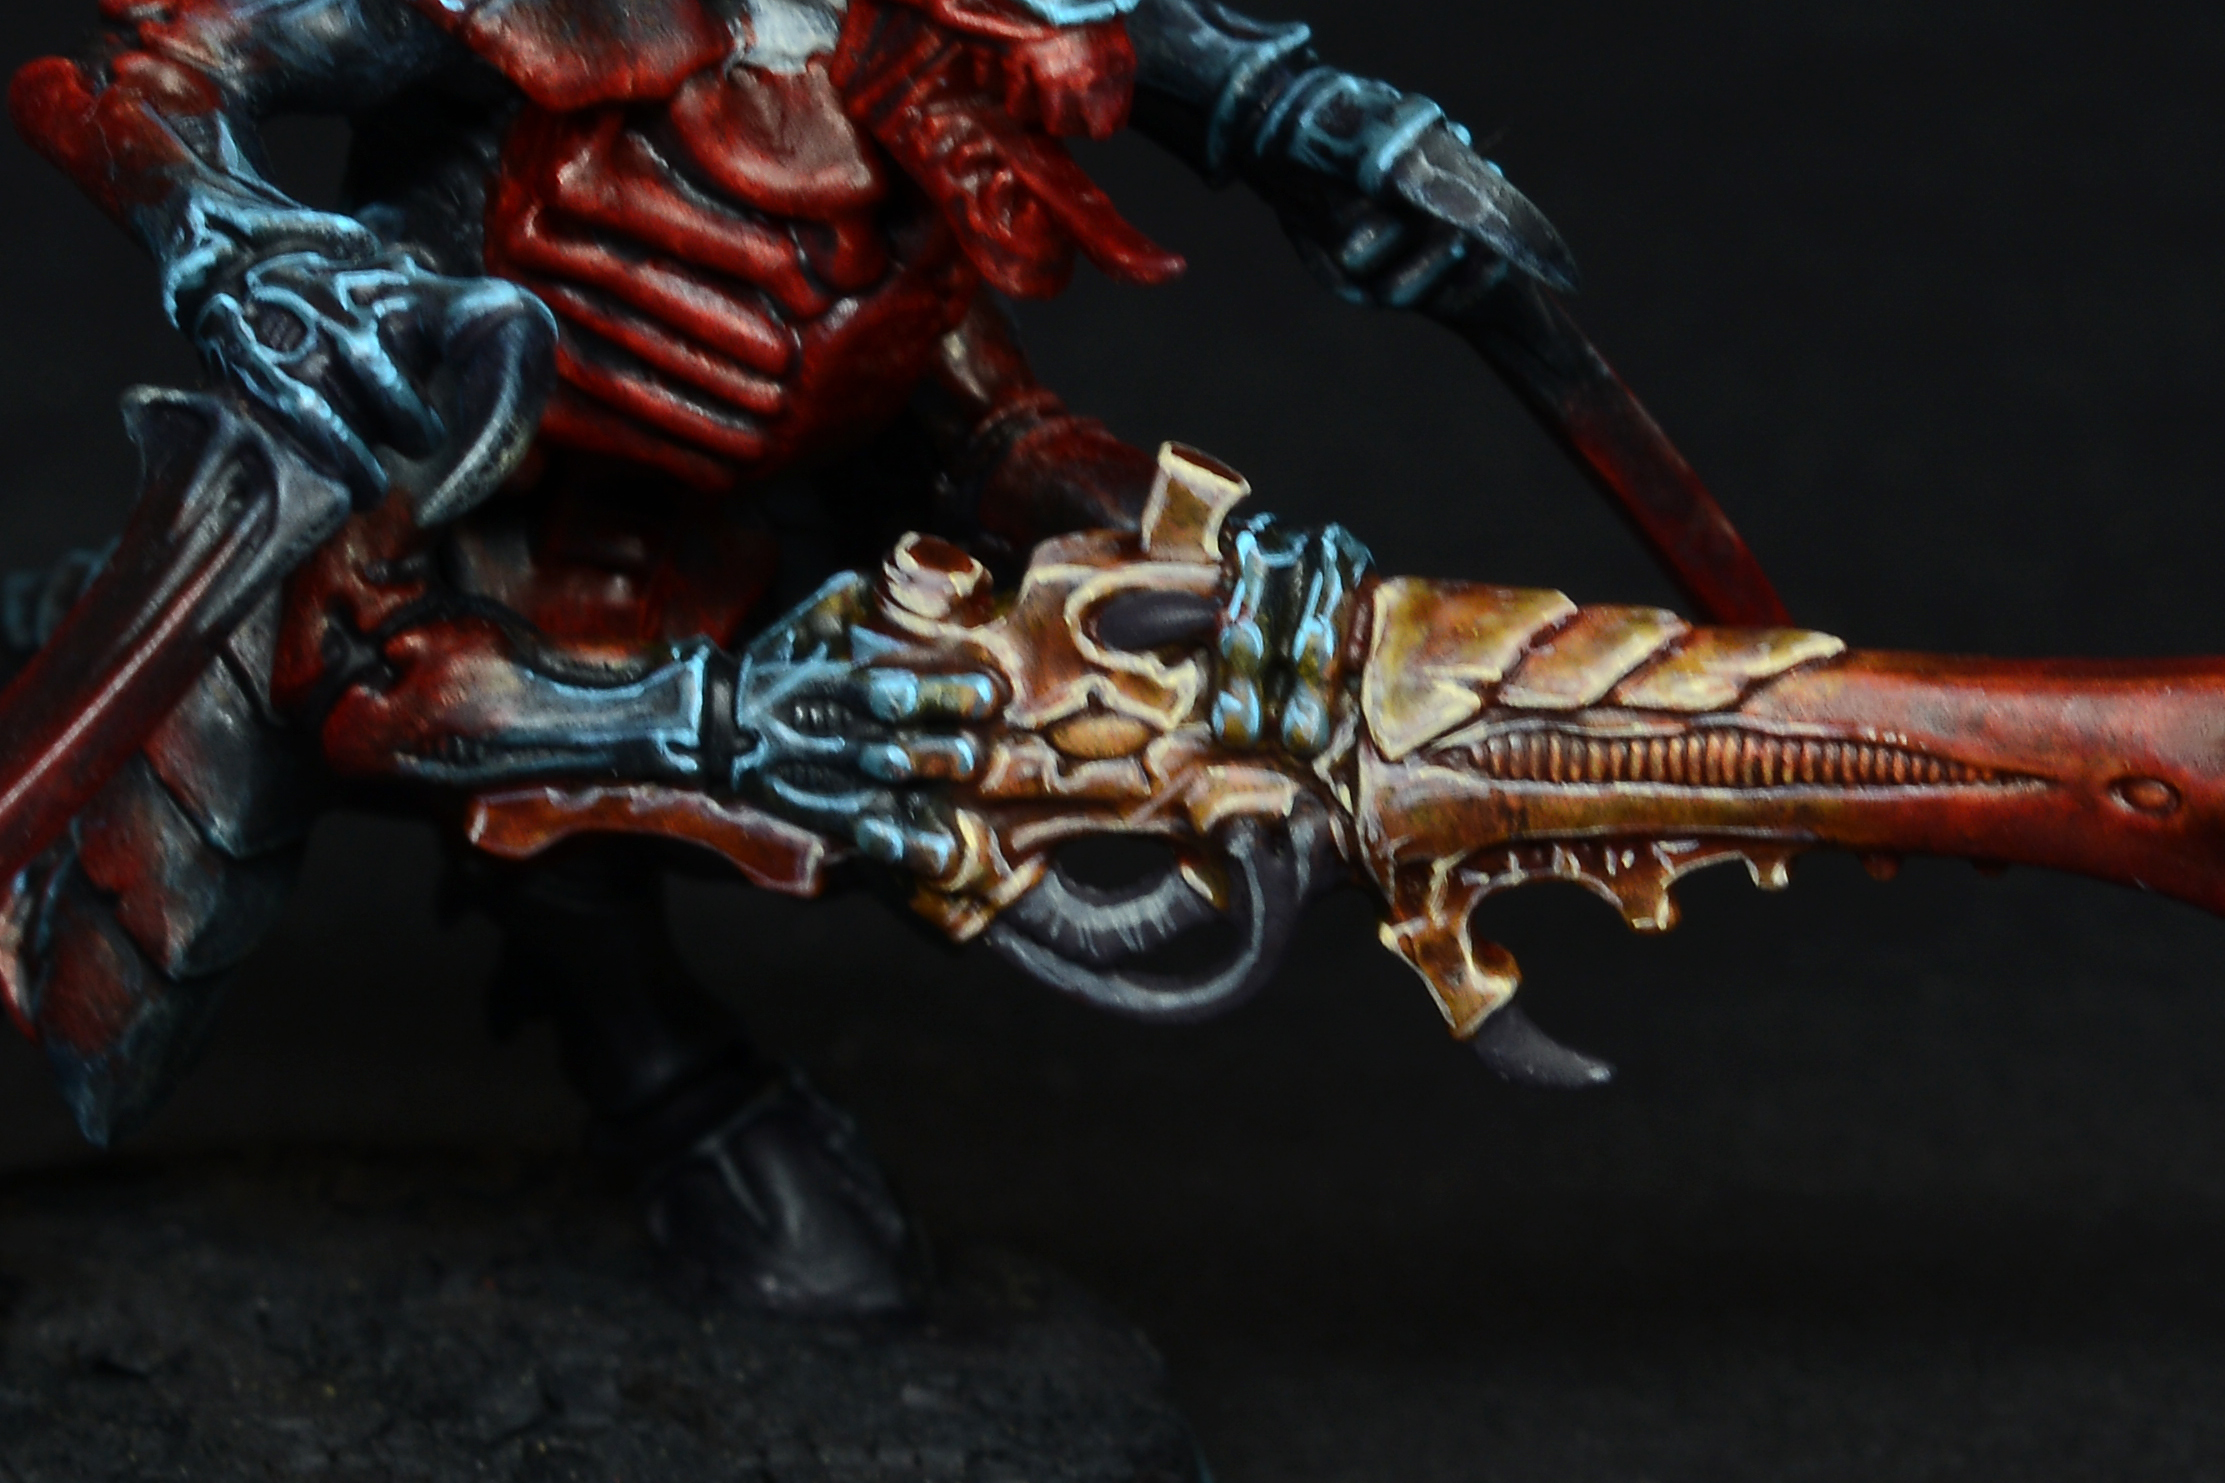
An important detail: when painting the weapons, some of the Contrast paint inevitably stained the hands with a brown-reddish color. I decided not the clean them and instead apply the blue-grey highlight over these areas, to give the idea that weapons and hands were merging together. The pic below will show what i mean:
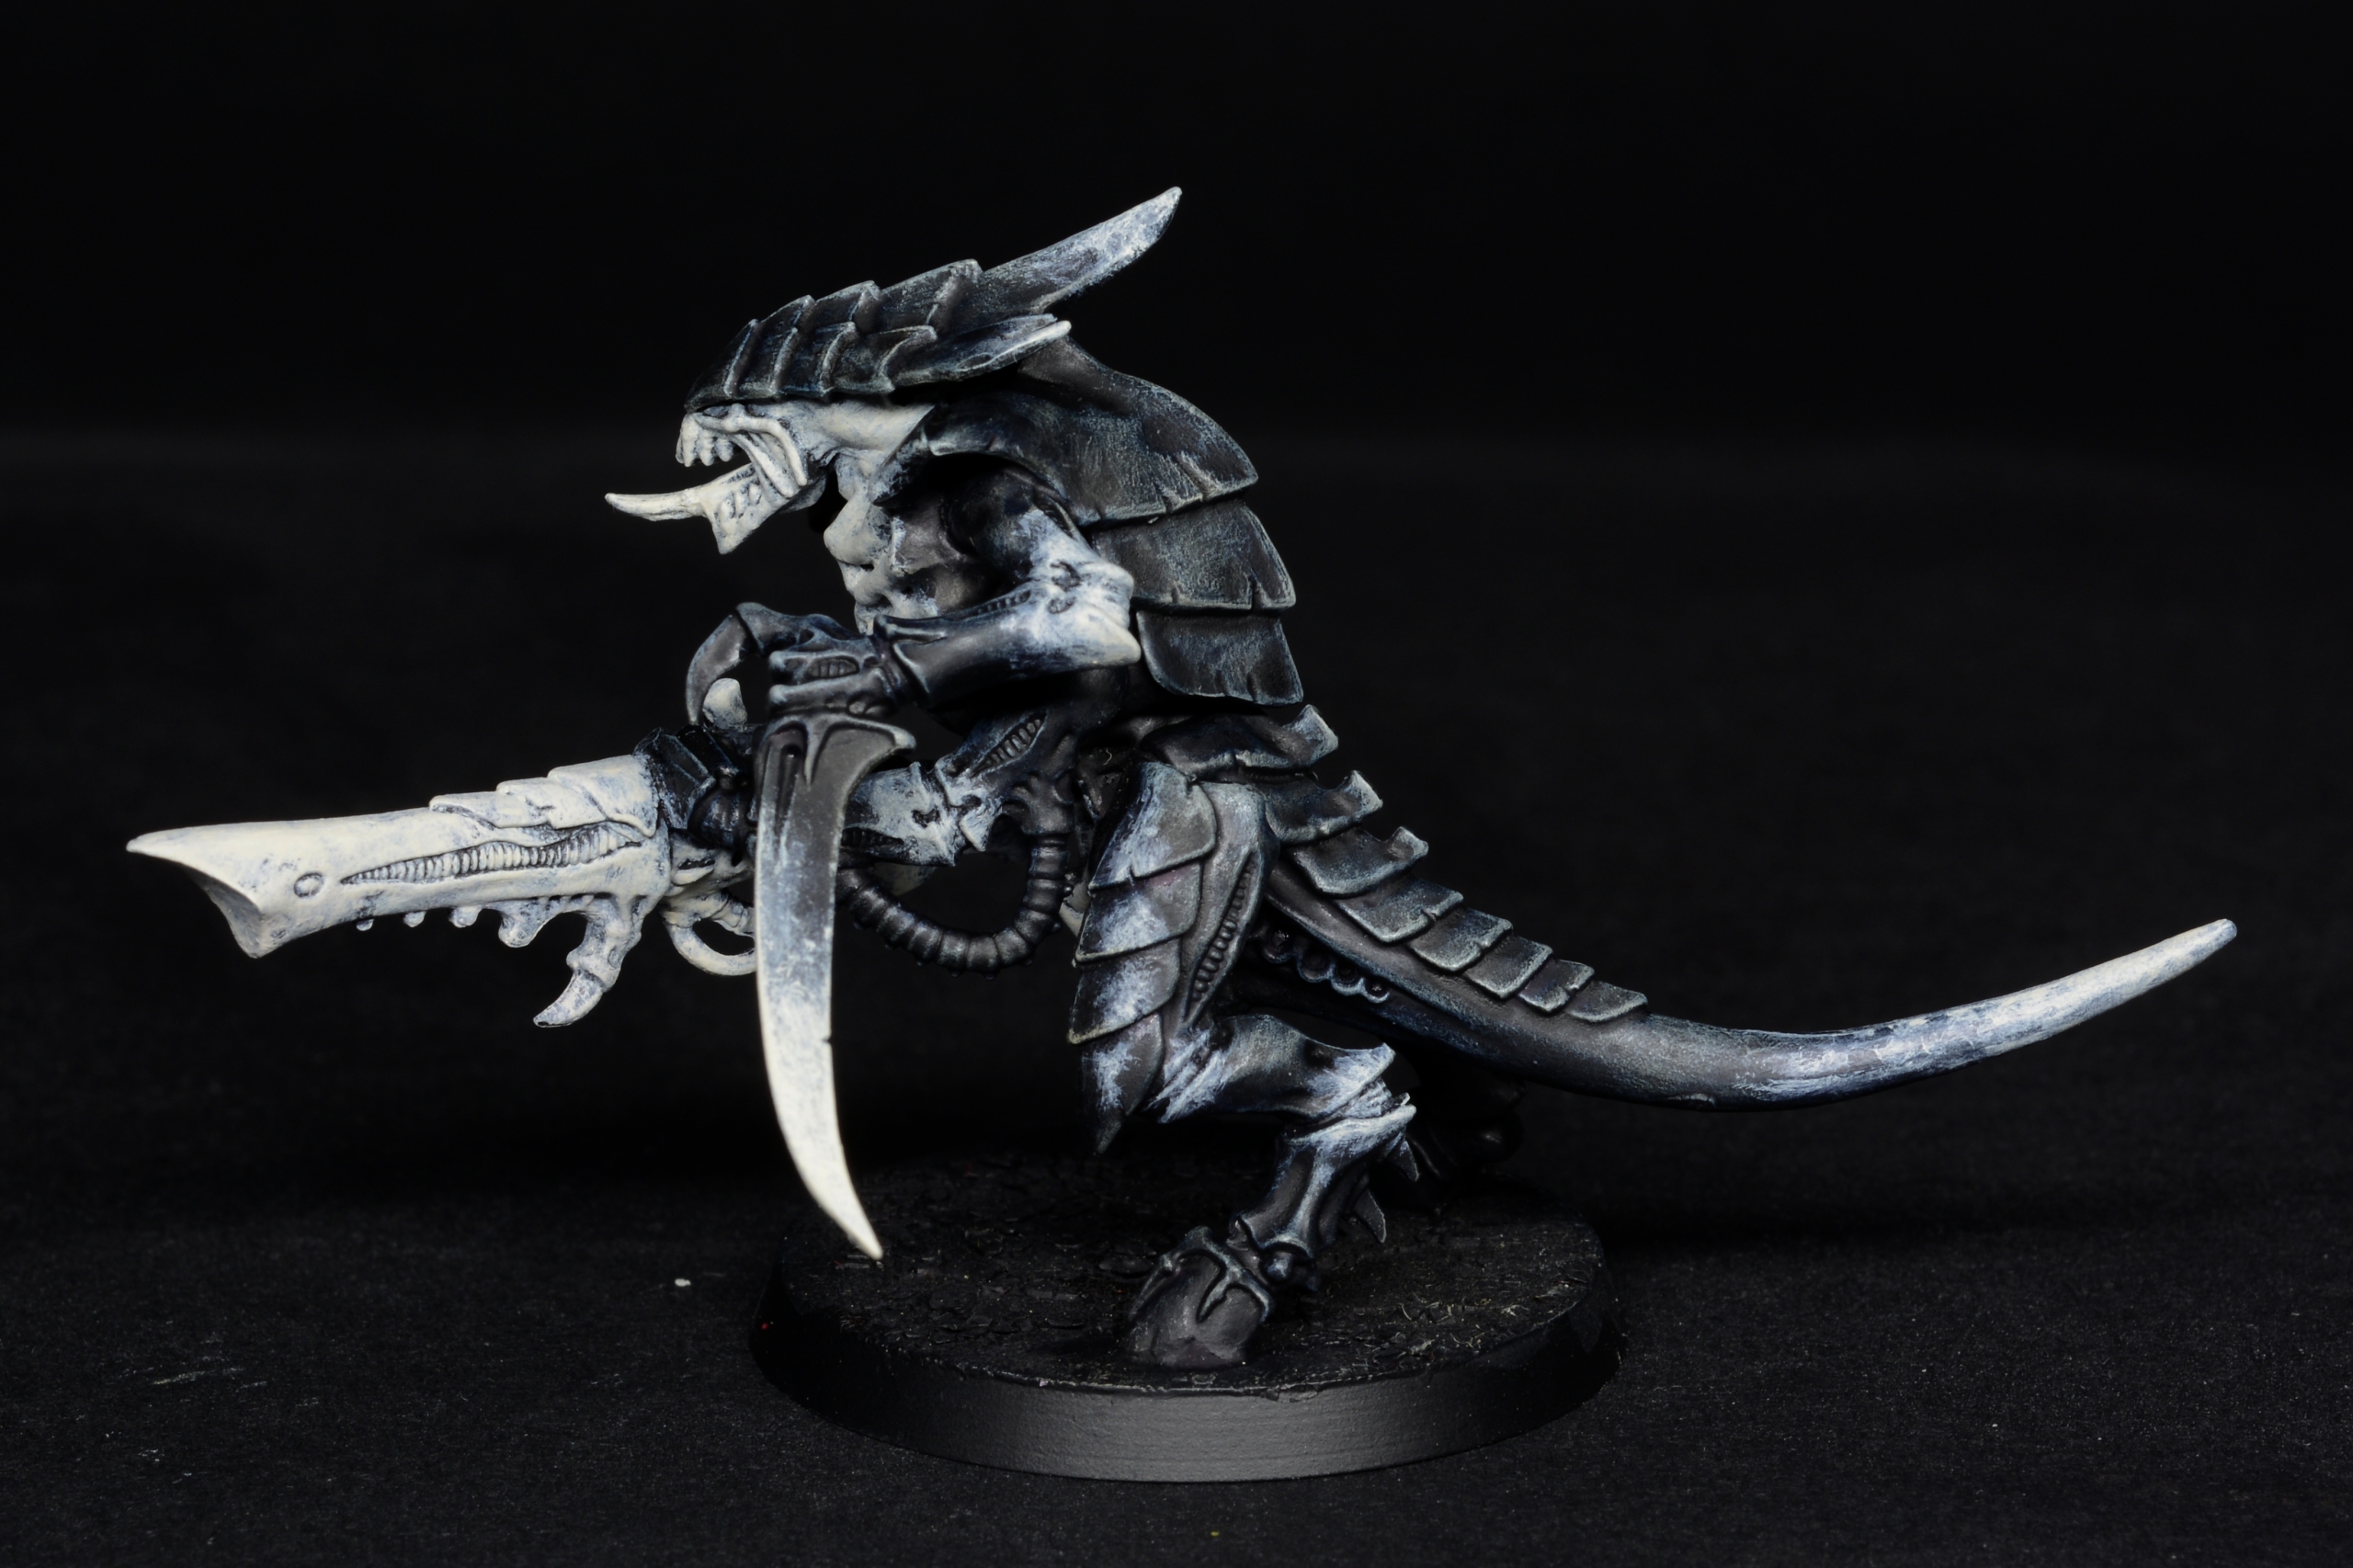
For the last highlight i created a mixture very similar to GW Temple Guard Blue, at least judging from this image:
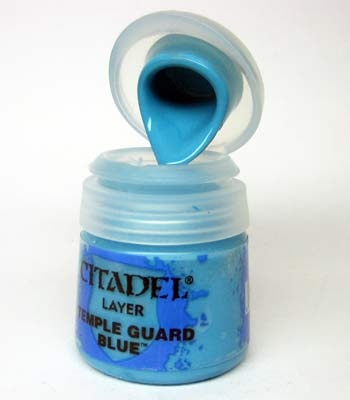
The color was applied with a pristine brush as an extreme edge highlight, and in some spots creating scratches. When doing this i don’t like super diluted colors: i add only a 5-10% of water and load the bristles with just the necessary amount of paint, discharging the extra amount that would cause thicker lines.

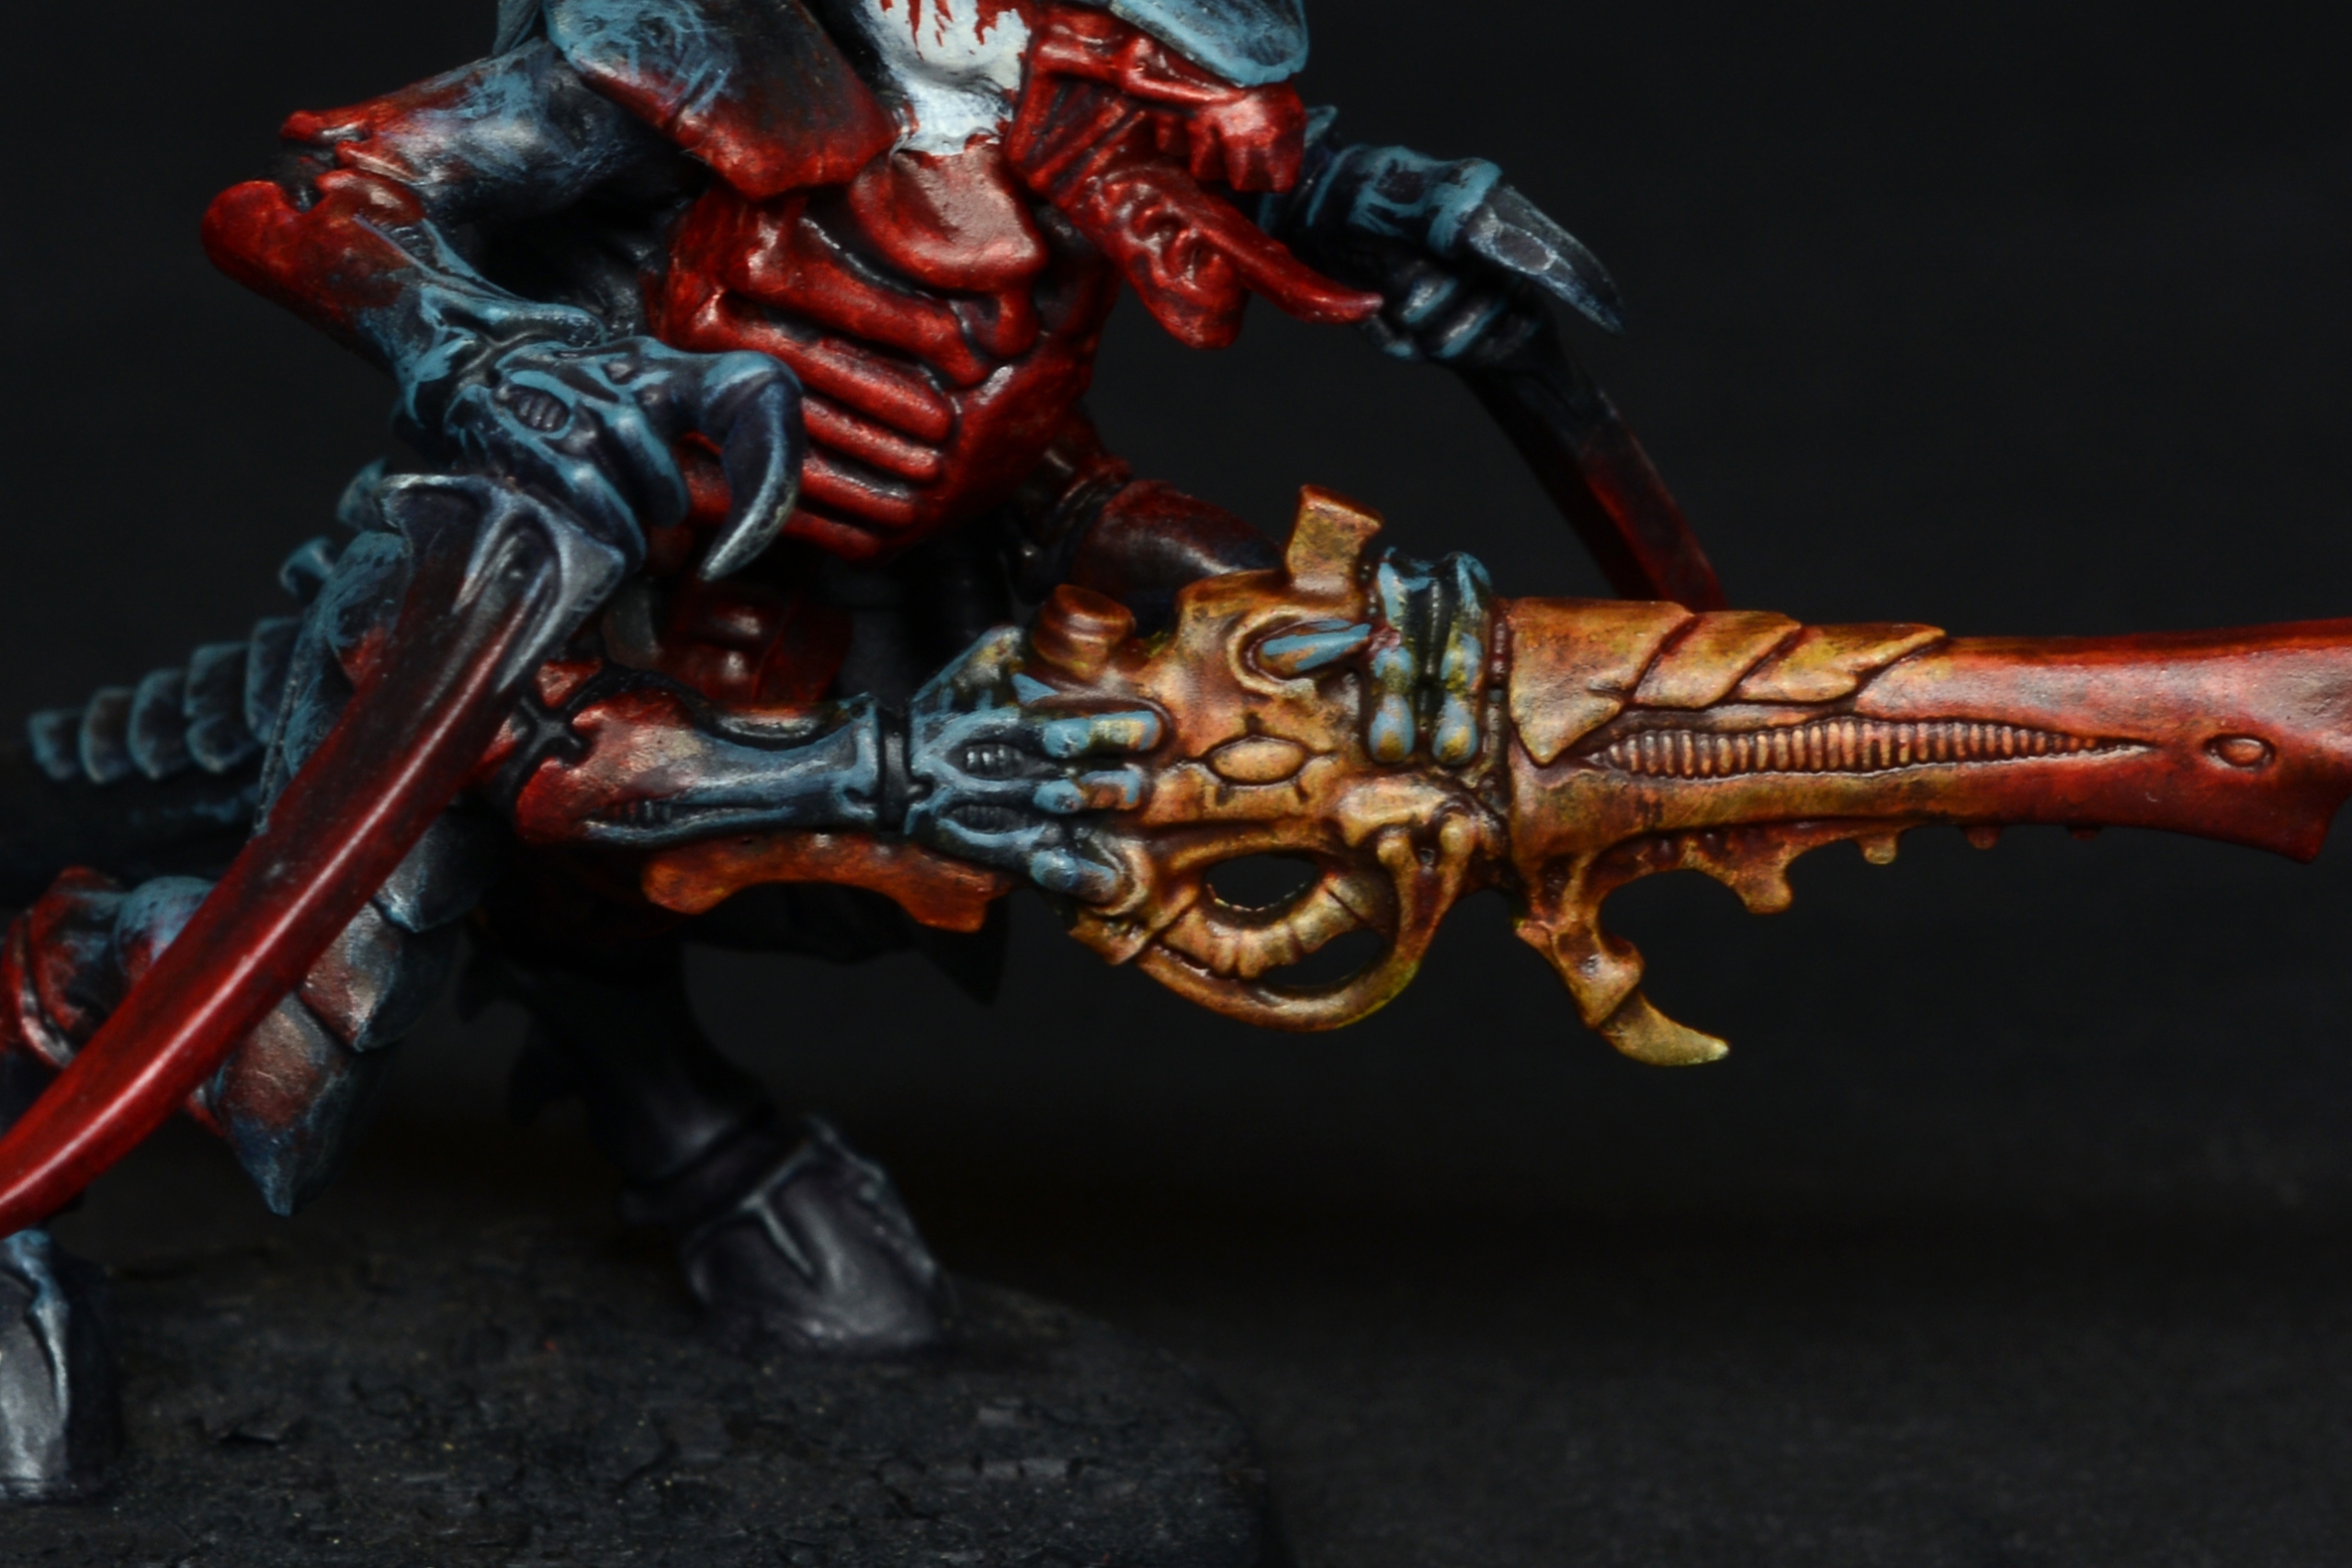
Back to the weapons: they received an edge highlight with Ak Light Earth on all pronunced shapes, without touching the red tips. The “pipes” were cleaned with black and then painted with a diluted layer of Light Earth, followed by a thicker edge-highlight.

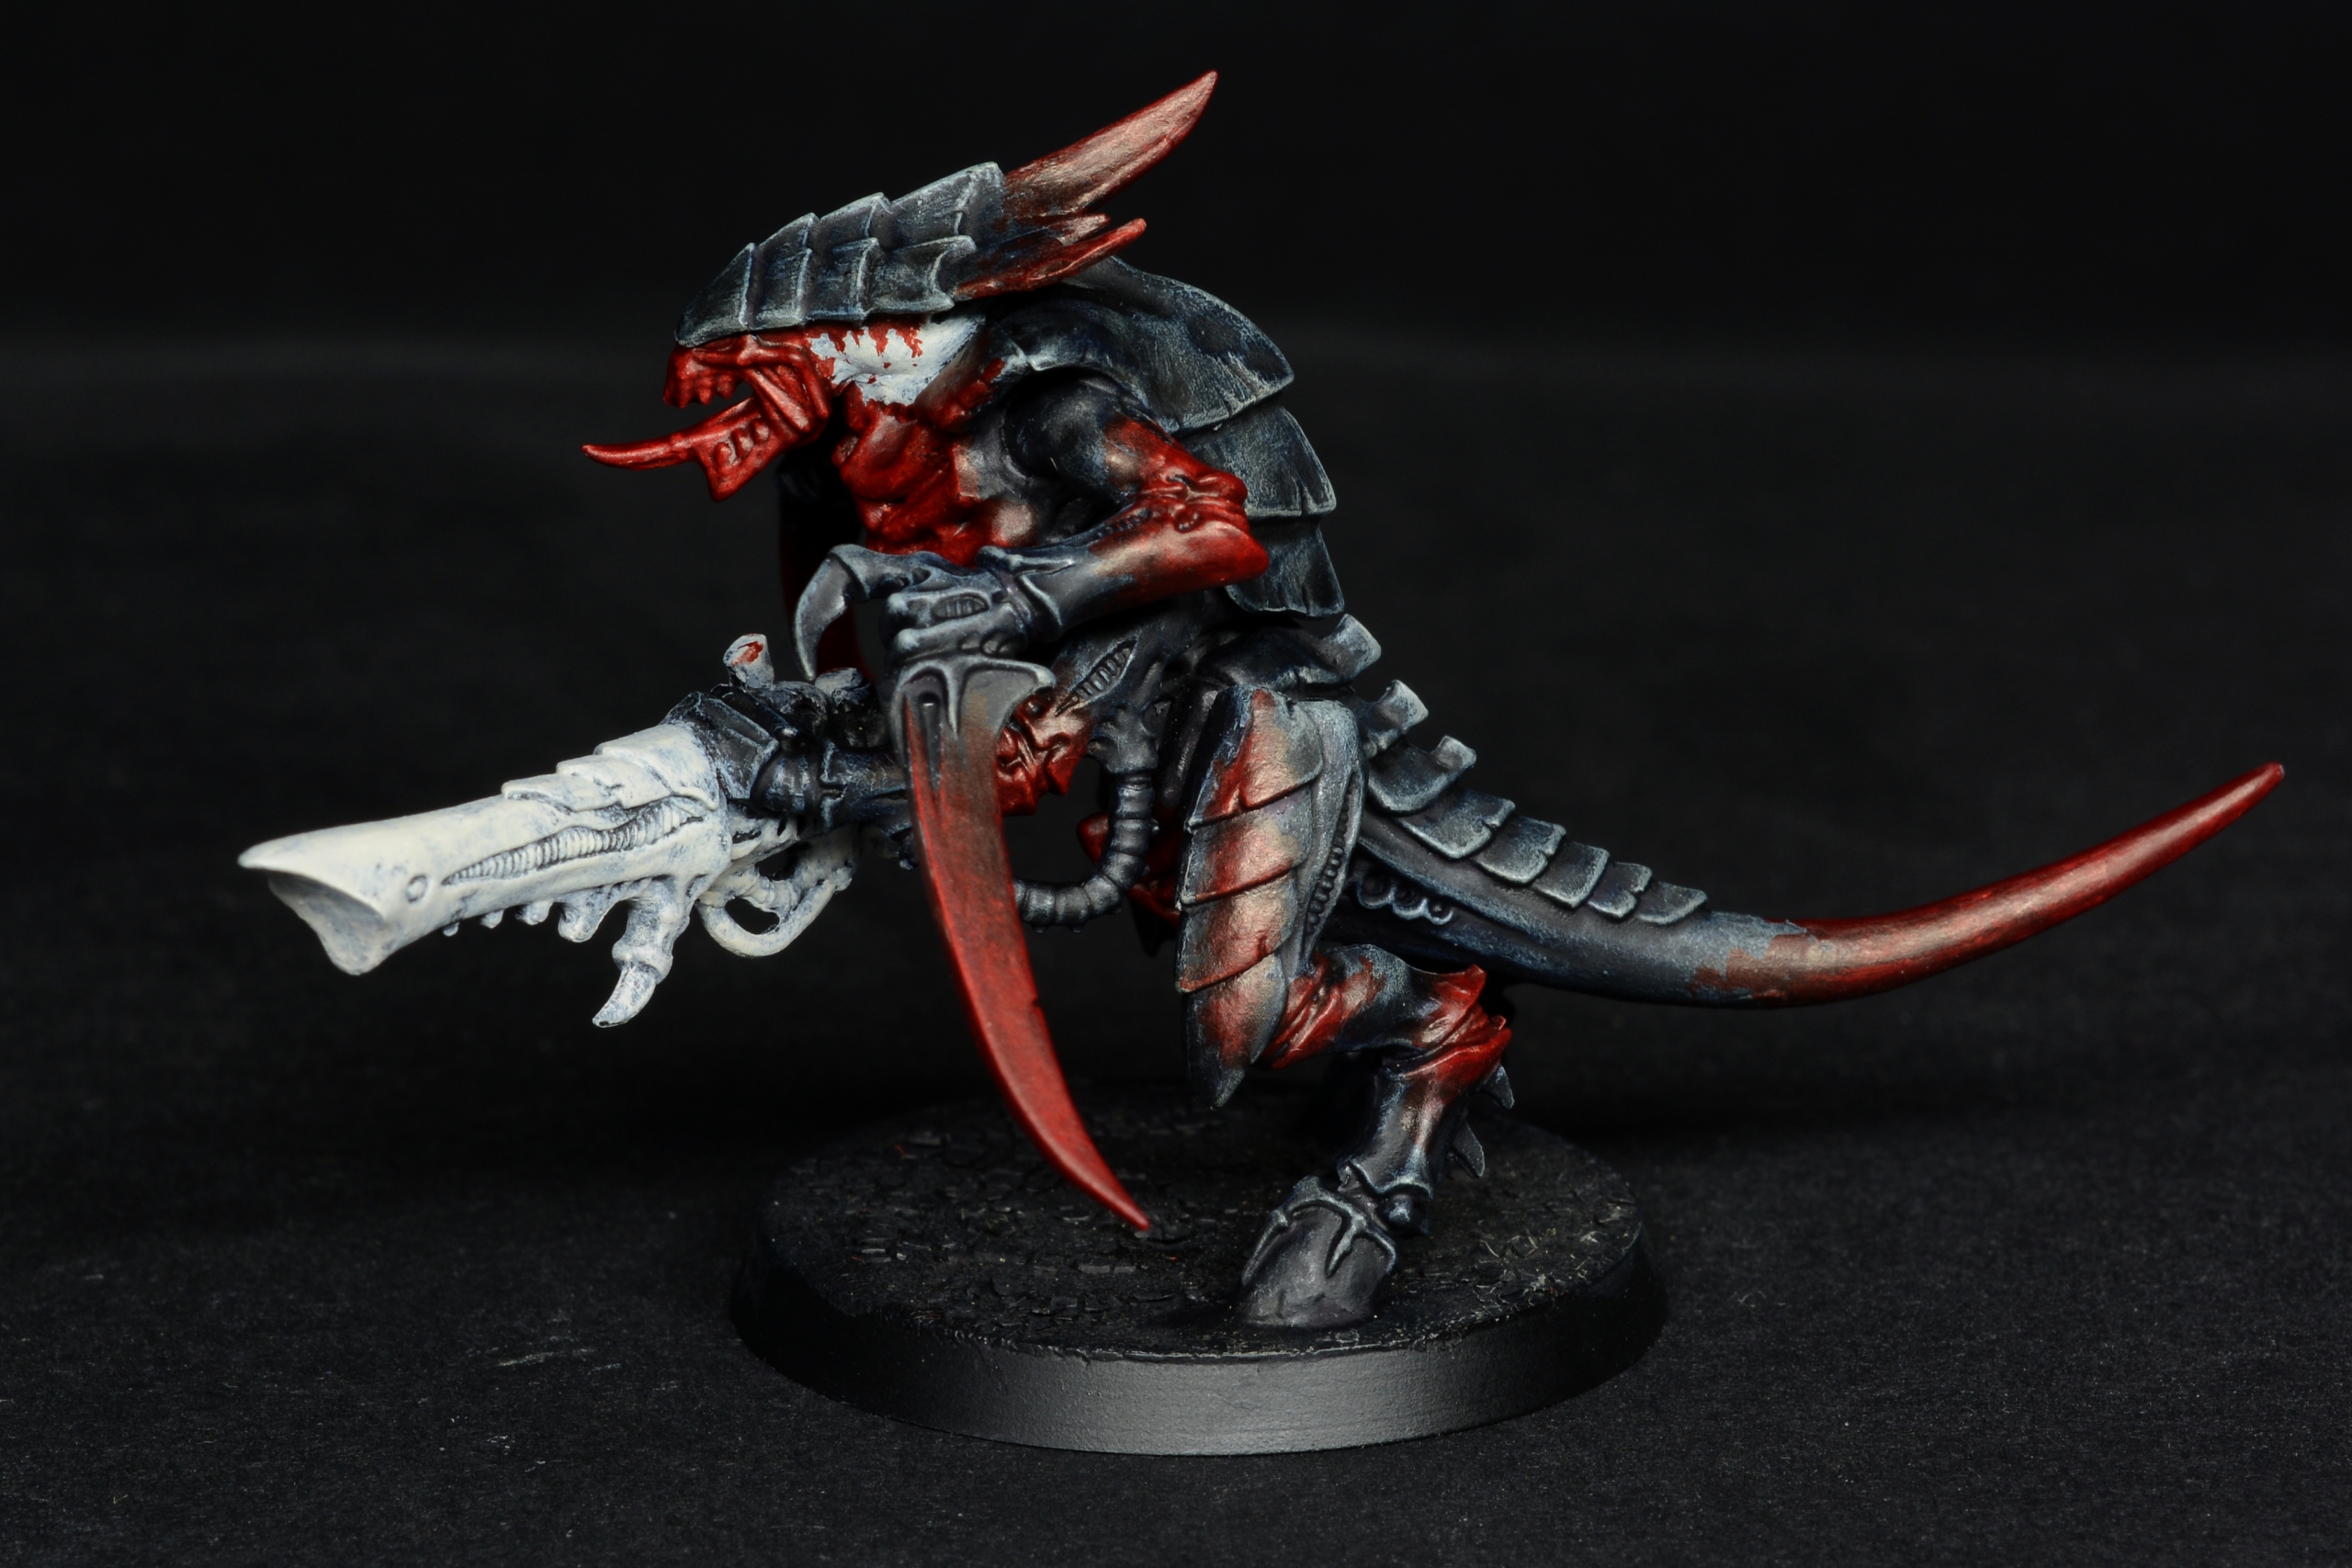
Final highlight was painted using almost undiluted VMC Ivory. I created very thin edge-highlights and drew some scratches&dots here and there.
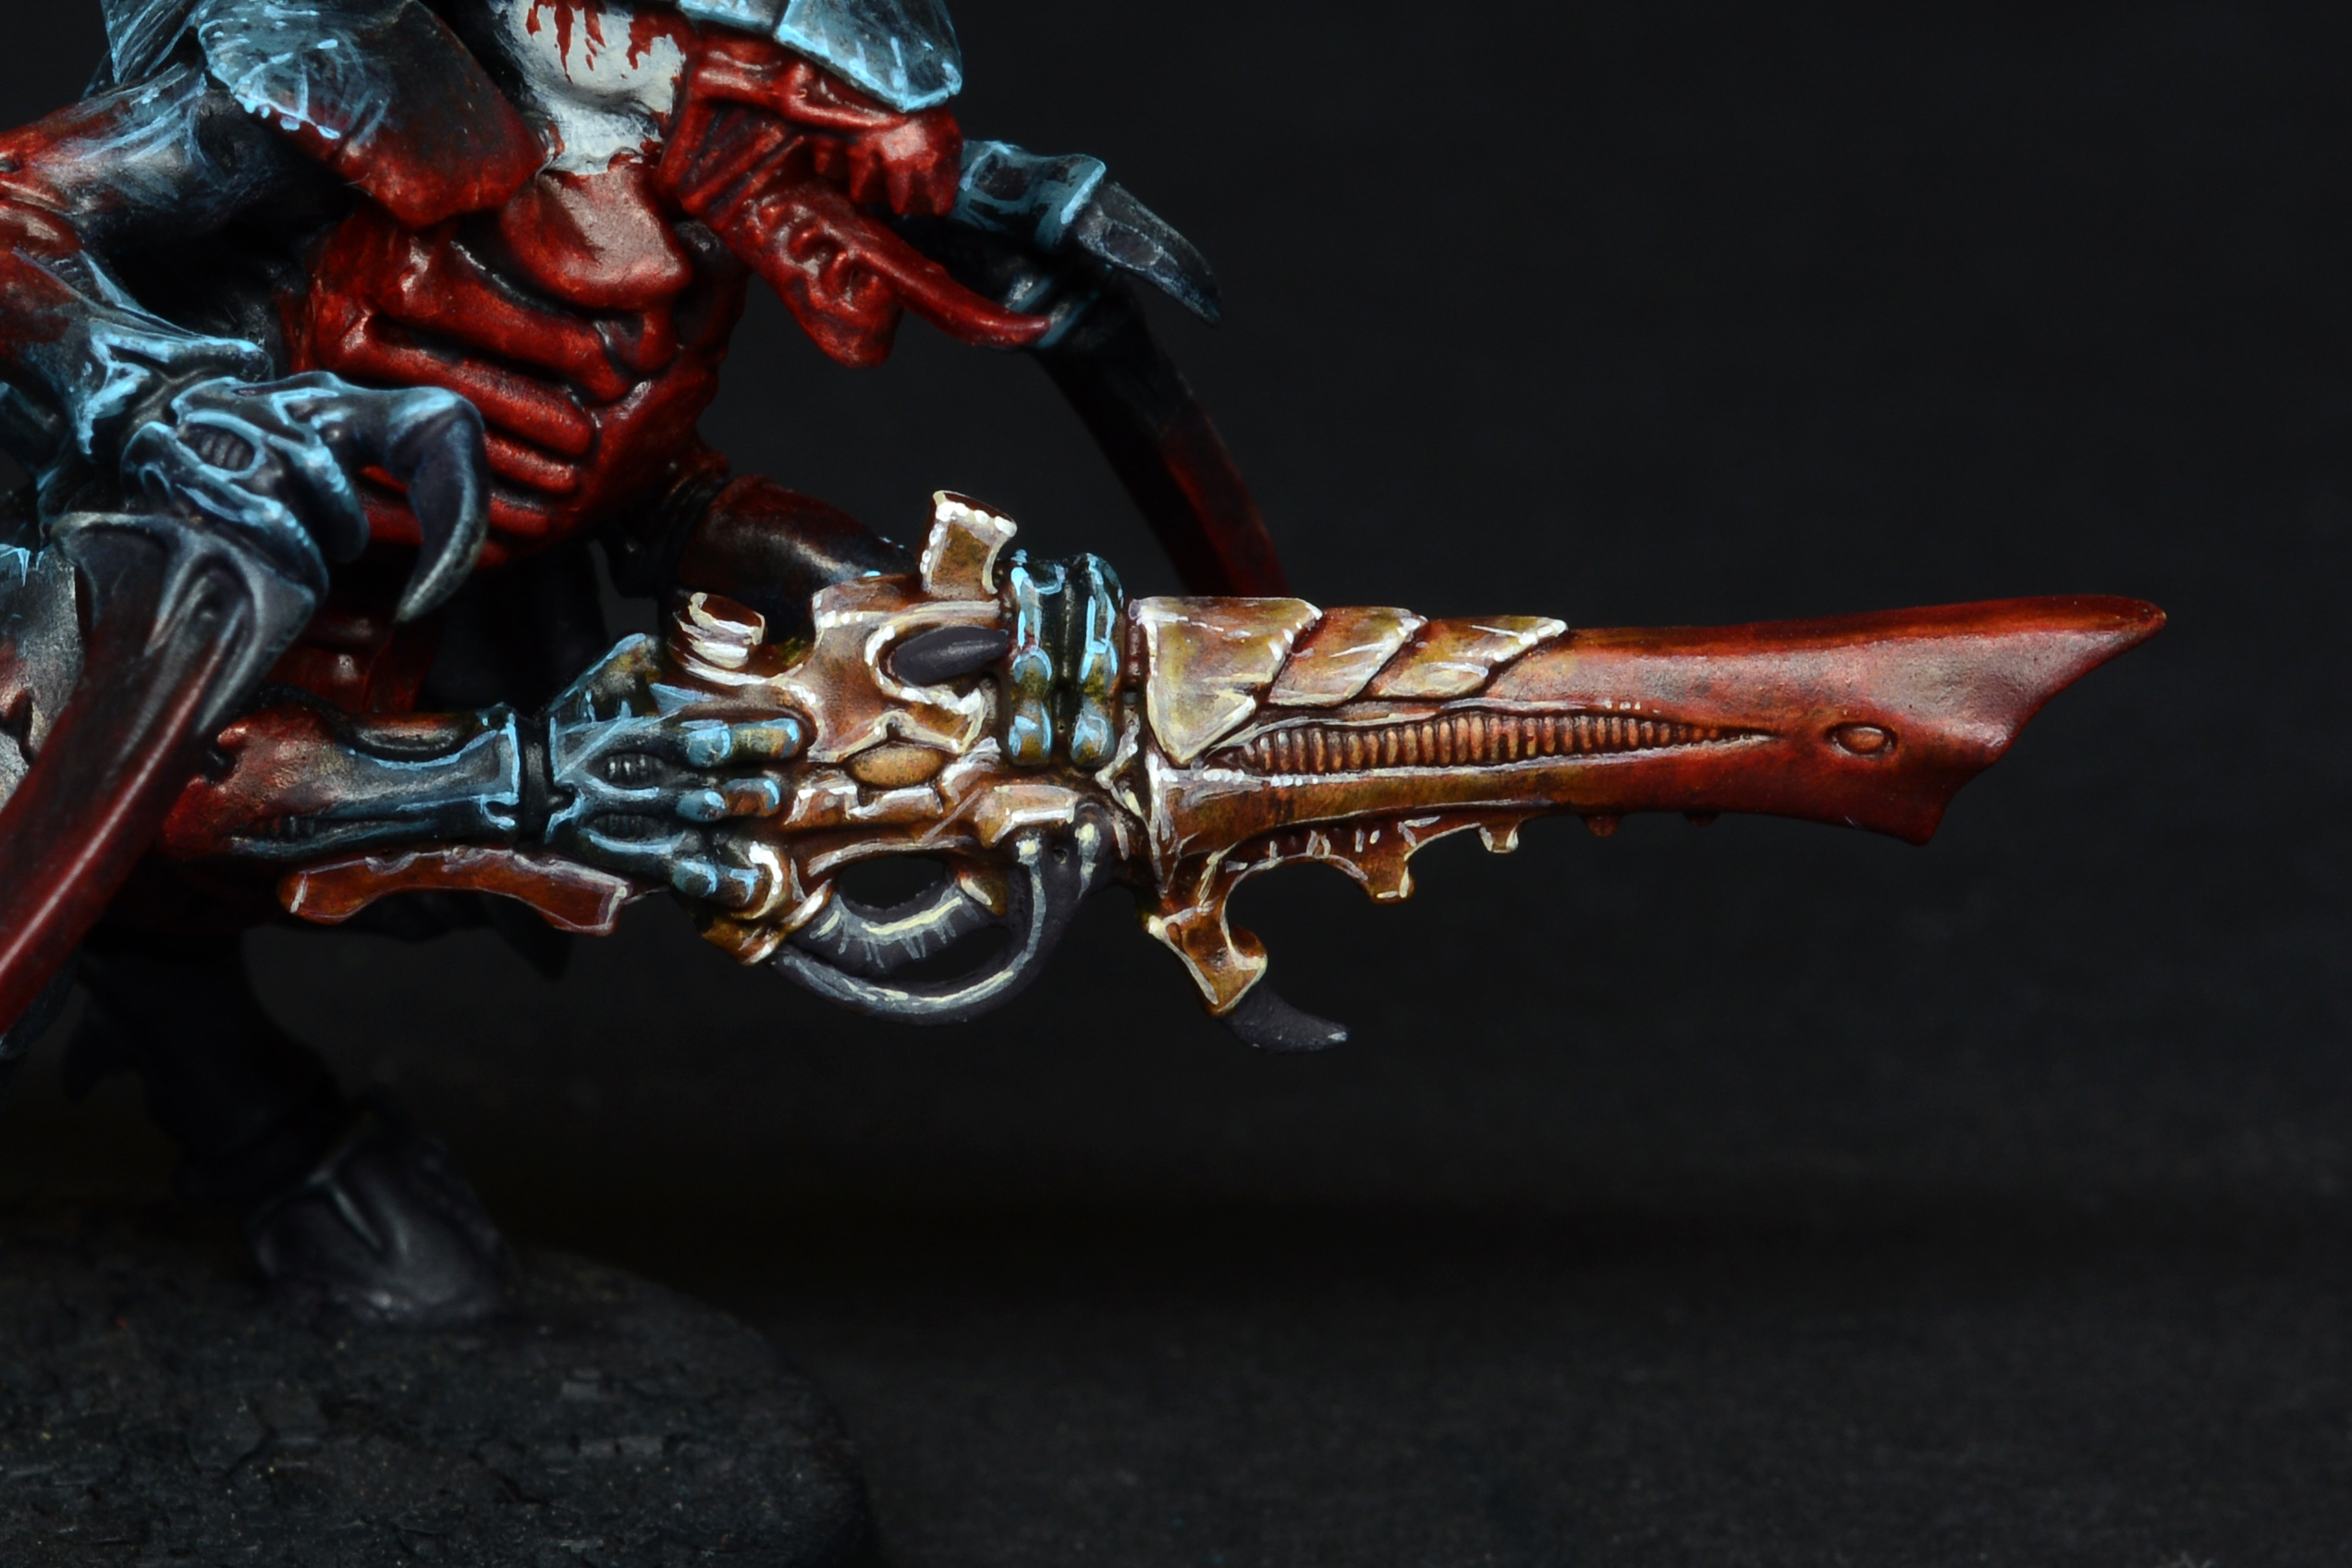
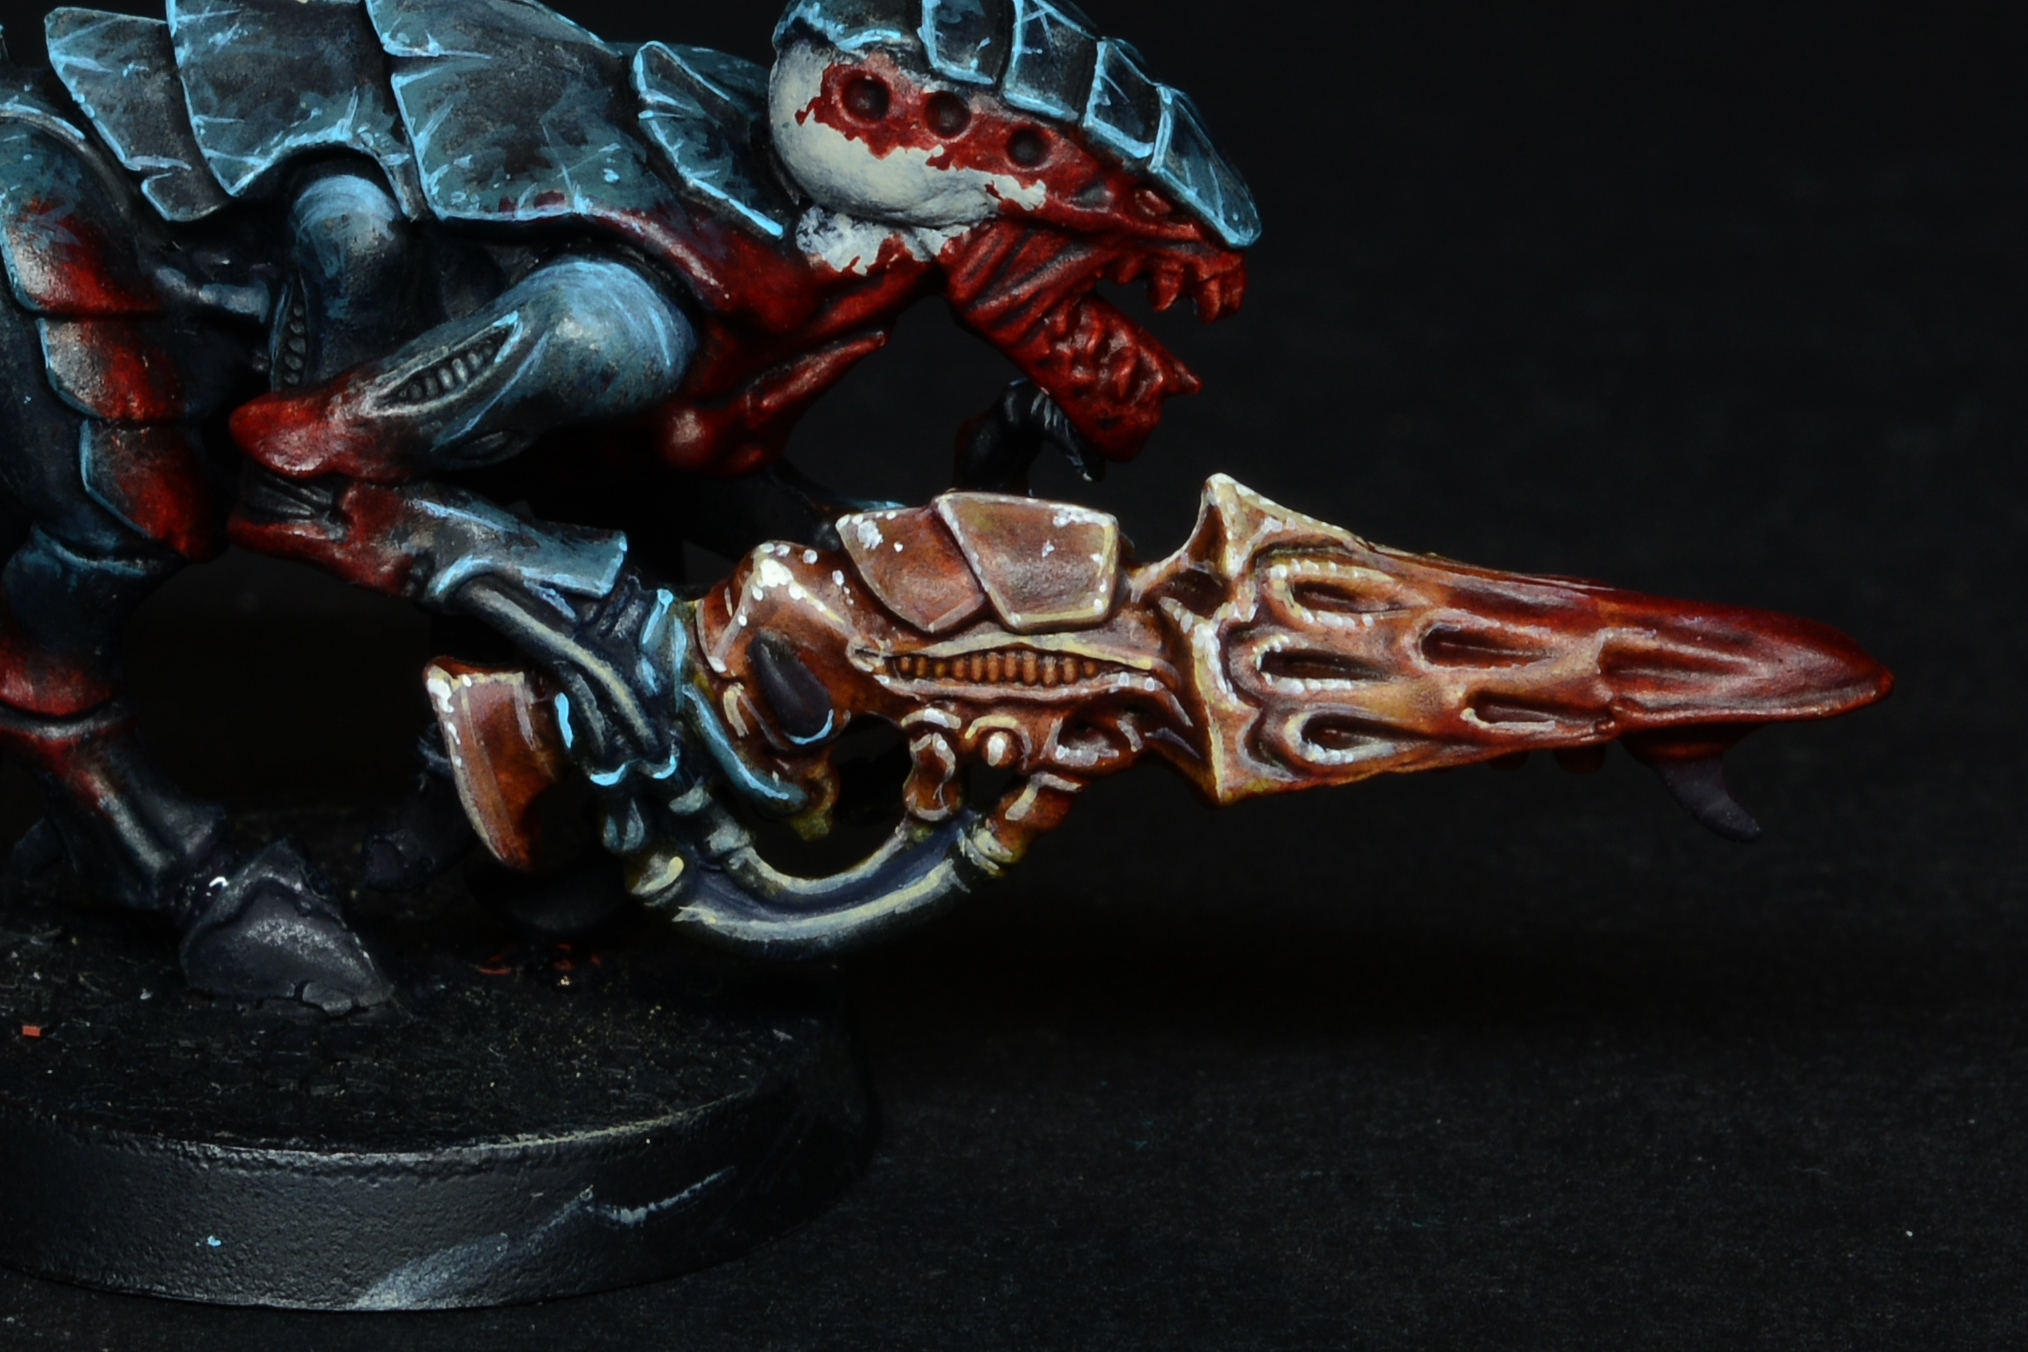
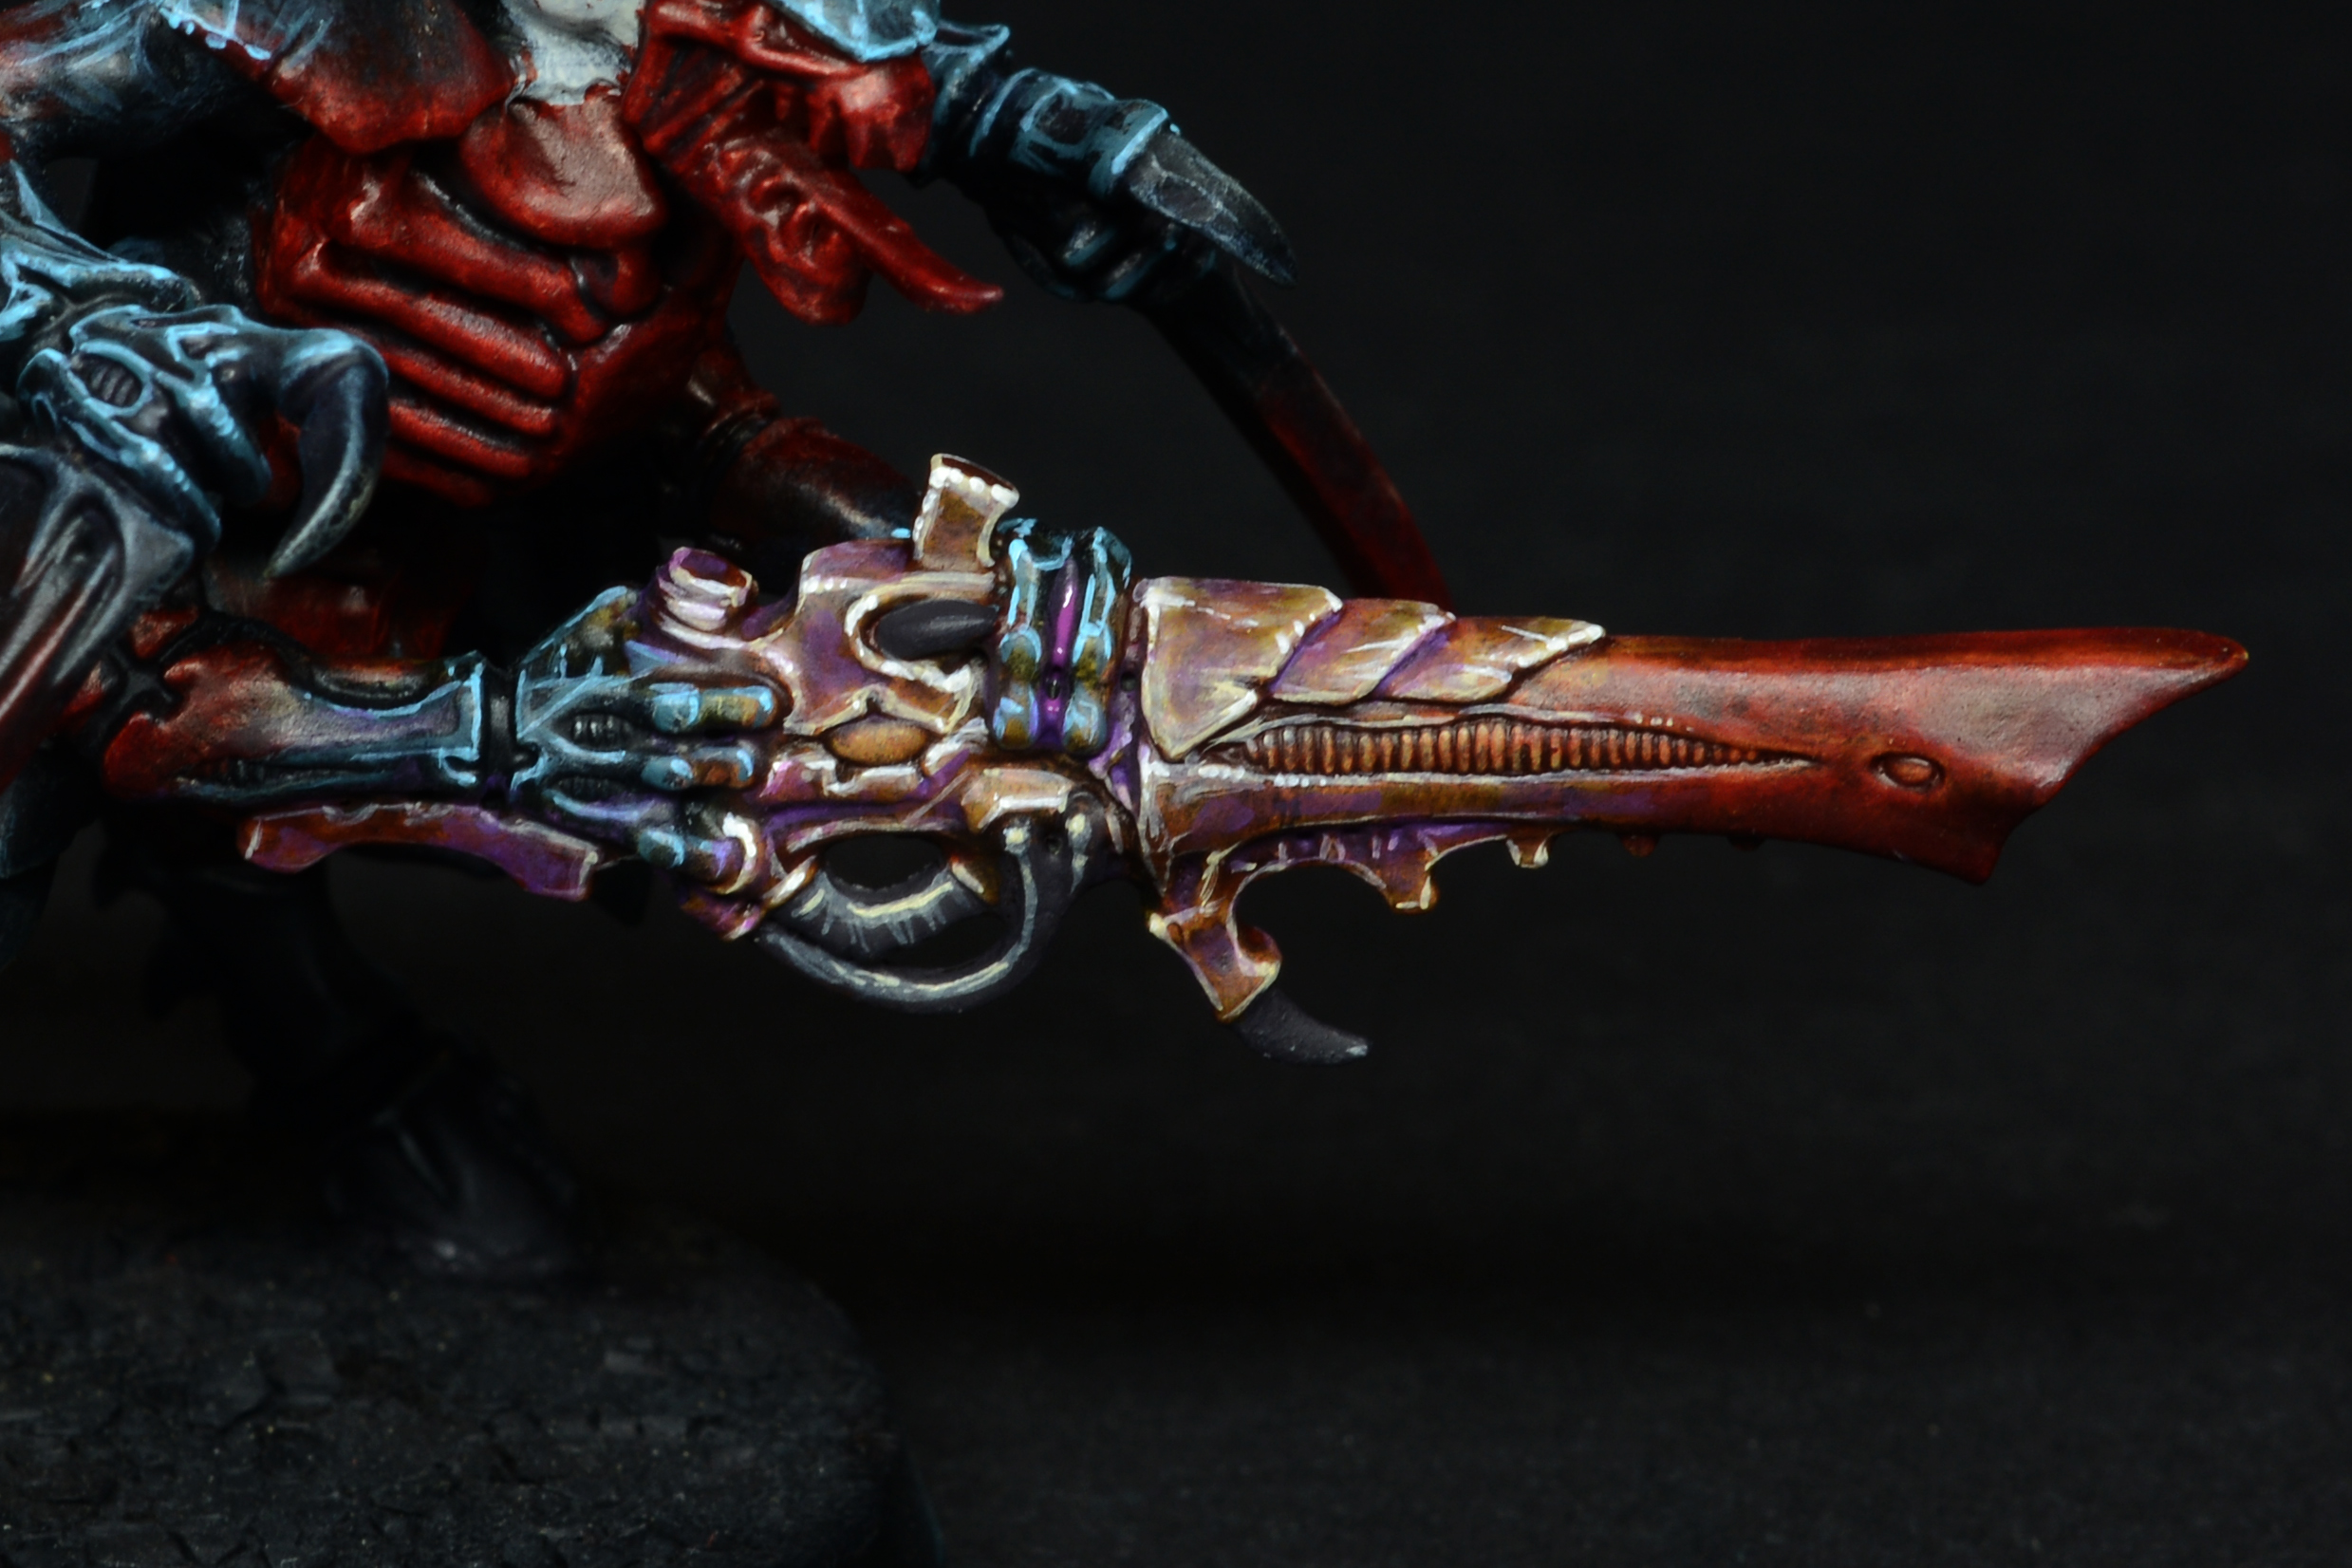
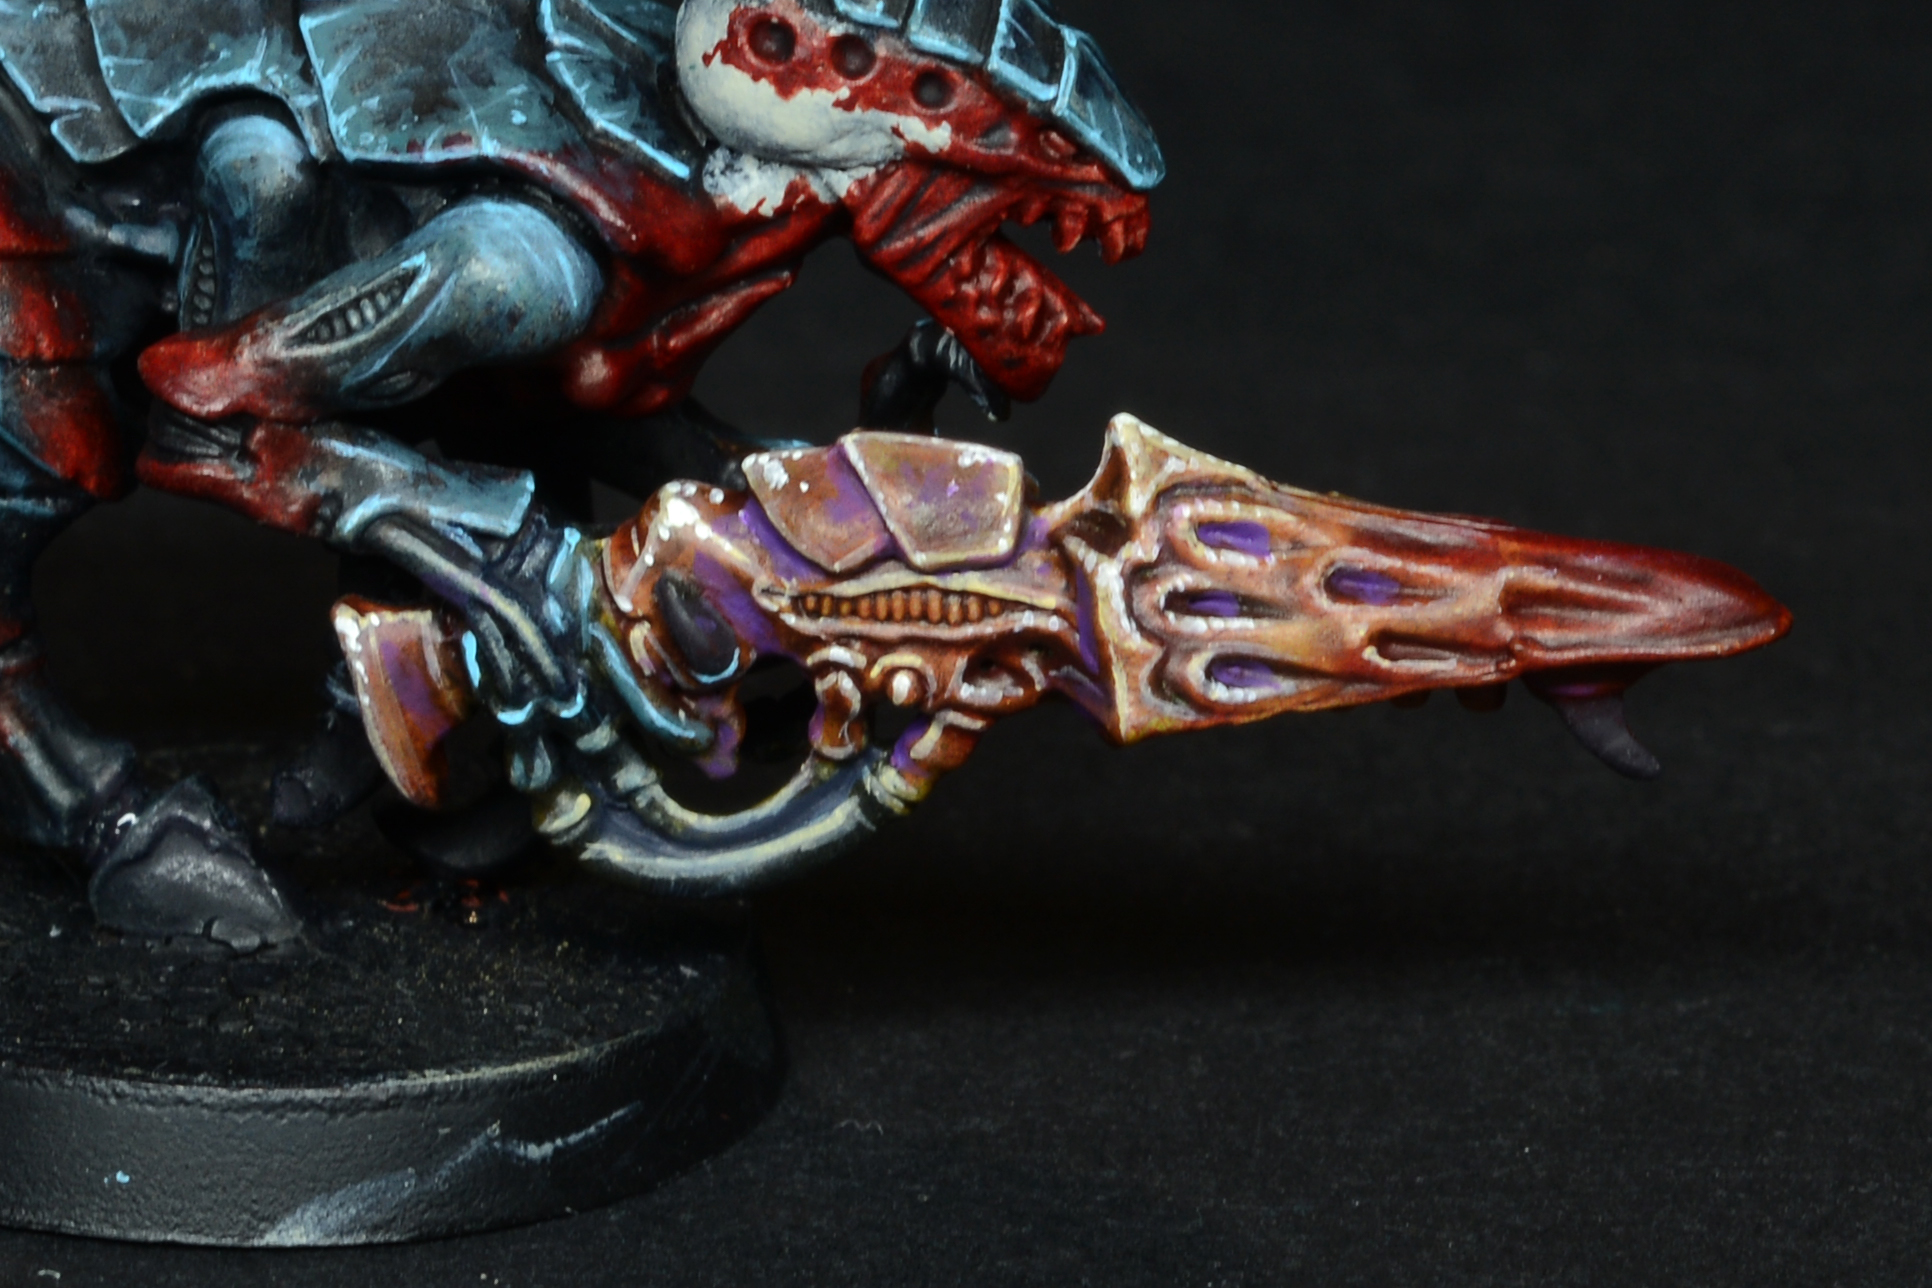
In order to get closer to the original artwork i added VMC Royal Purple, 50/50 diluted with water and applied using thin glazes in the recesses. This can greatly change the appearance of the piece, so be careful not to overdo it.
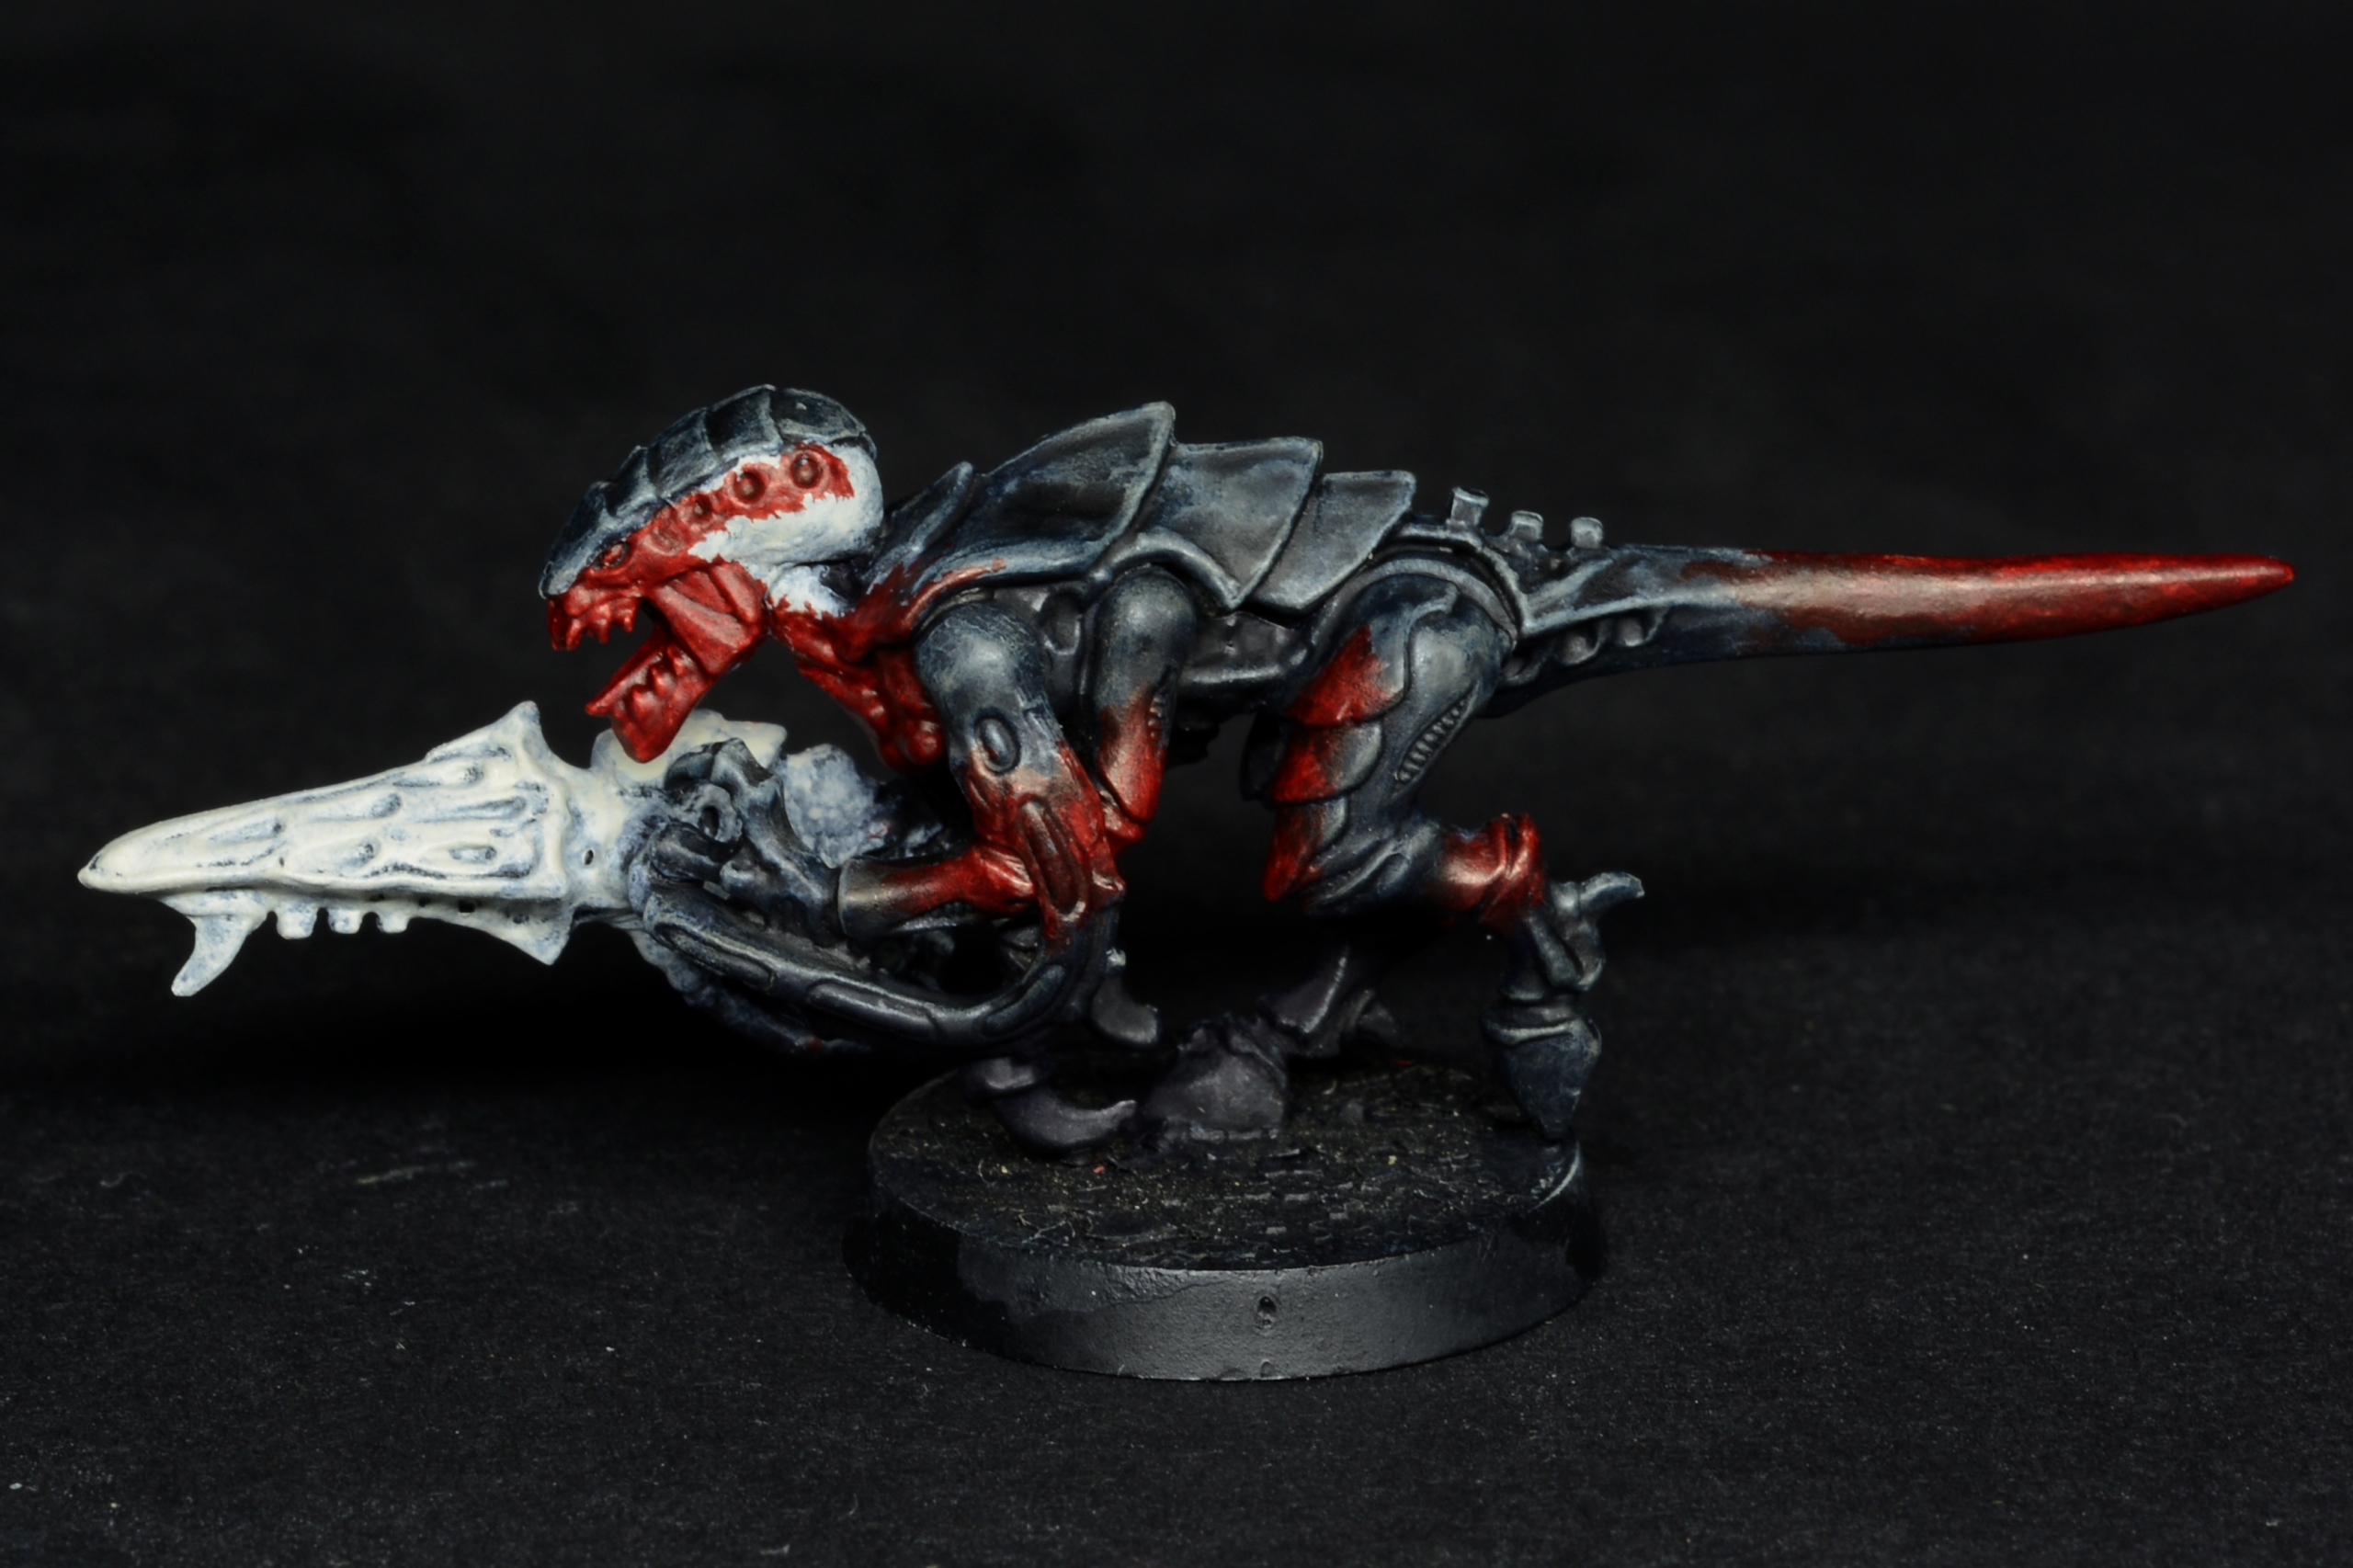
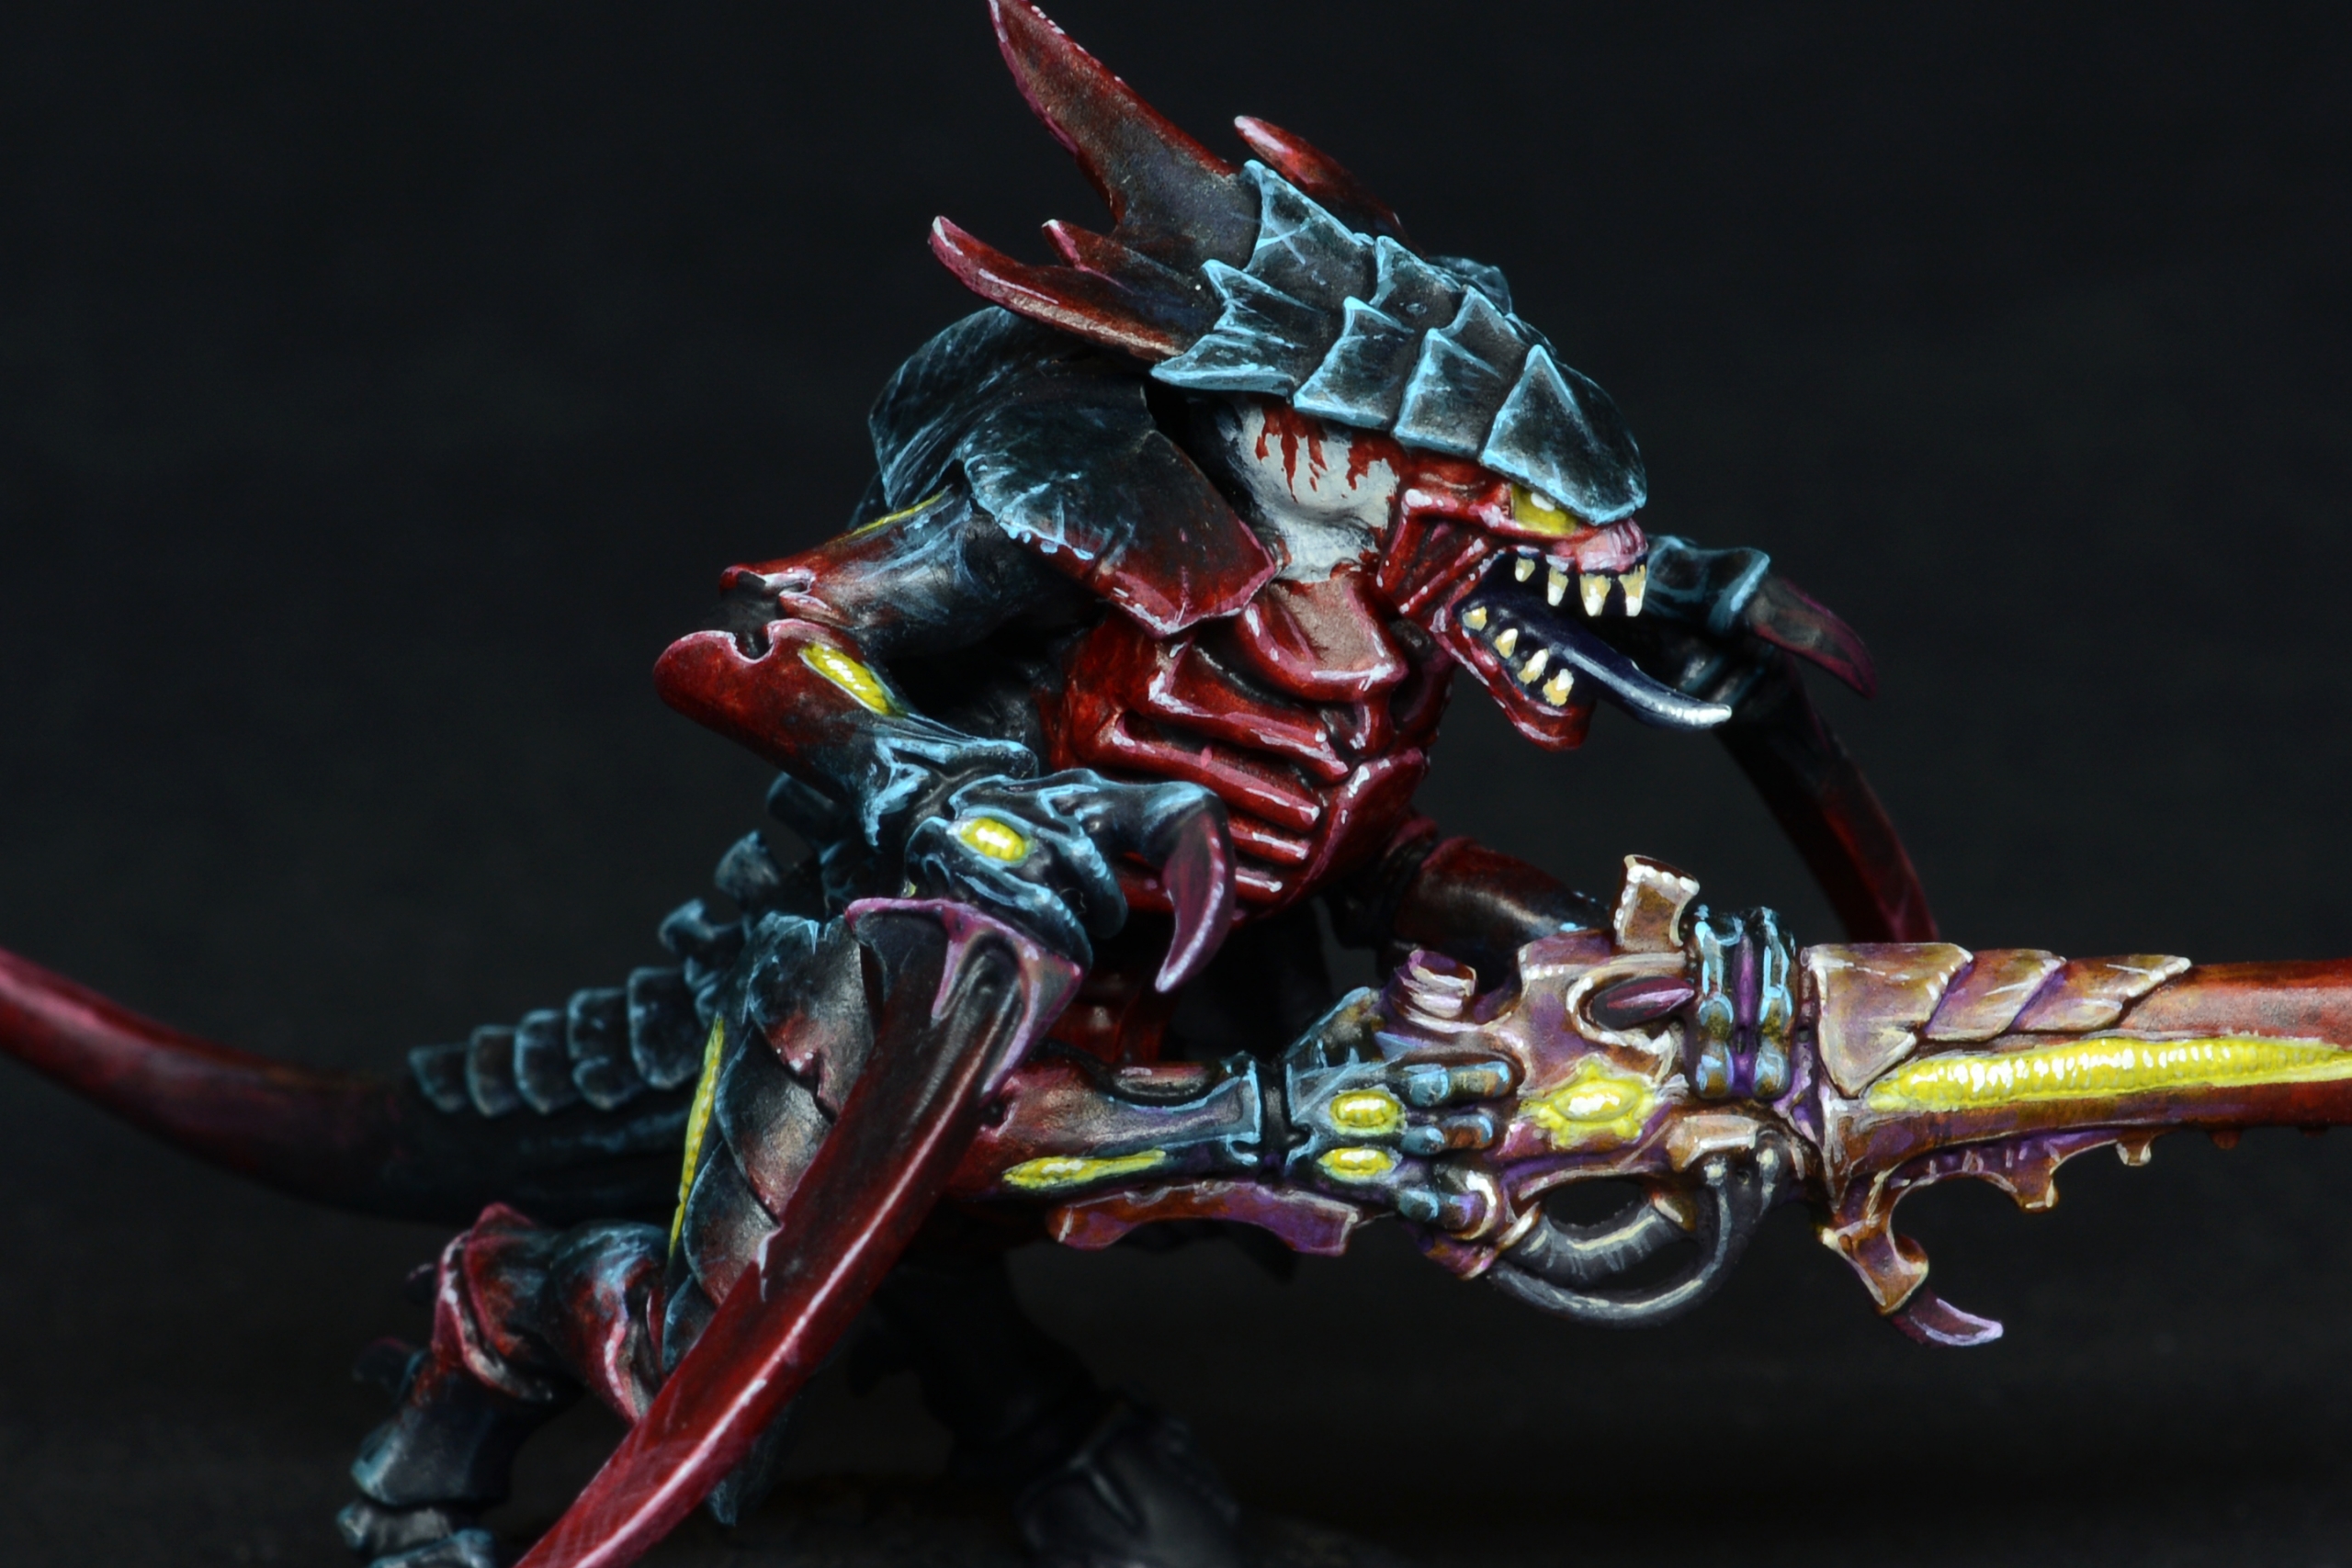
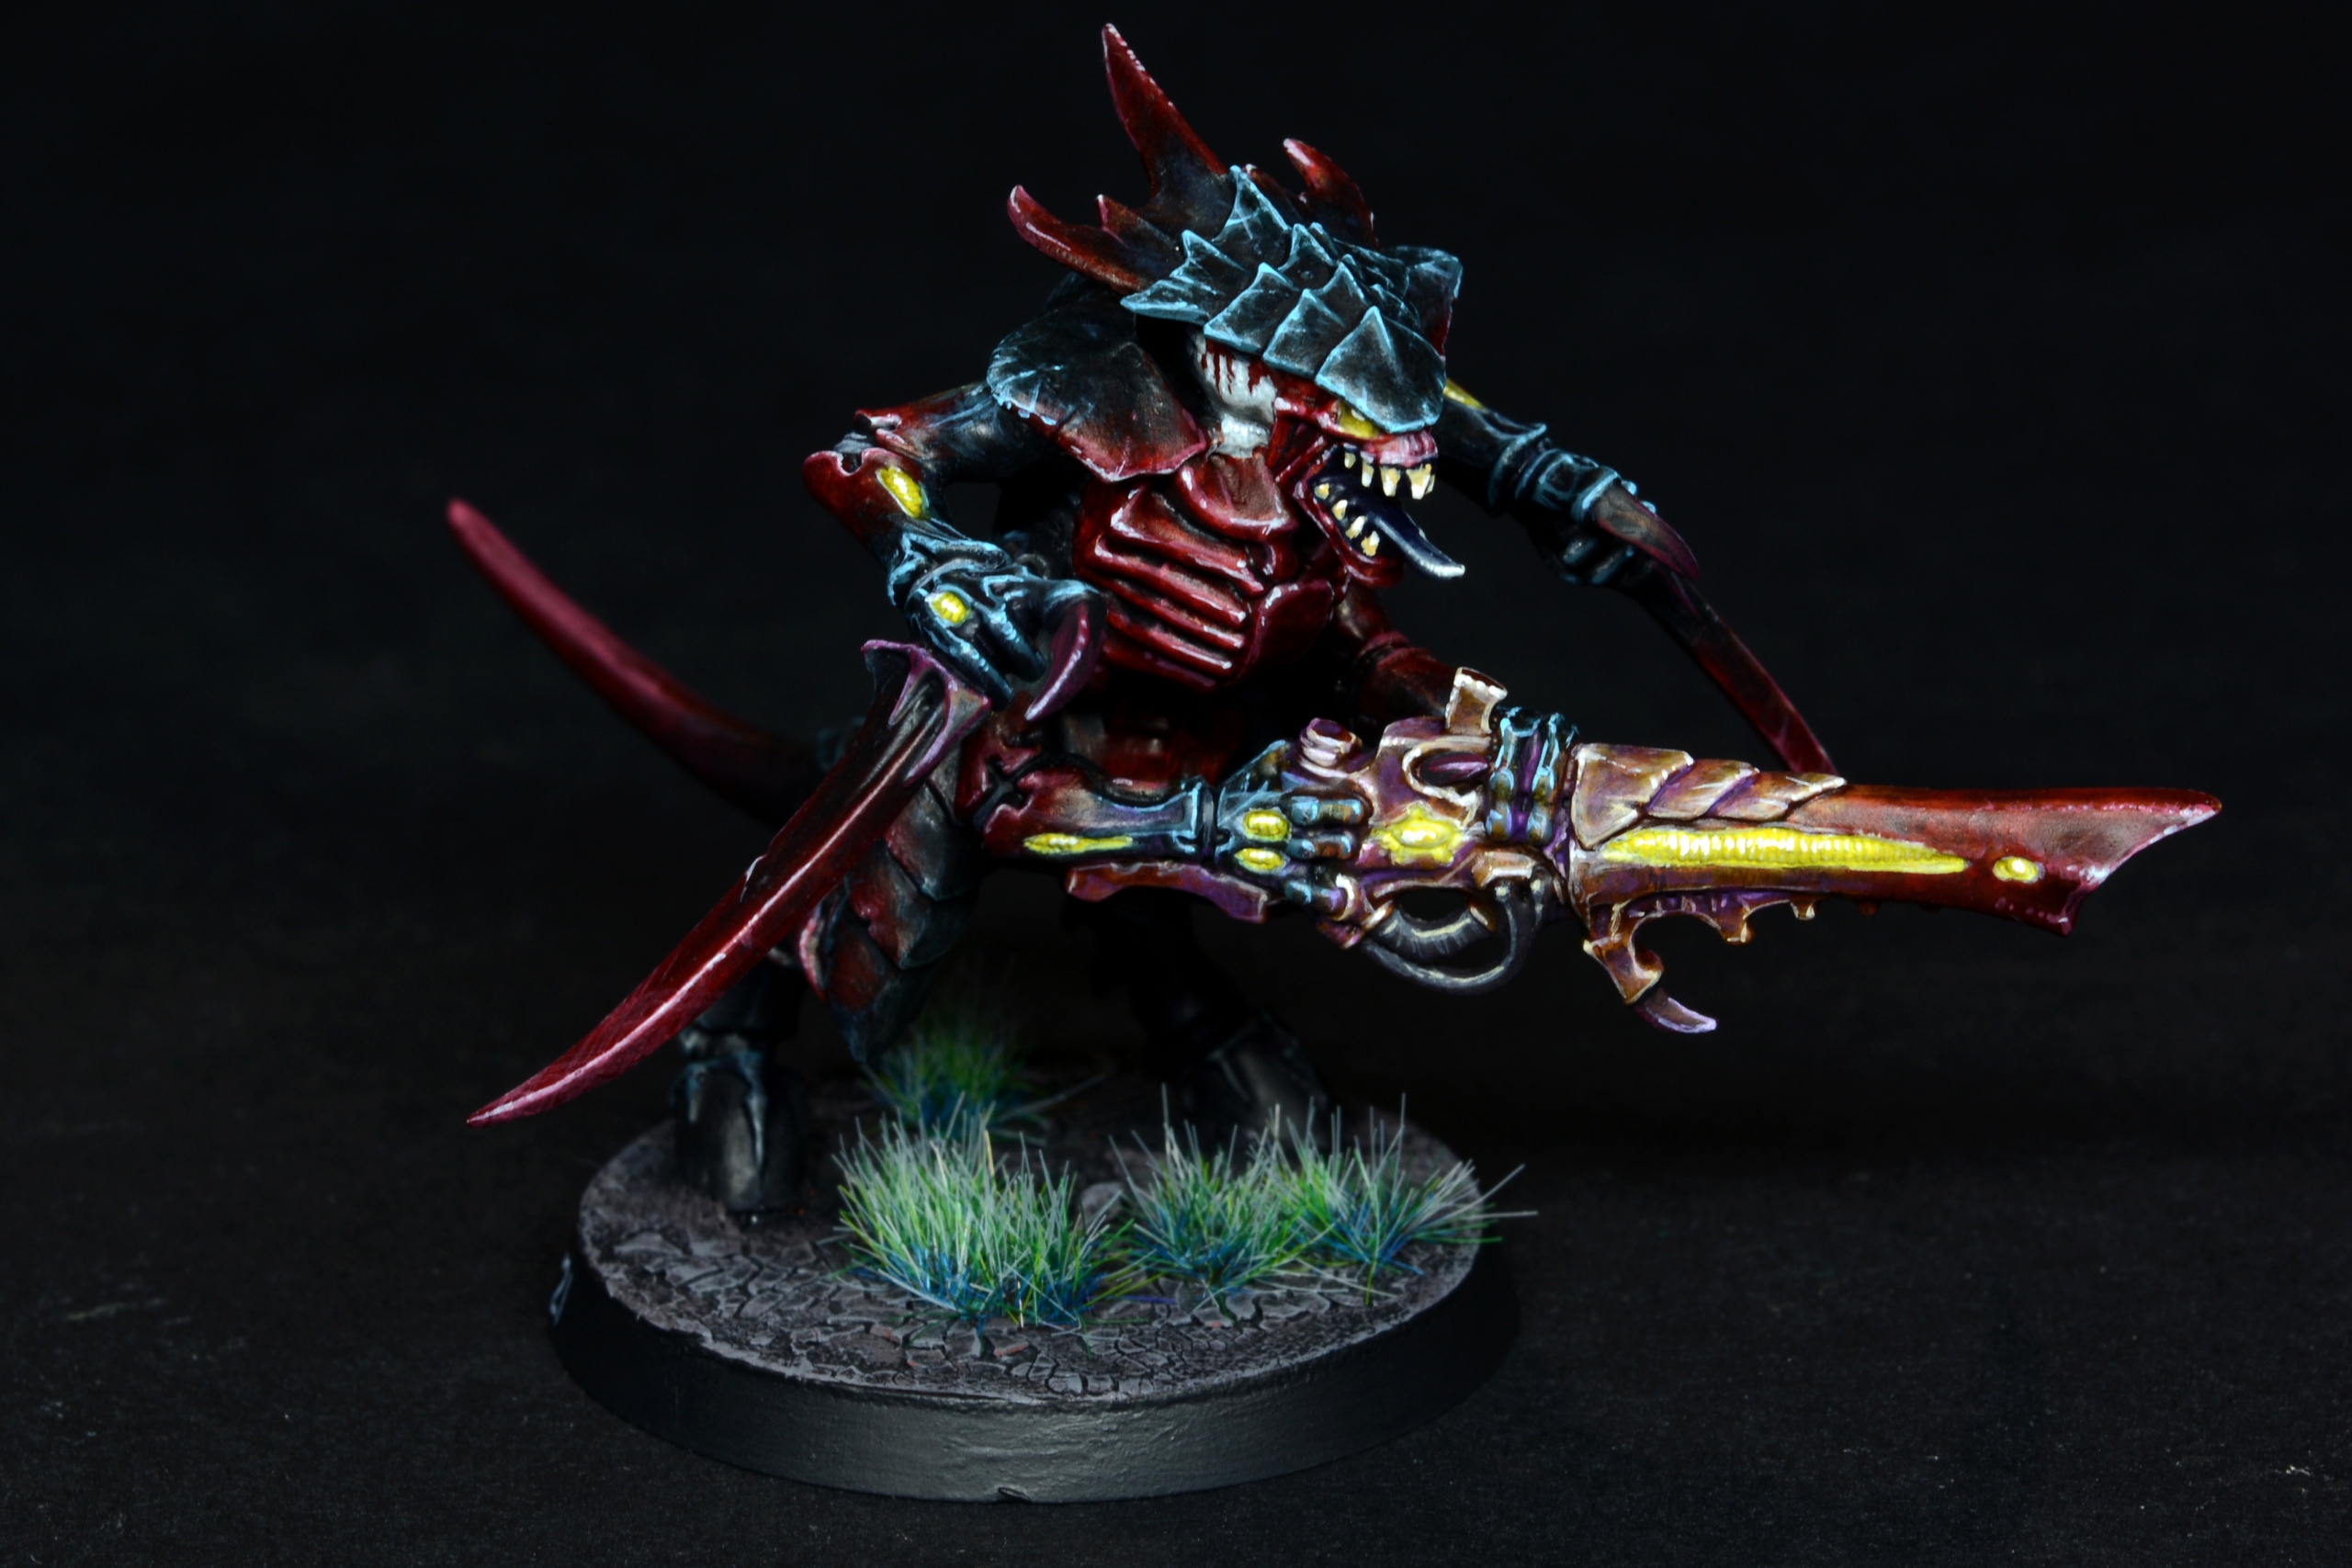
Next step was working on the red areas. Before moving to highlights, i painted a mix of Gw Nuln Oil + 5-10% black inside all the recesses of the face, neck and ribs on both models.
For the first highlight i mixed Reaper Blood Red (it’s basically a primary red, use whatever color you want here) with around 30% of Ak Blue Grey. The resulting color was a cold and desaturated red that i applied on all raised areas. Don’t forget the red tips of the weapons!
On flat areas like the tails, carapaces and the warrior blades’ it’s easy to overdo this step and paint blotchy transitions; i resorted to apply more diluted layers or to create some textures (see the blades) and stippling (some lower plates on the legs).


Second and last highlight was painted using almost undiluted Ak Blue grey to draw very thin highlights or small dots.
Again, i don’t like to use heavily diluted color for this steps, because i lose control of the paint, but i encourage everyone to experiment with dilution and find their best spot.
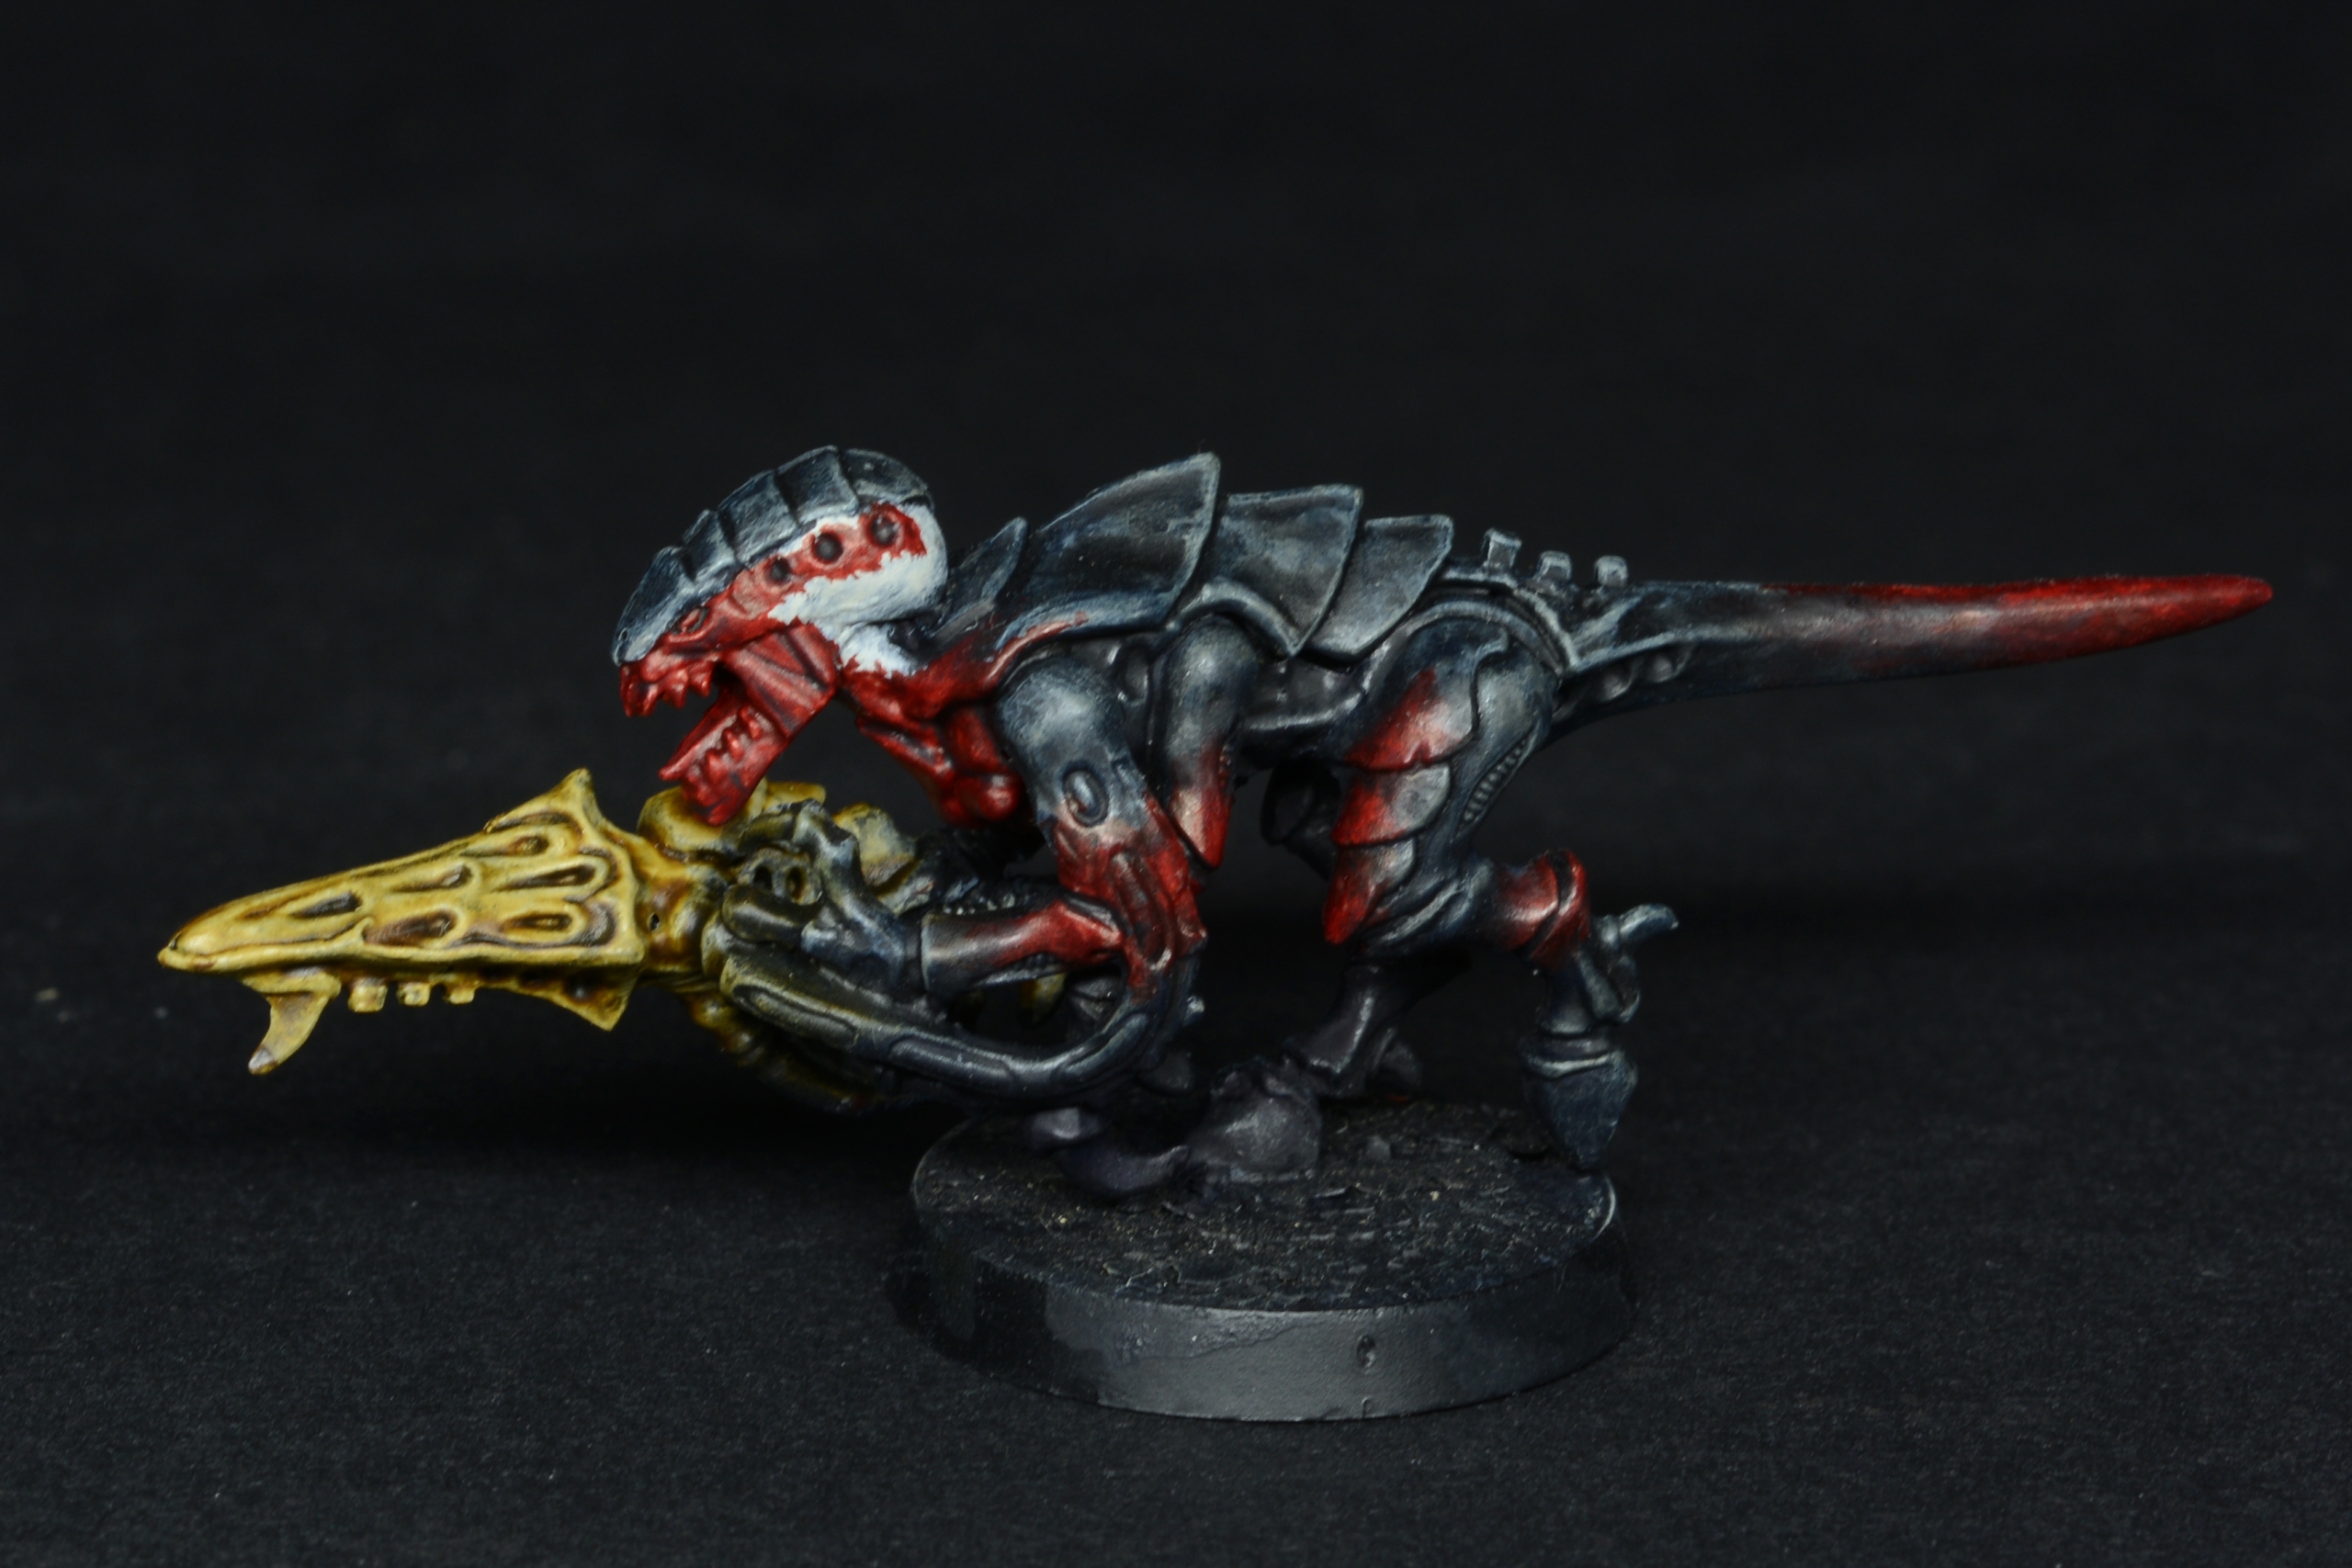
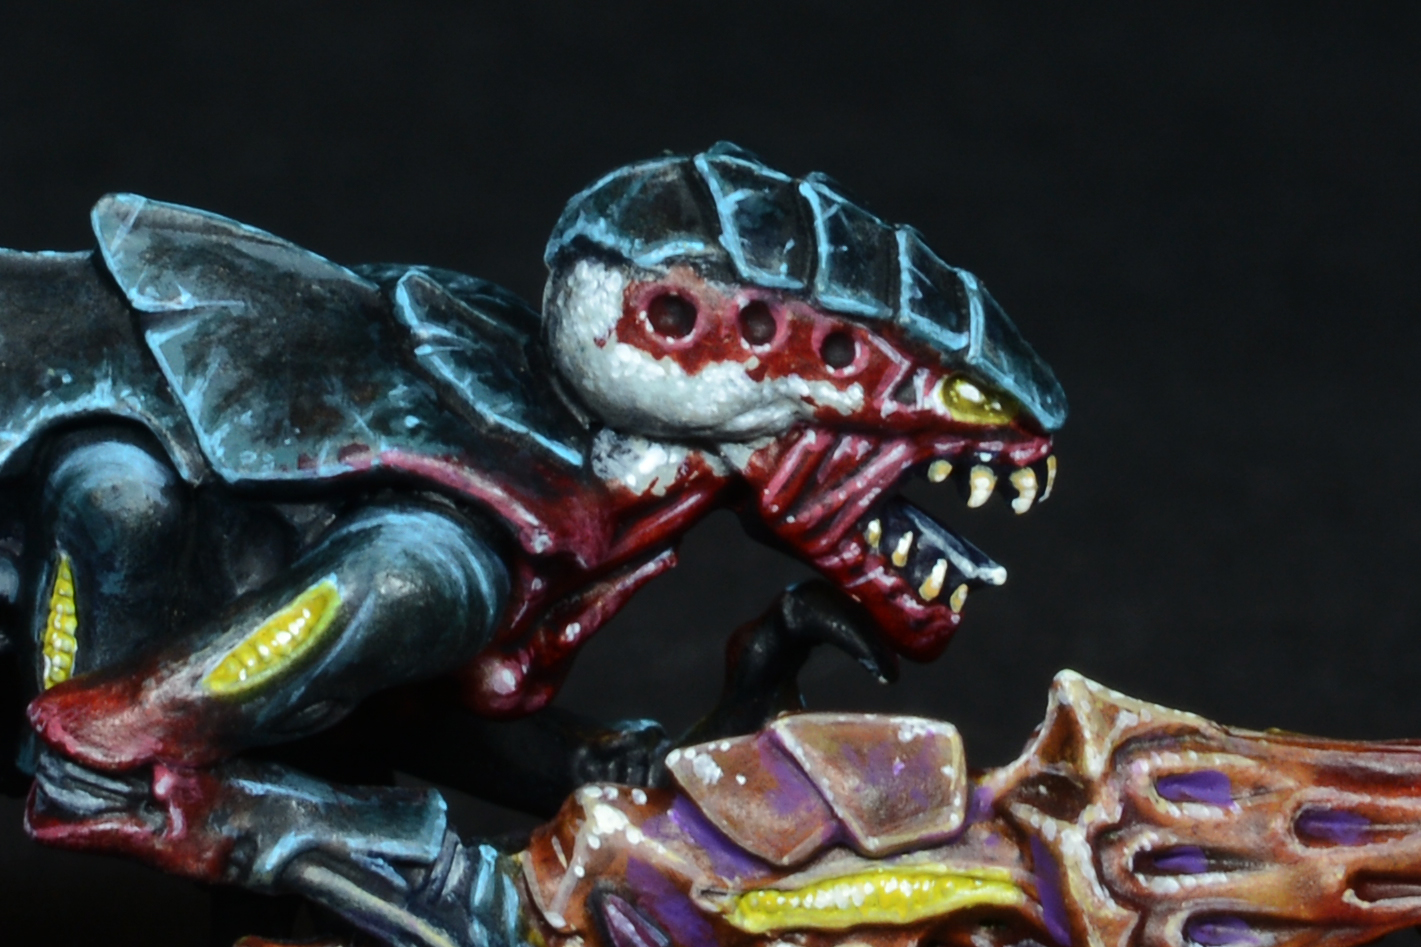
It was now time to paint the eyes and all the fibrous areas: they received 2 precise coats of white, first one diluted 50/50 and second one almost pure. Then, a layer of Gw Plaguebearer flesh. The eyes received also a wash with GW Athonian Camoshade.
In the following step, a coat of Reaper Gilded yellow was painted onto that sort of “stripes” (and on the eyes) you can see inside the yellow areas. This is difficult to do, because you need to use a good brush and avoid painting the recesses, and difficult to show in the pictures.
Final step was to paint precise dots of pure white on the eyes and on the inside of the other yellow areas.
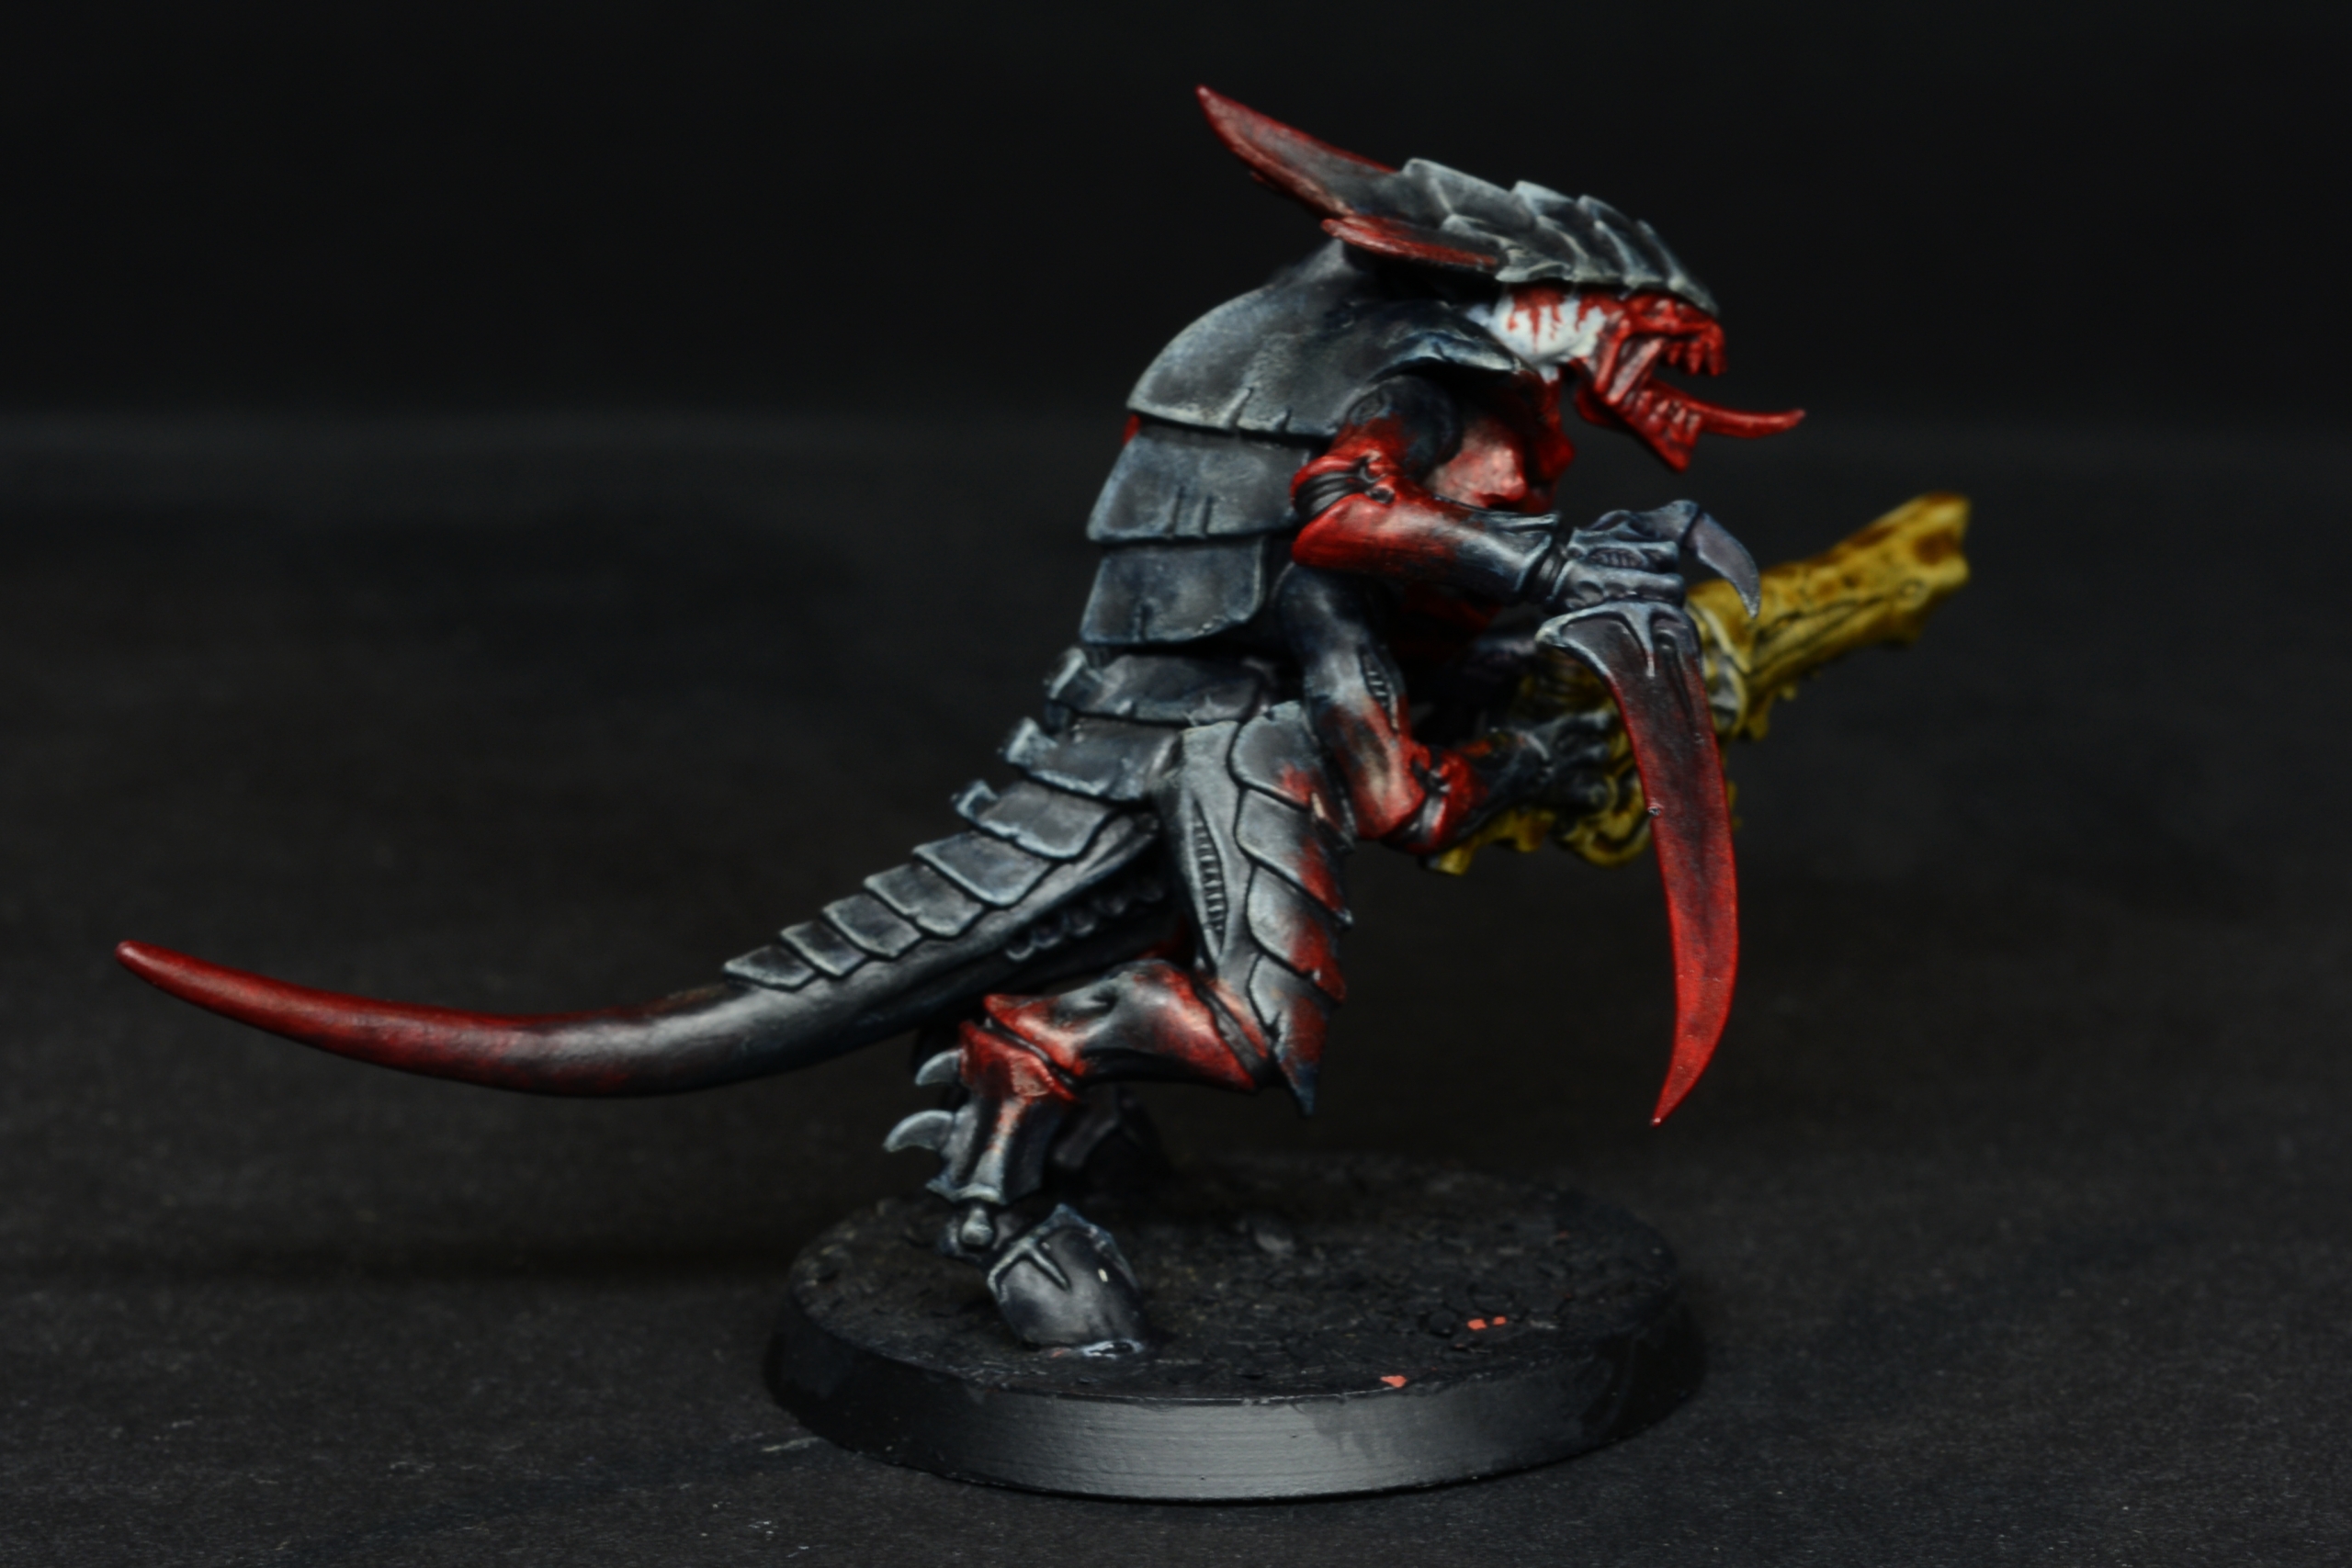
I then moved to the mouth – and a pic is missing here. The teeth, tongues and inside of the mouths received a coat of Gw Akhelian Green.
Once the Contrast dried, the tongues received a first highlight with Ak Rock Gray (use a couple of diluted layer if you have difficulties in drawing a thin line) while the teeth were painted with AK Tan Yellow. In some areas, the gums are visible above the teeth: in that case, they also were painted with thin lines of Rock Gray.
To paint such small details i usually go with a dilution % of 90paint/10water.
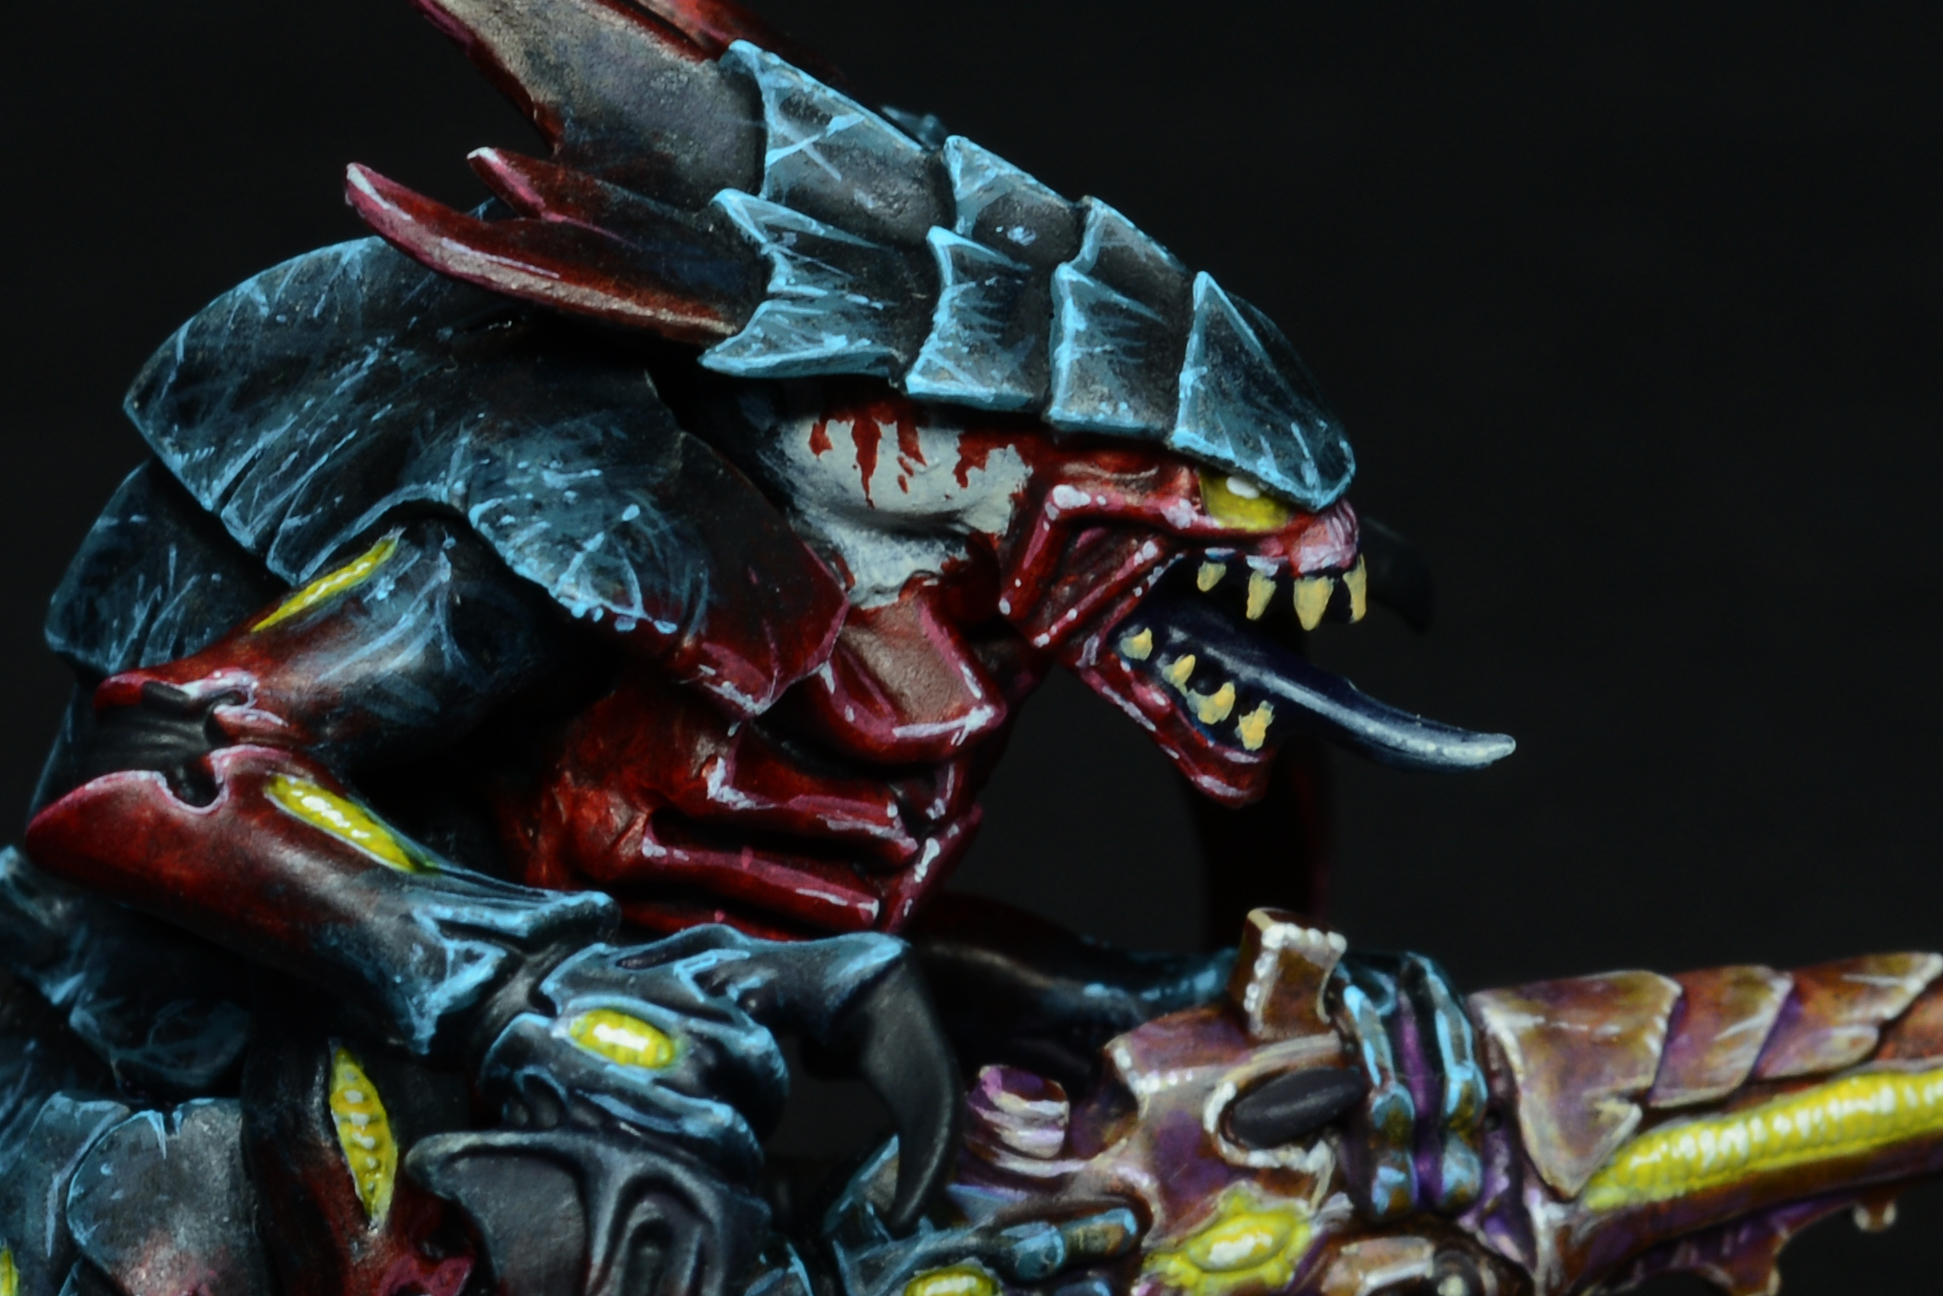
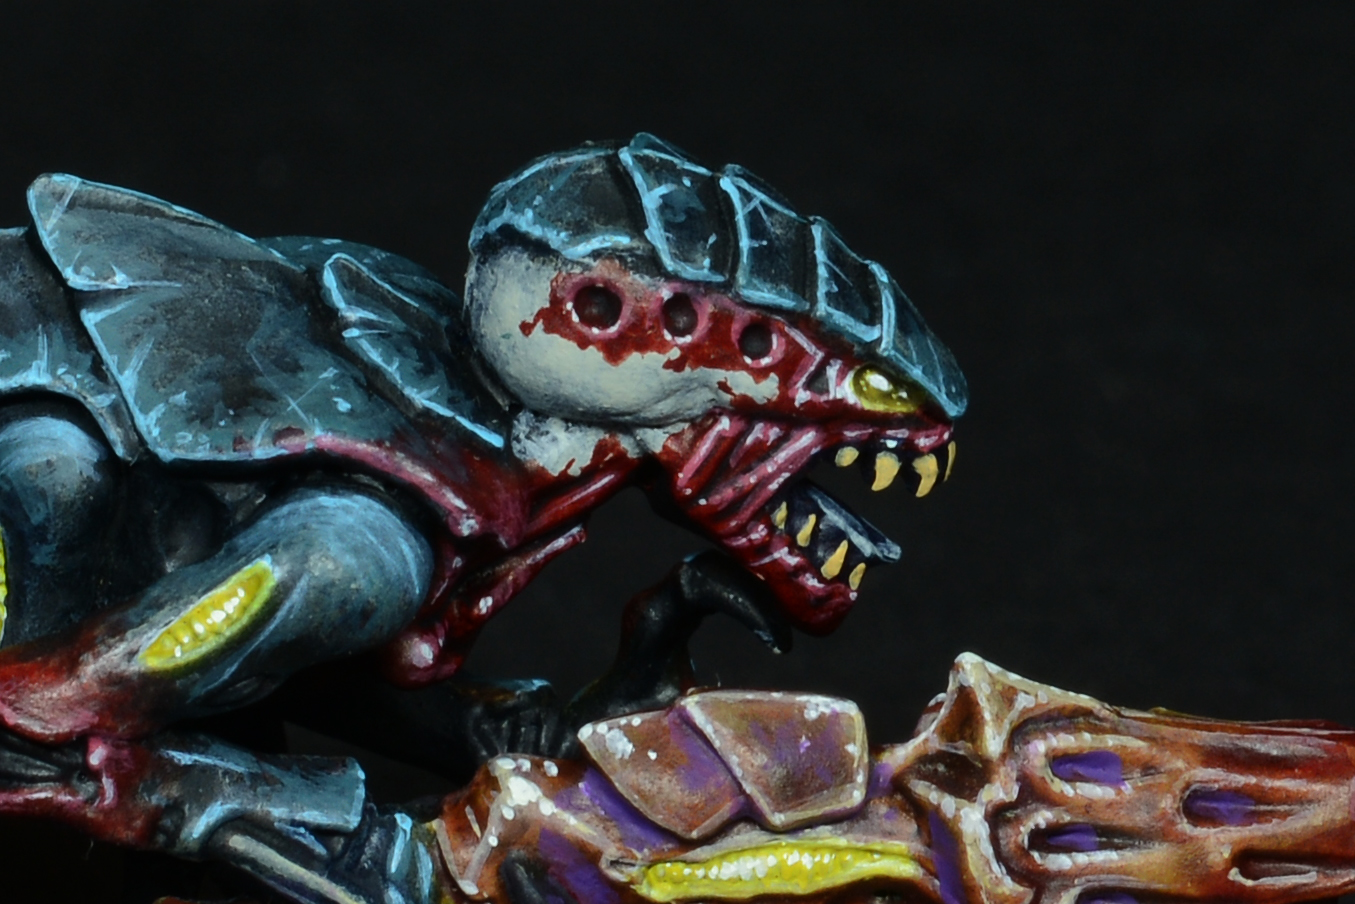
VMC Ivory was then painted on the teeth, and as small dots on the tongues’ tips.

At this point i painted all the fangs, and the blades’ handles, with an edge-highlight of Ak Wine Red, followed by a strong highlight of Ak Blue Grey.
I also twekad the flesh and carapace reducing the blue component; to achieve that, i carefully stippled some GW Black Templar inside the plates and in the shadow areas of the body, erasing around 50-60% of the previous texture but leaving the brightest lights and scratches.
Last area to be painted was the white on the heads.
First of all, i applied a couple layers of GW Nuln Oil on the lower portion, and once dried i carefully stippled some Ak Blue Grey on the upper portion, careful not to paint over the red shapes.
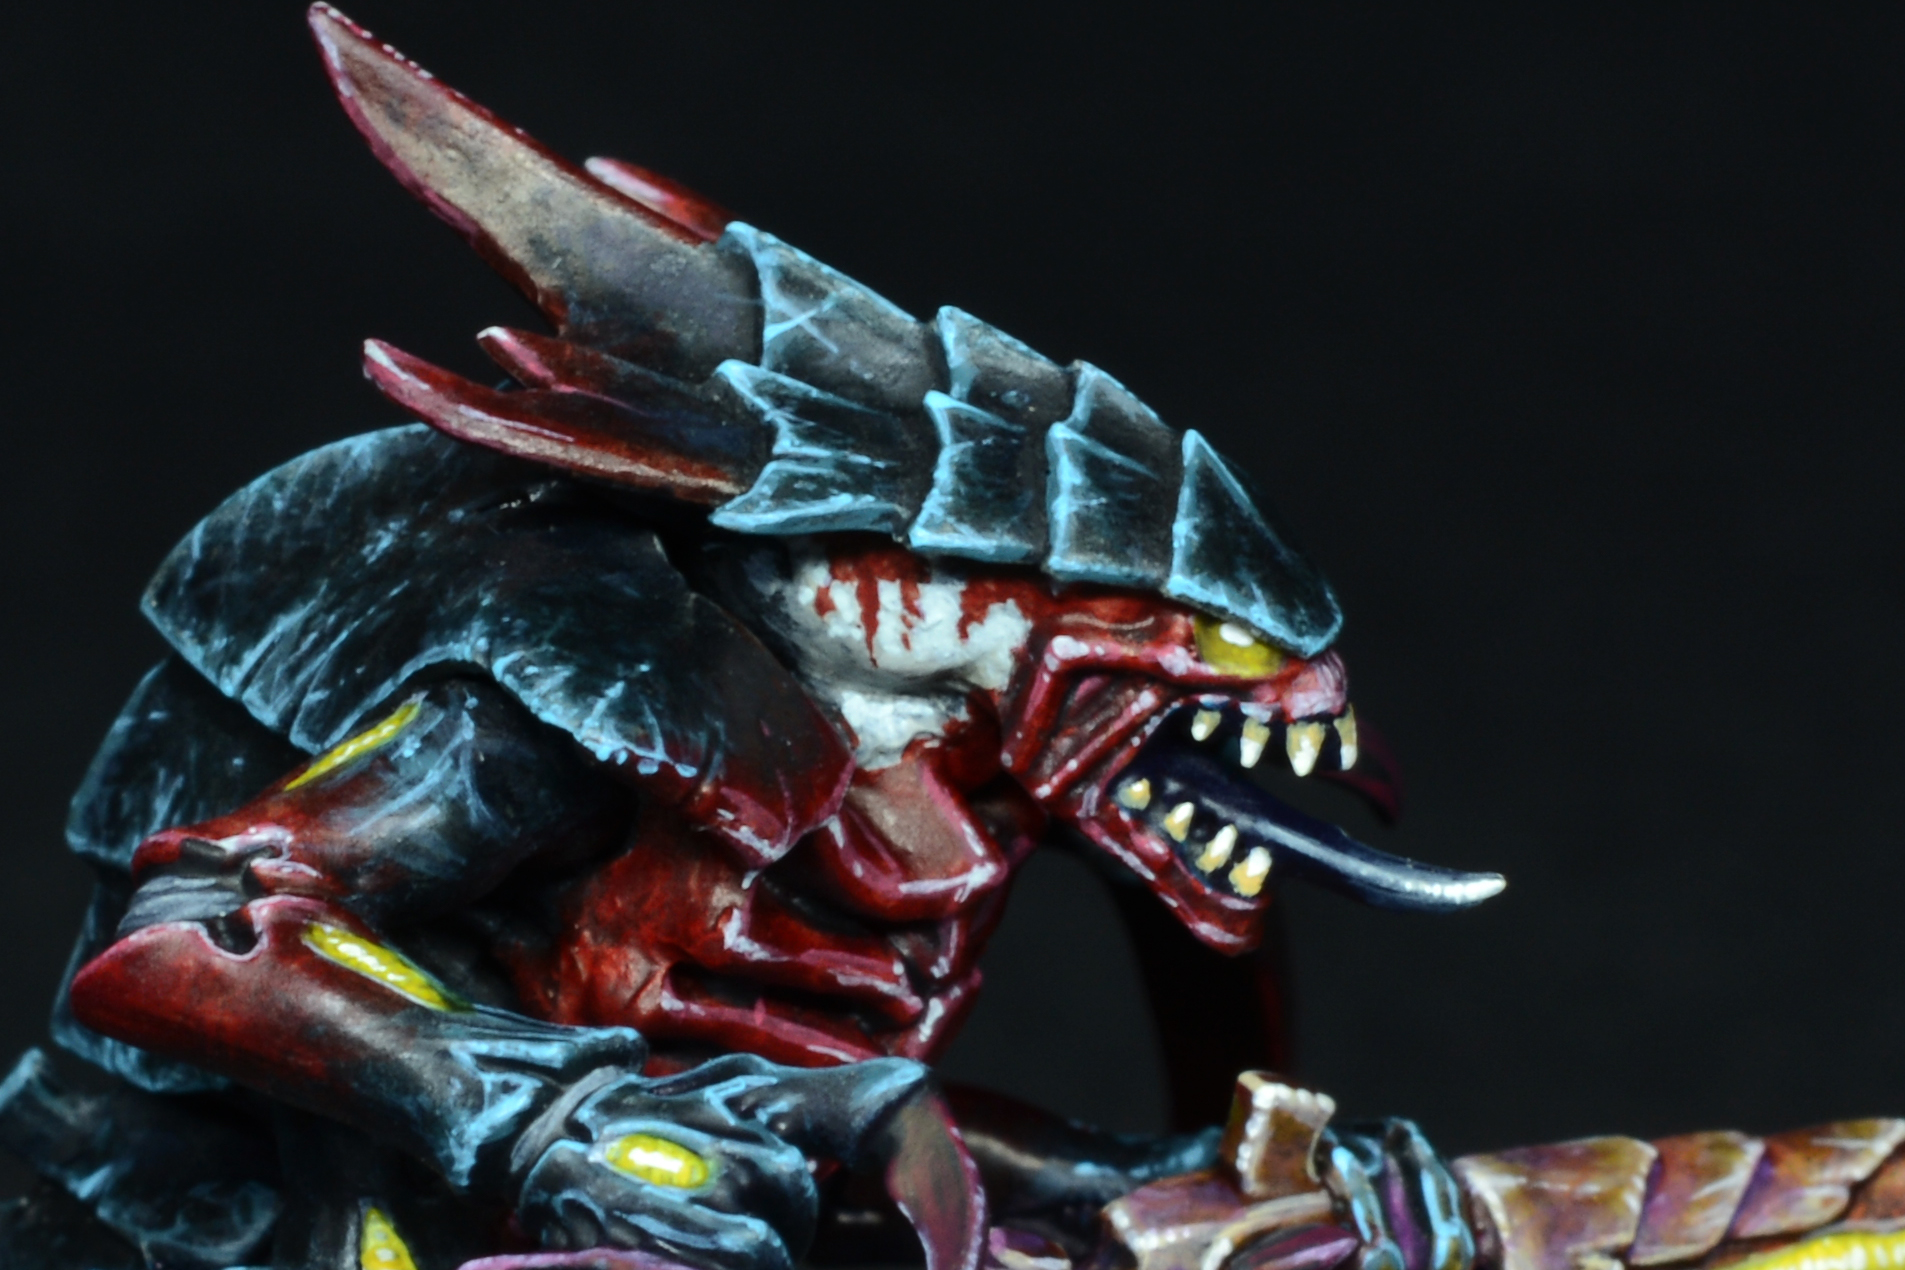
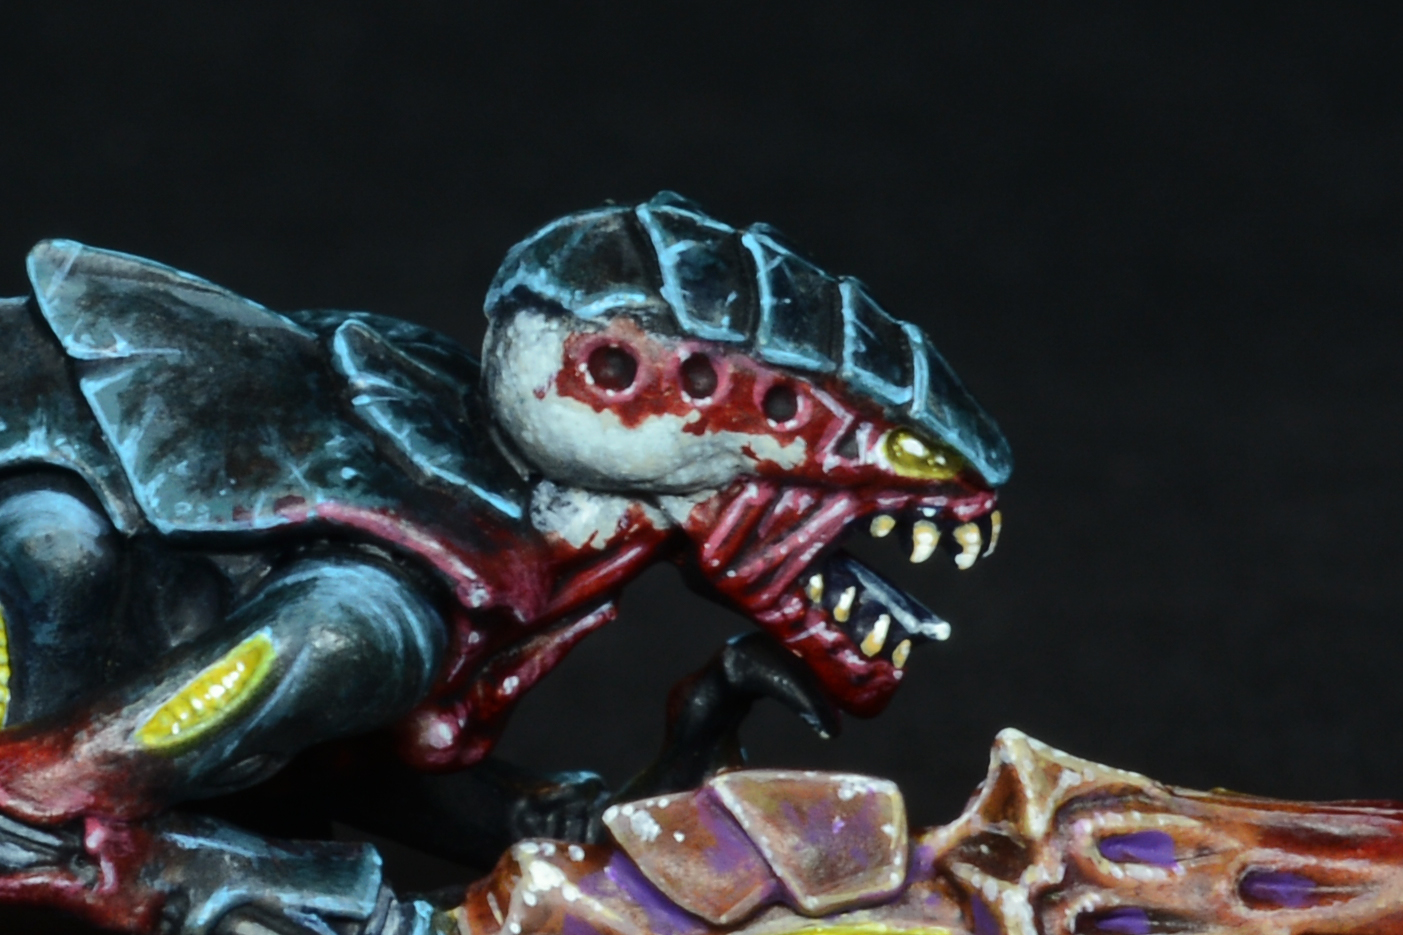
Some pure white dots were then carefully stippled as last highlight.
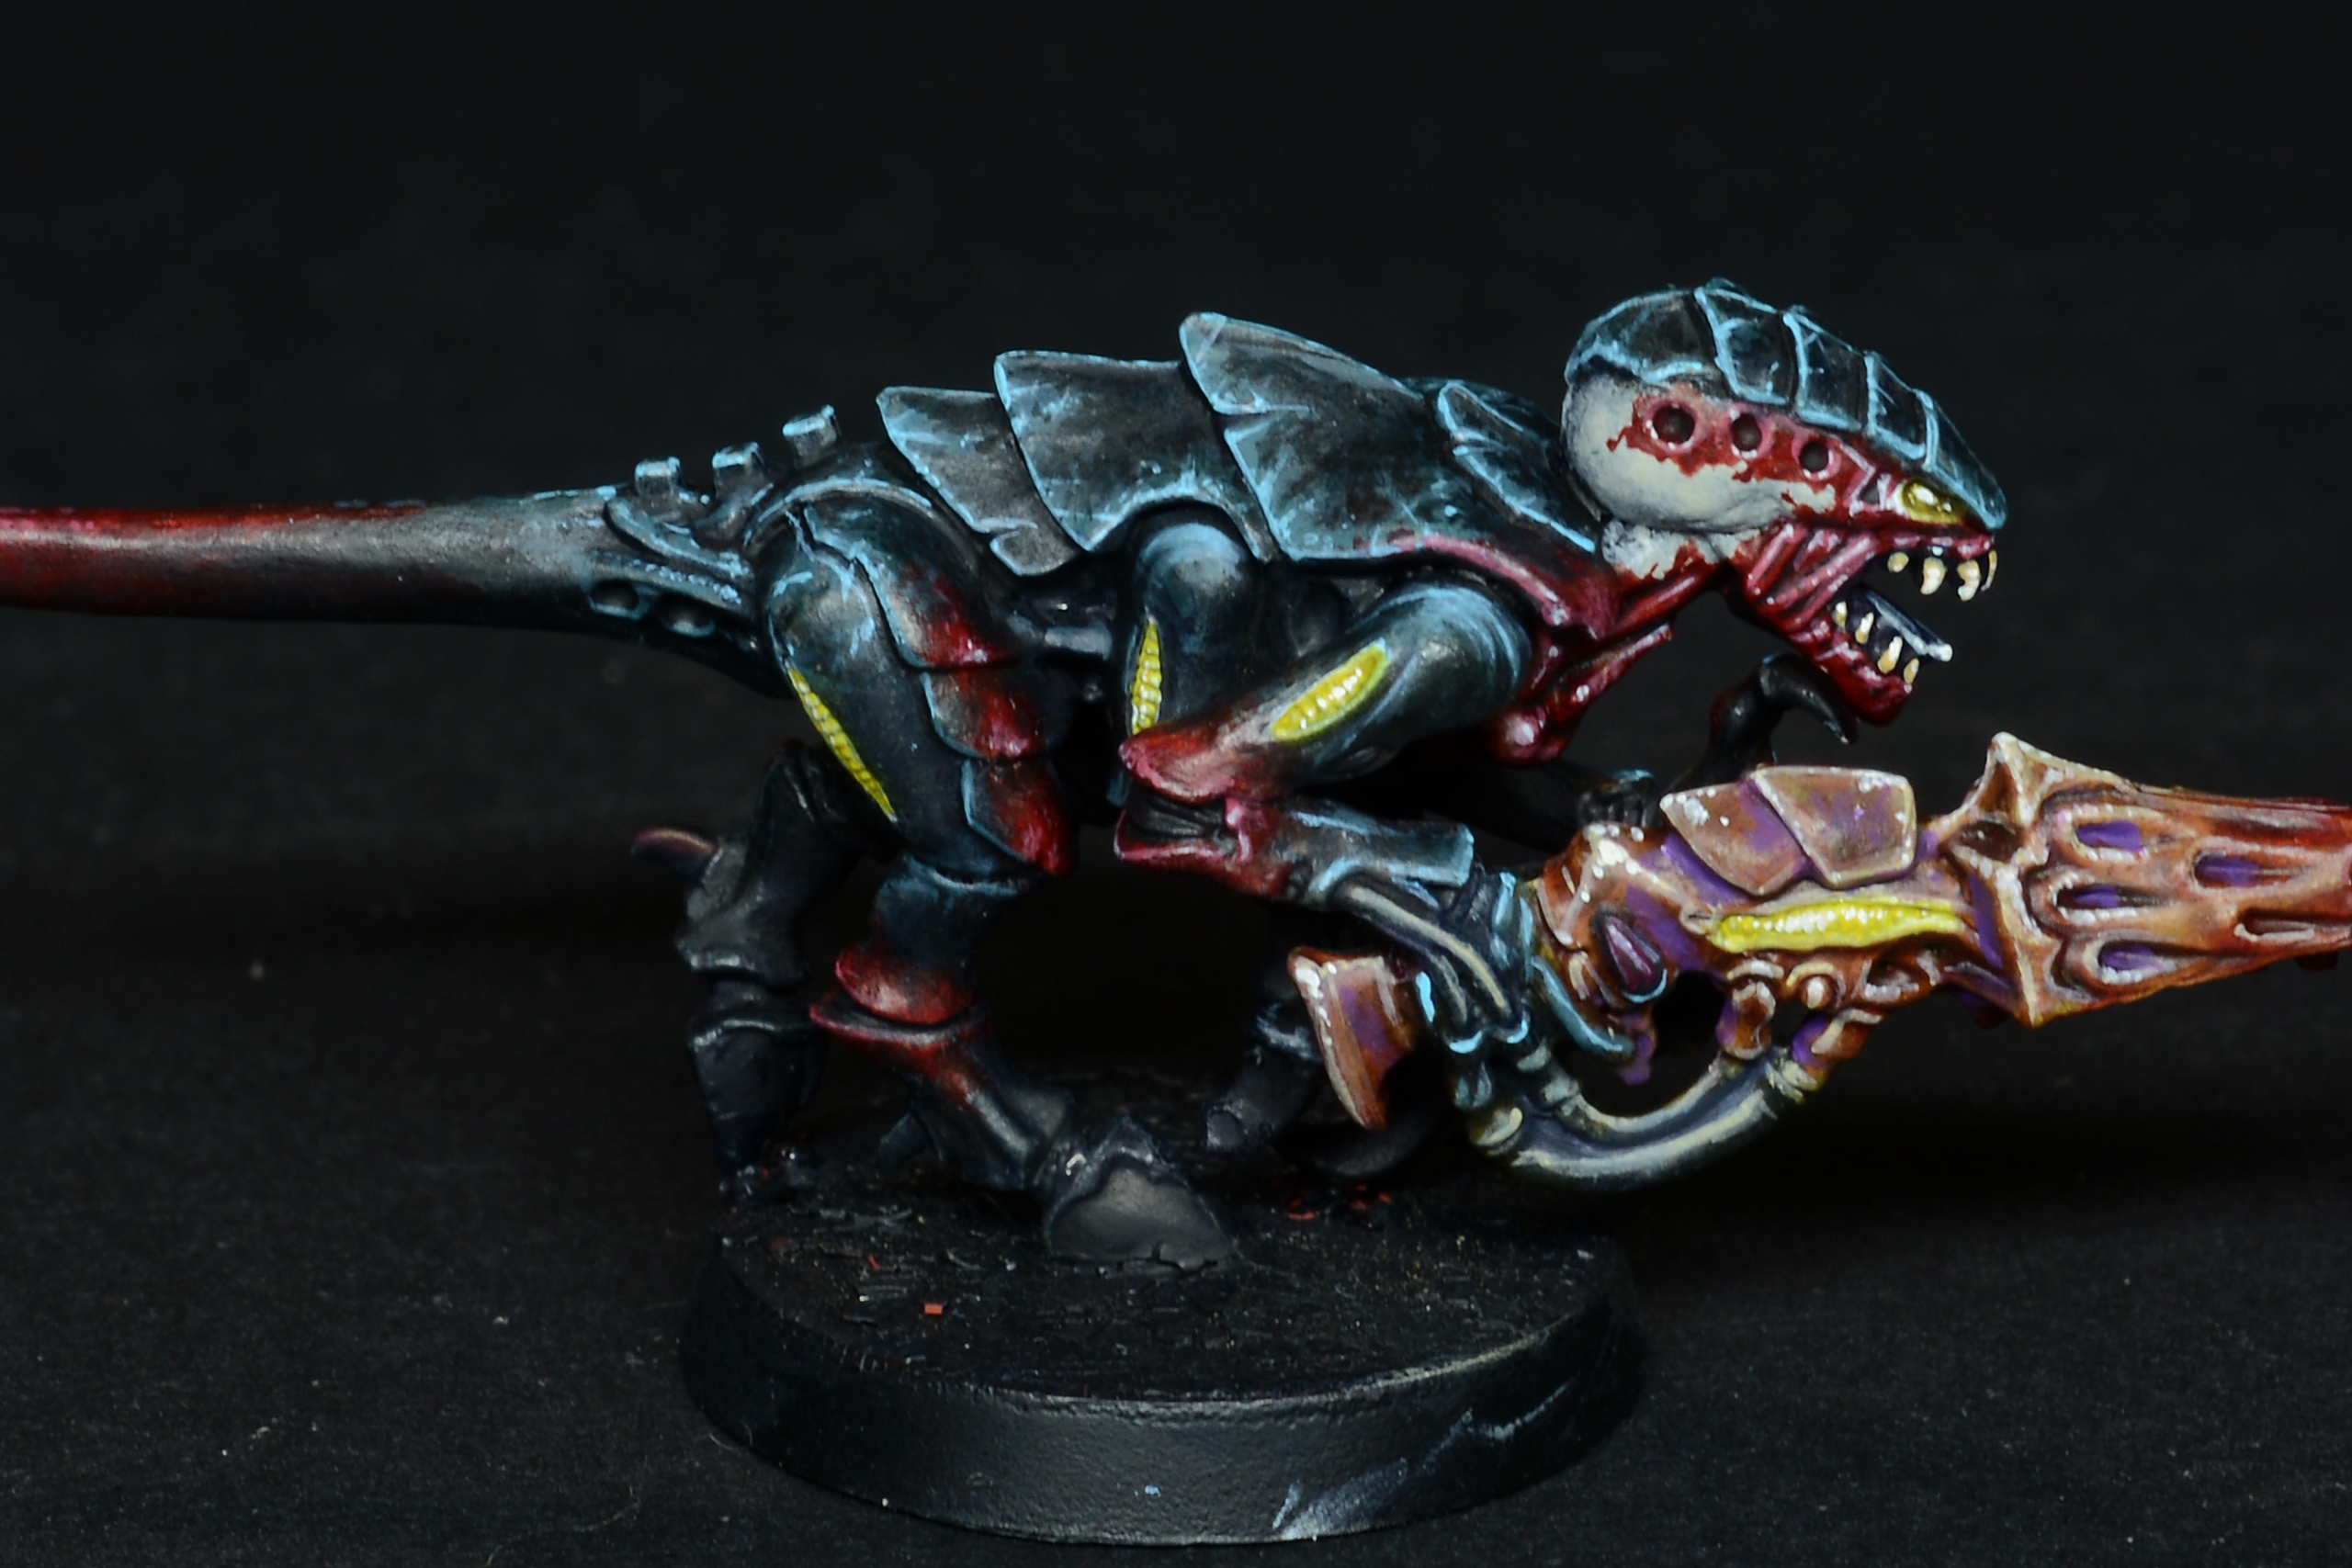
The bases were drybrushed with a color created mixing VMC Saddle Brown and VGC Heavy Blue. I wanted a cold and desaturated brown, something similar to Gw Gorthor Brown.
Be gentle in drybrushing the Martian Ironheart previously applied, otherwise some pieces will come off.
This time i’ve added a second drybrush of Ak Blue Grey on the edges, and completed adding some Alien Turquoise Tufts from Gamers Grass.
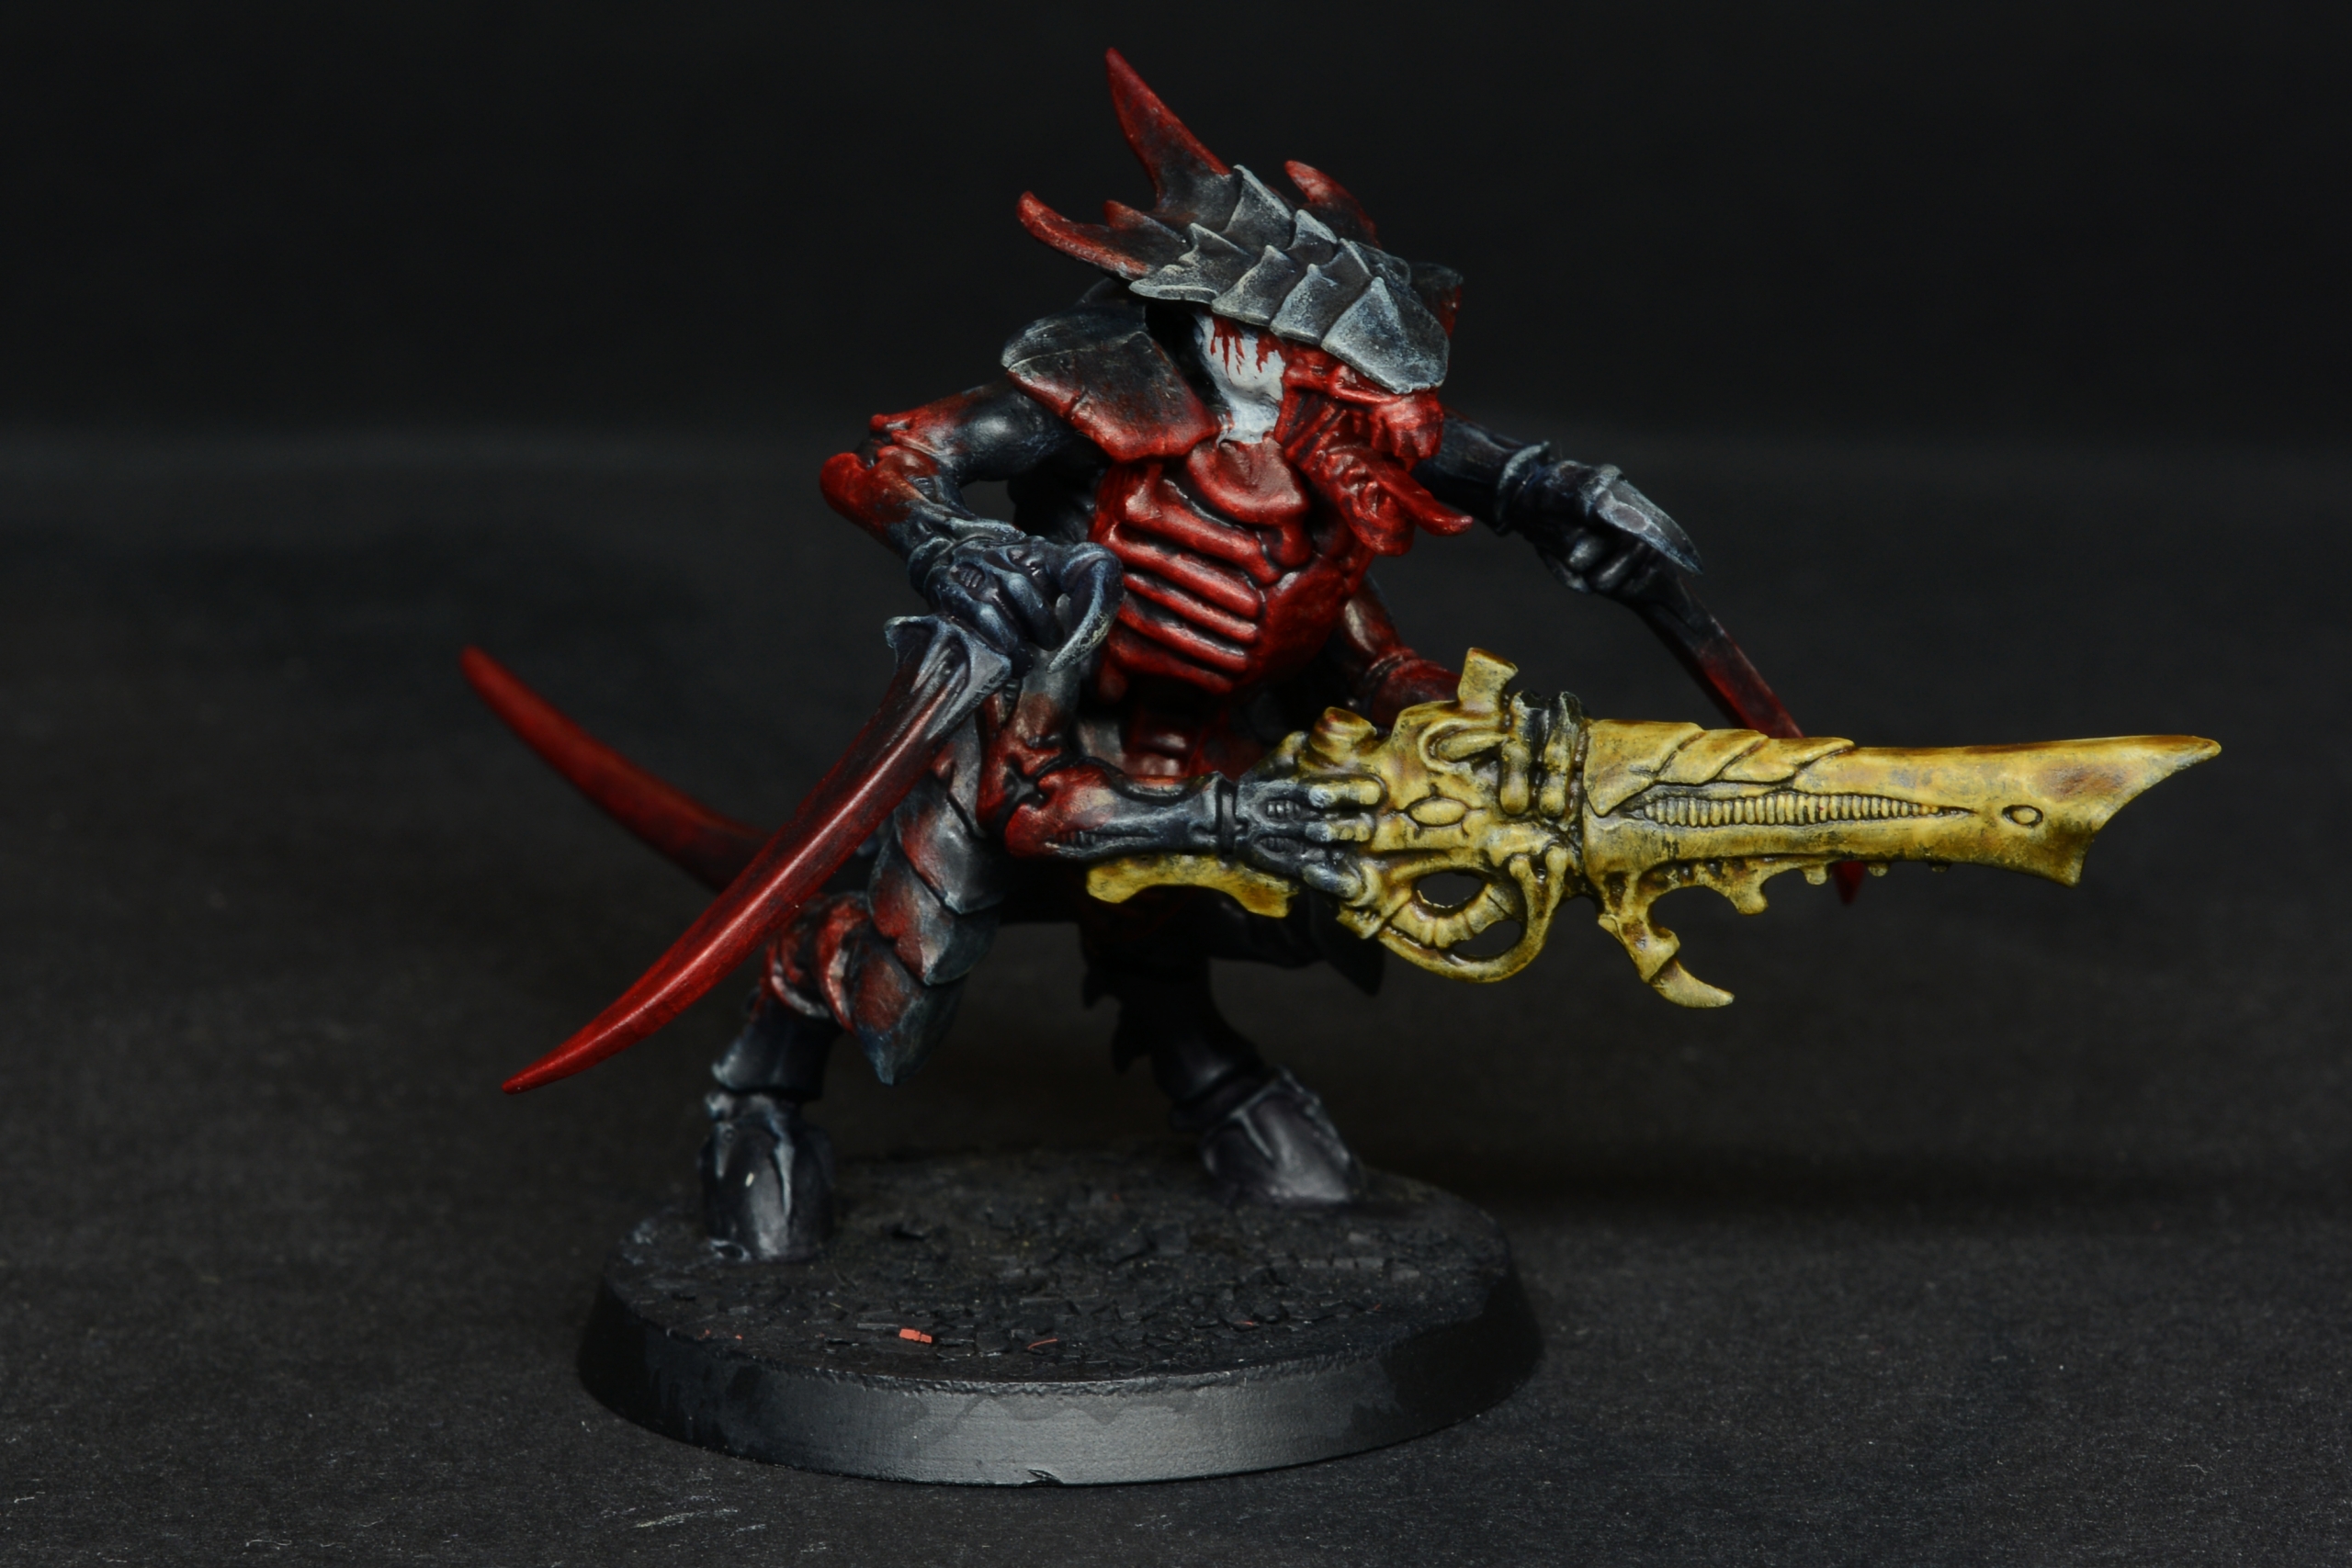
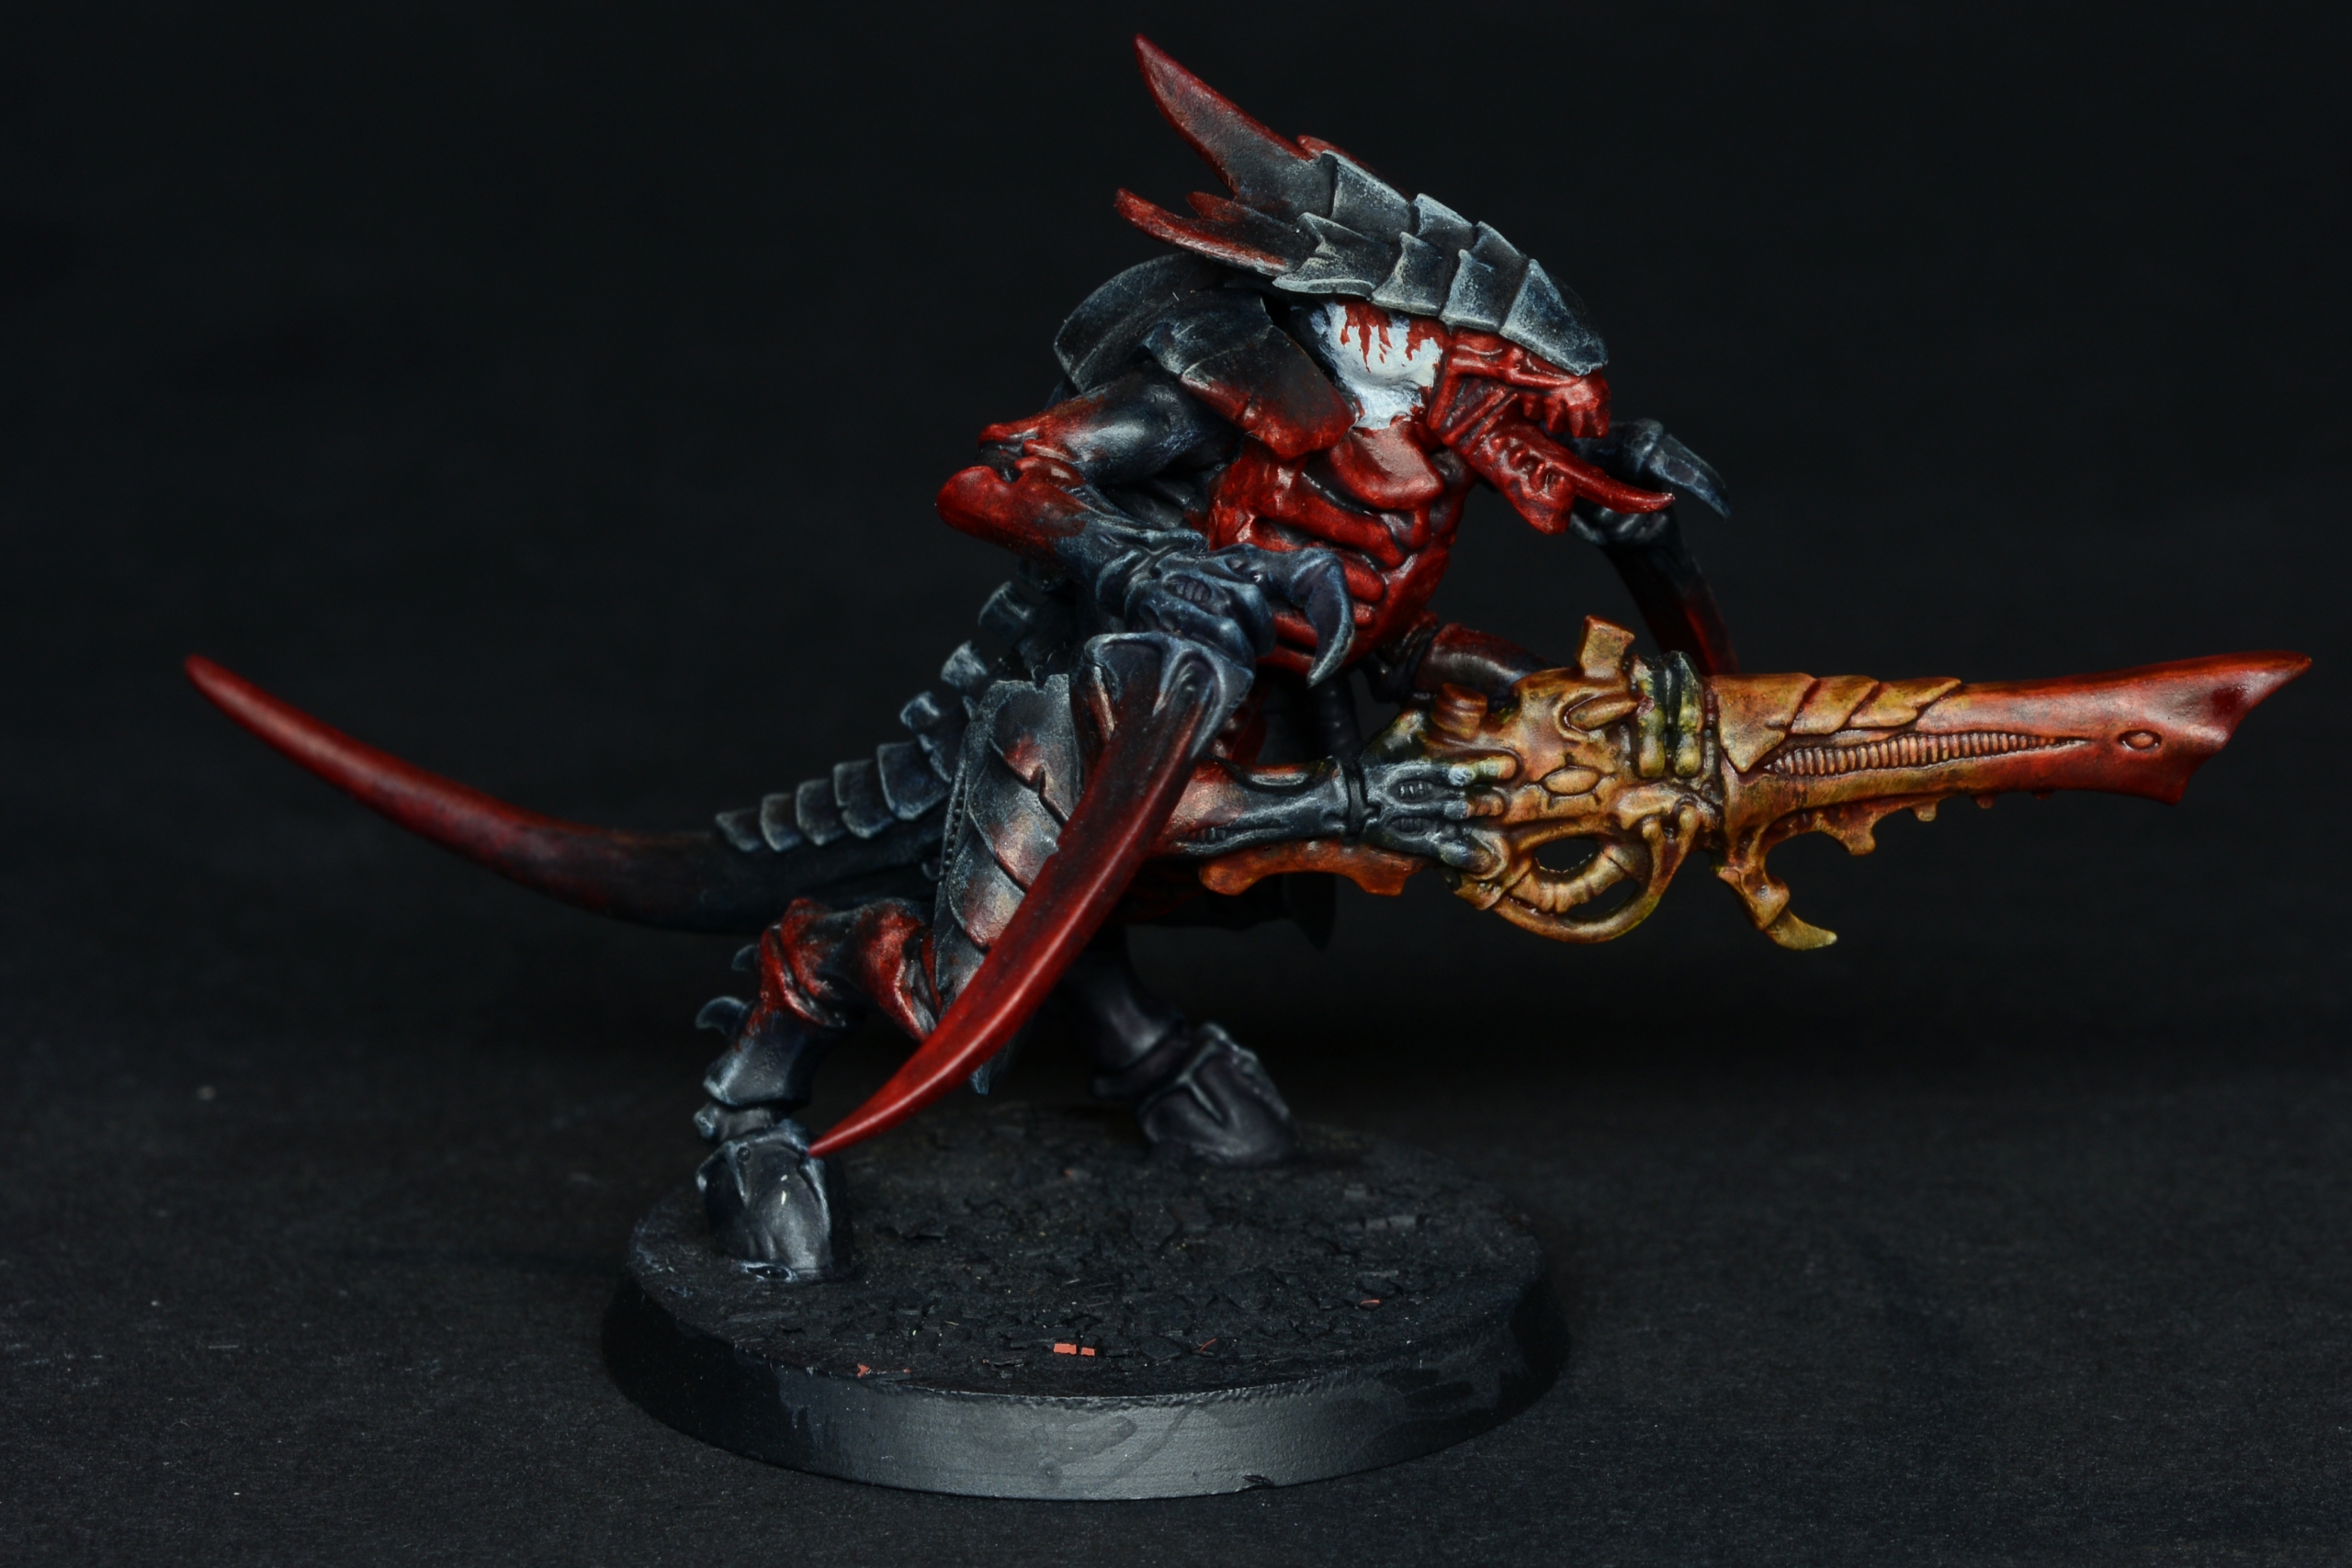
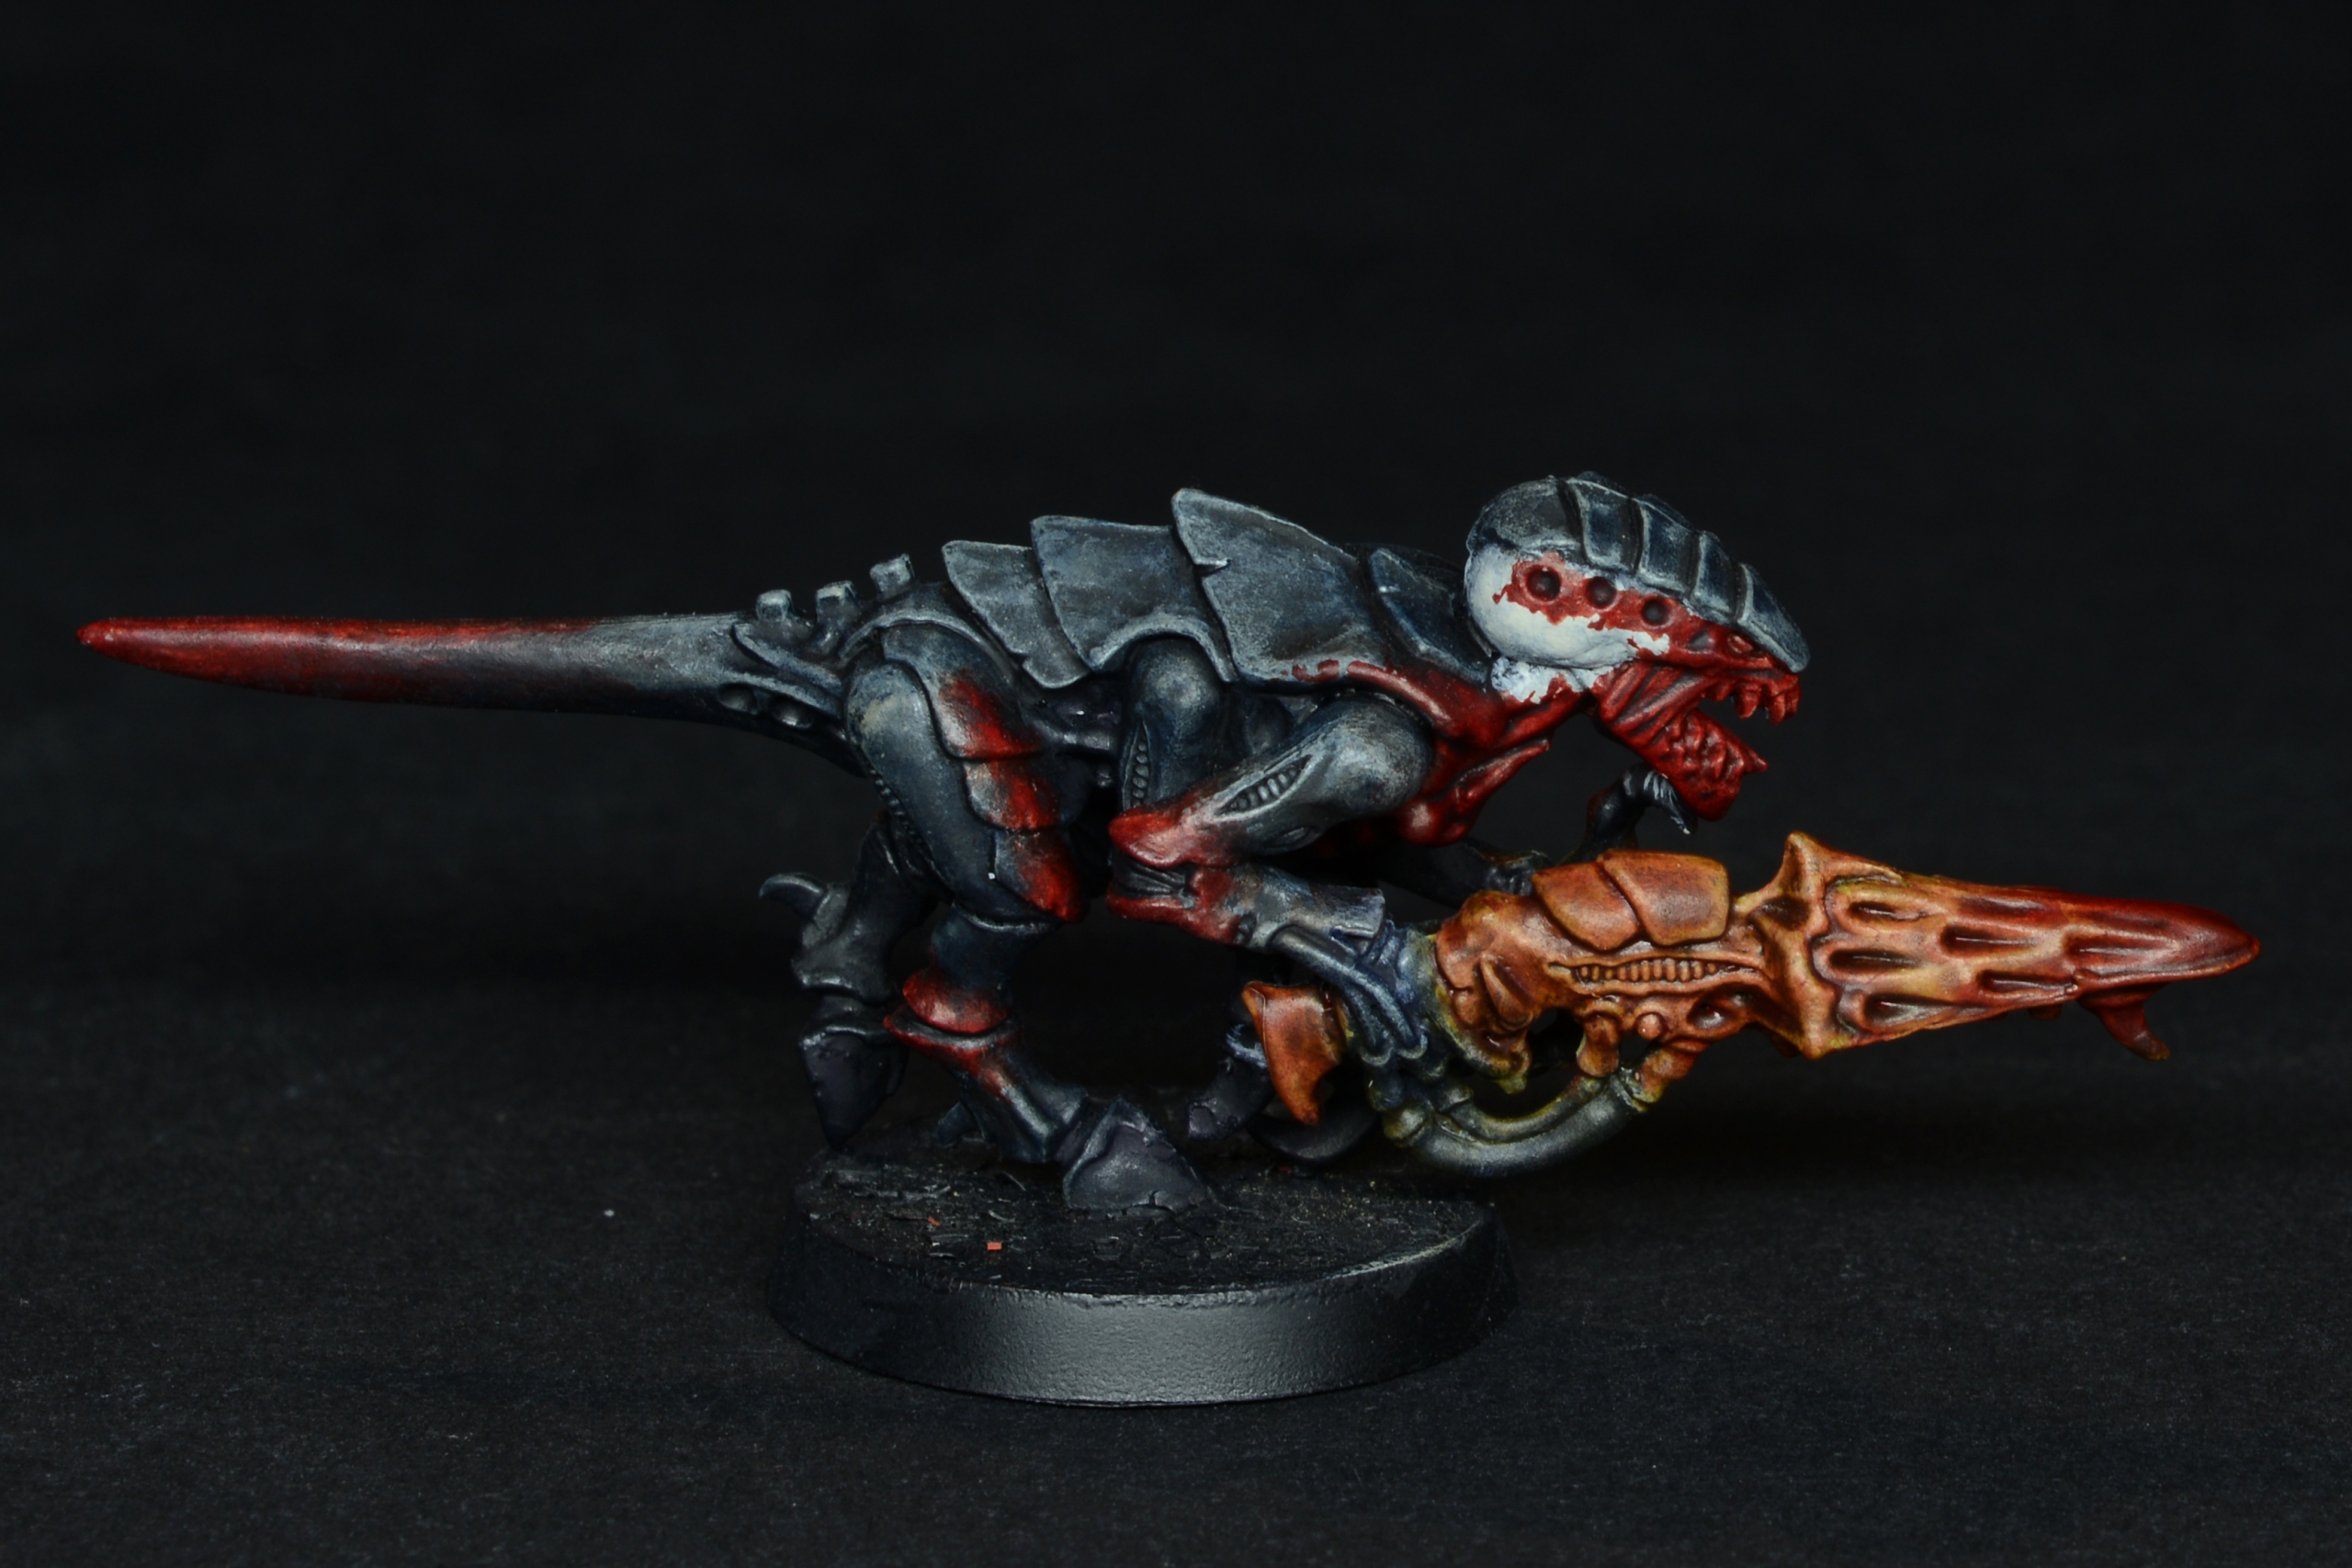
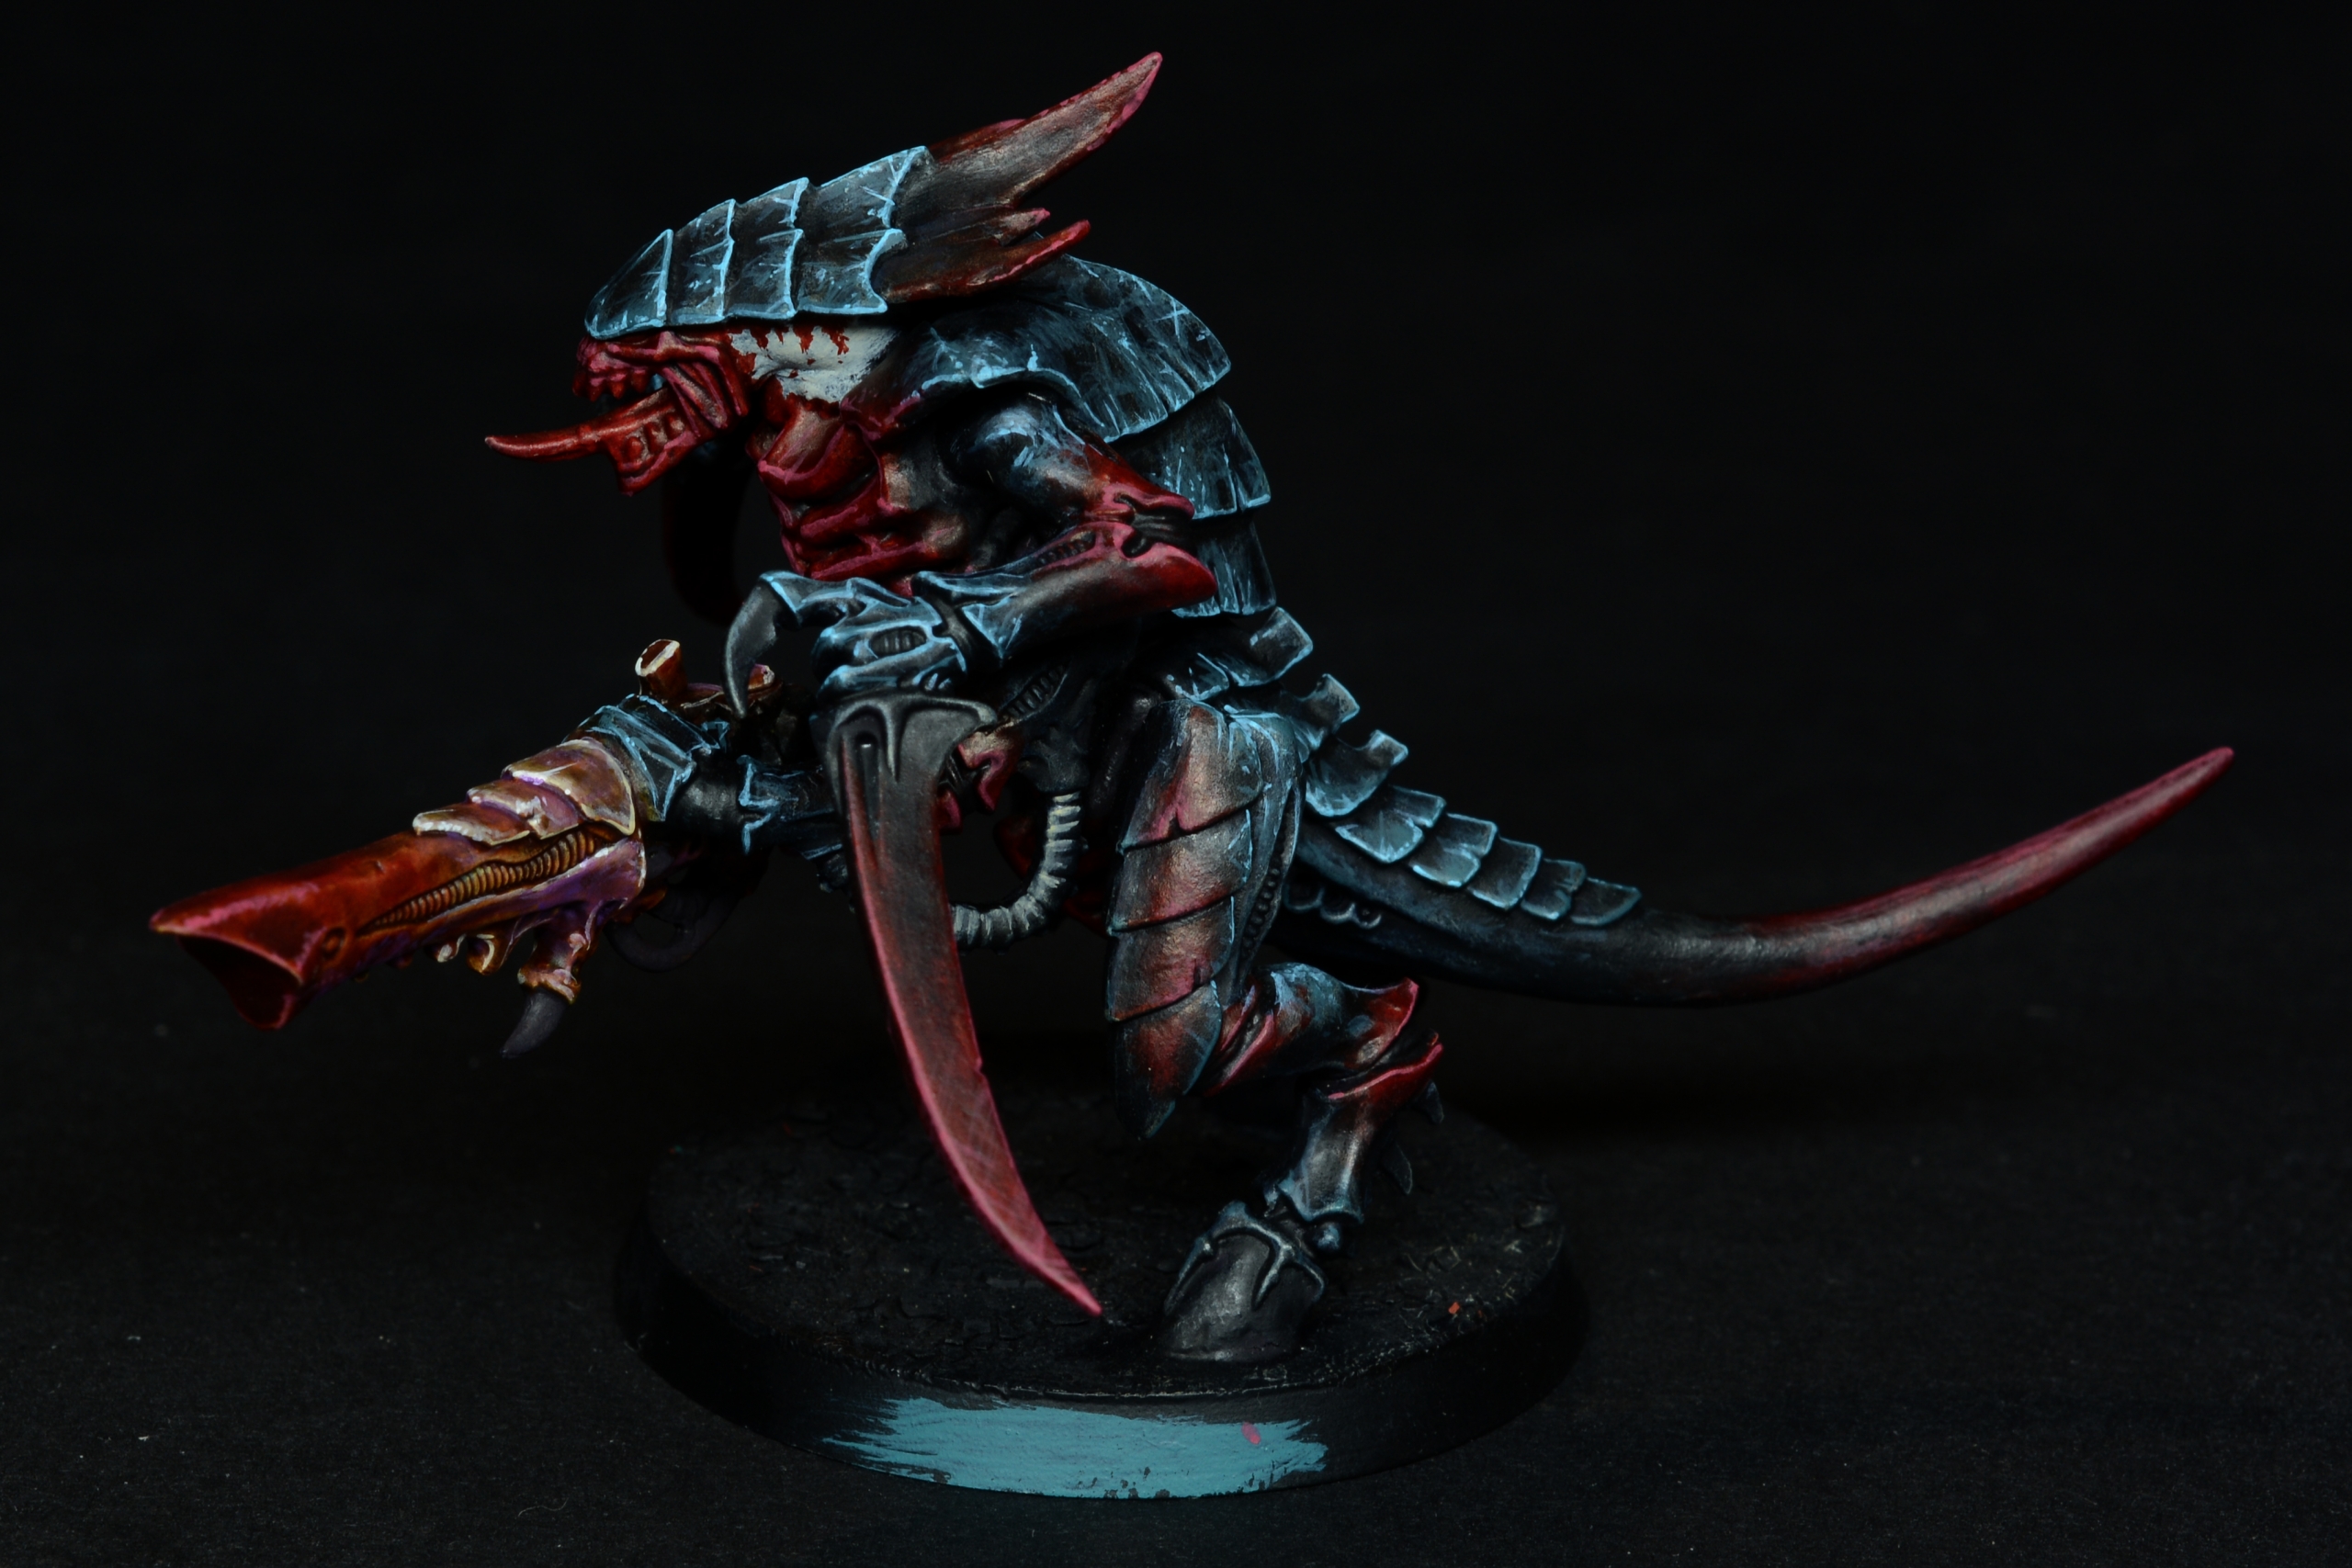
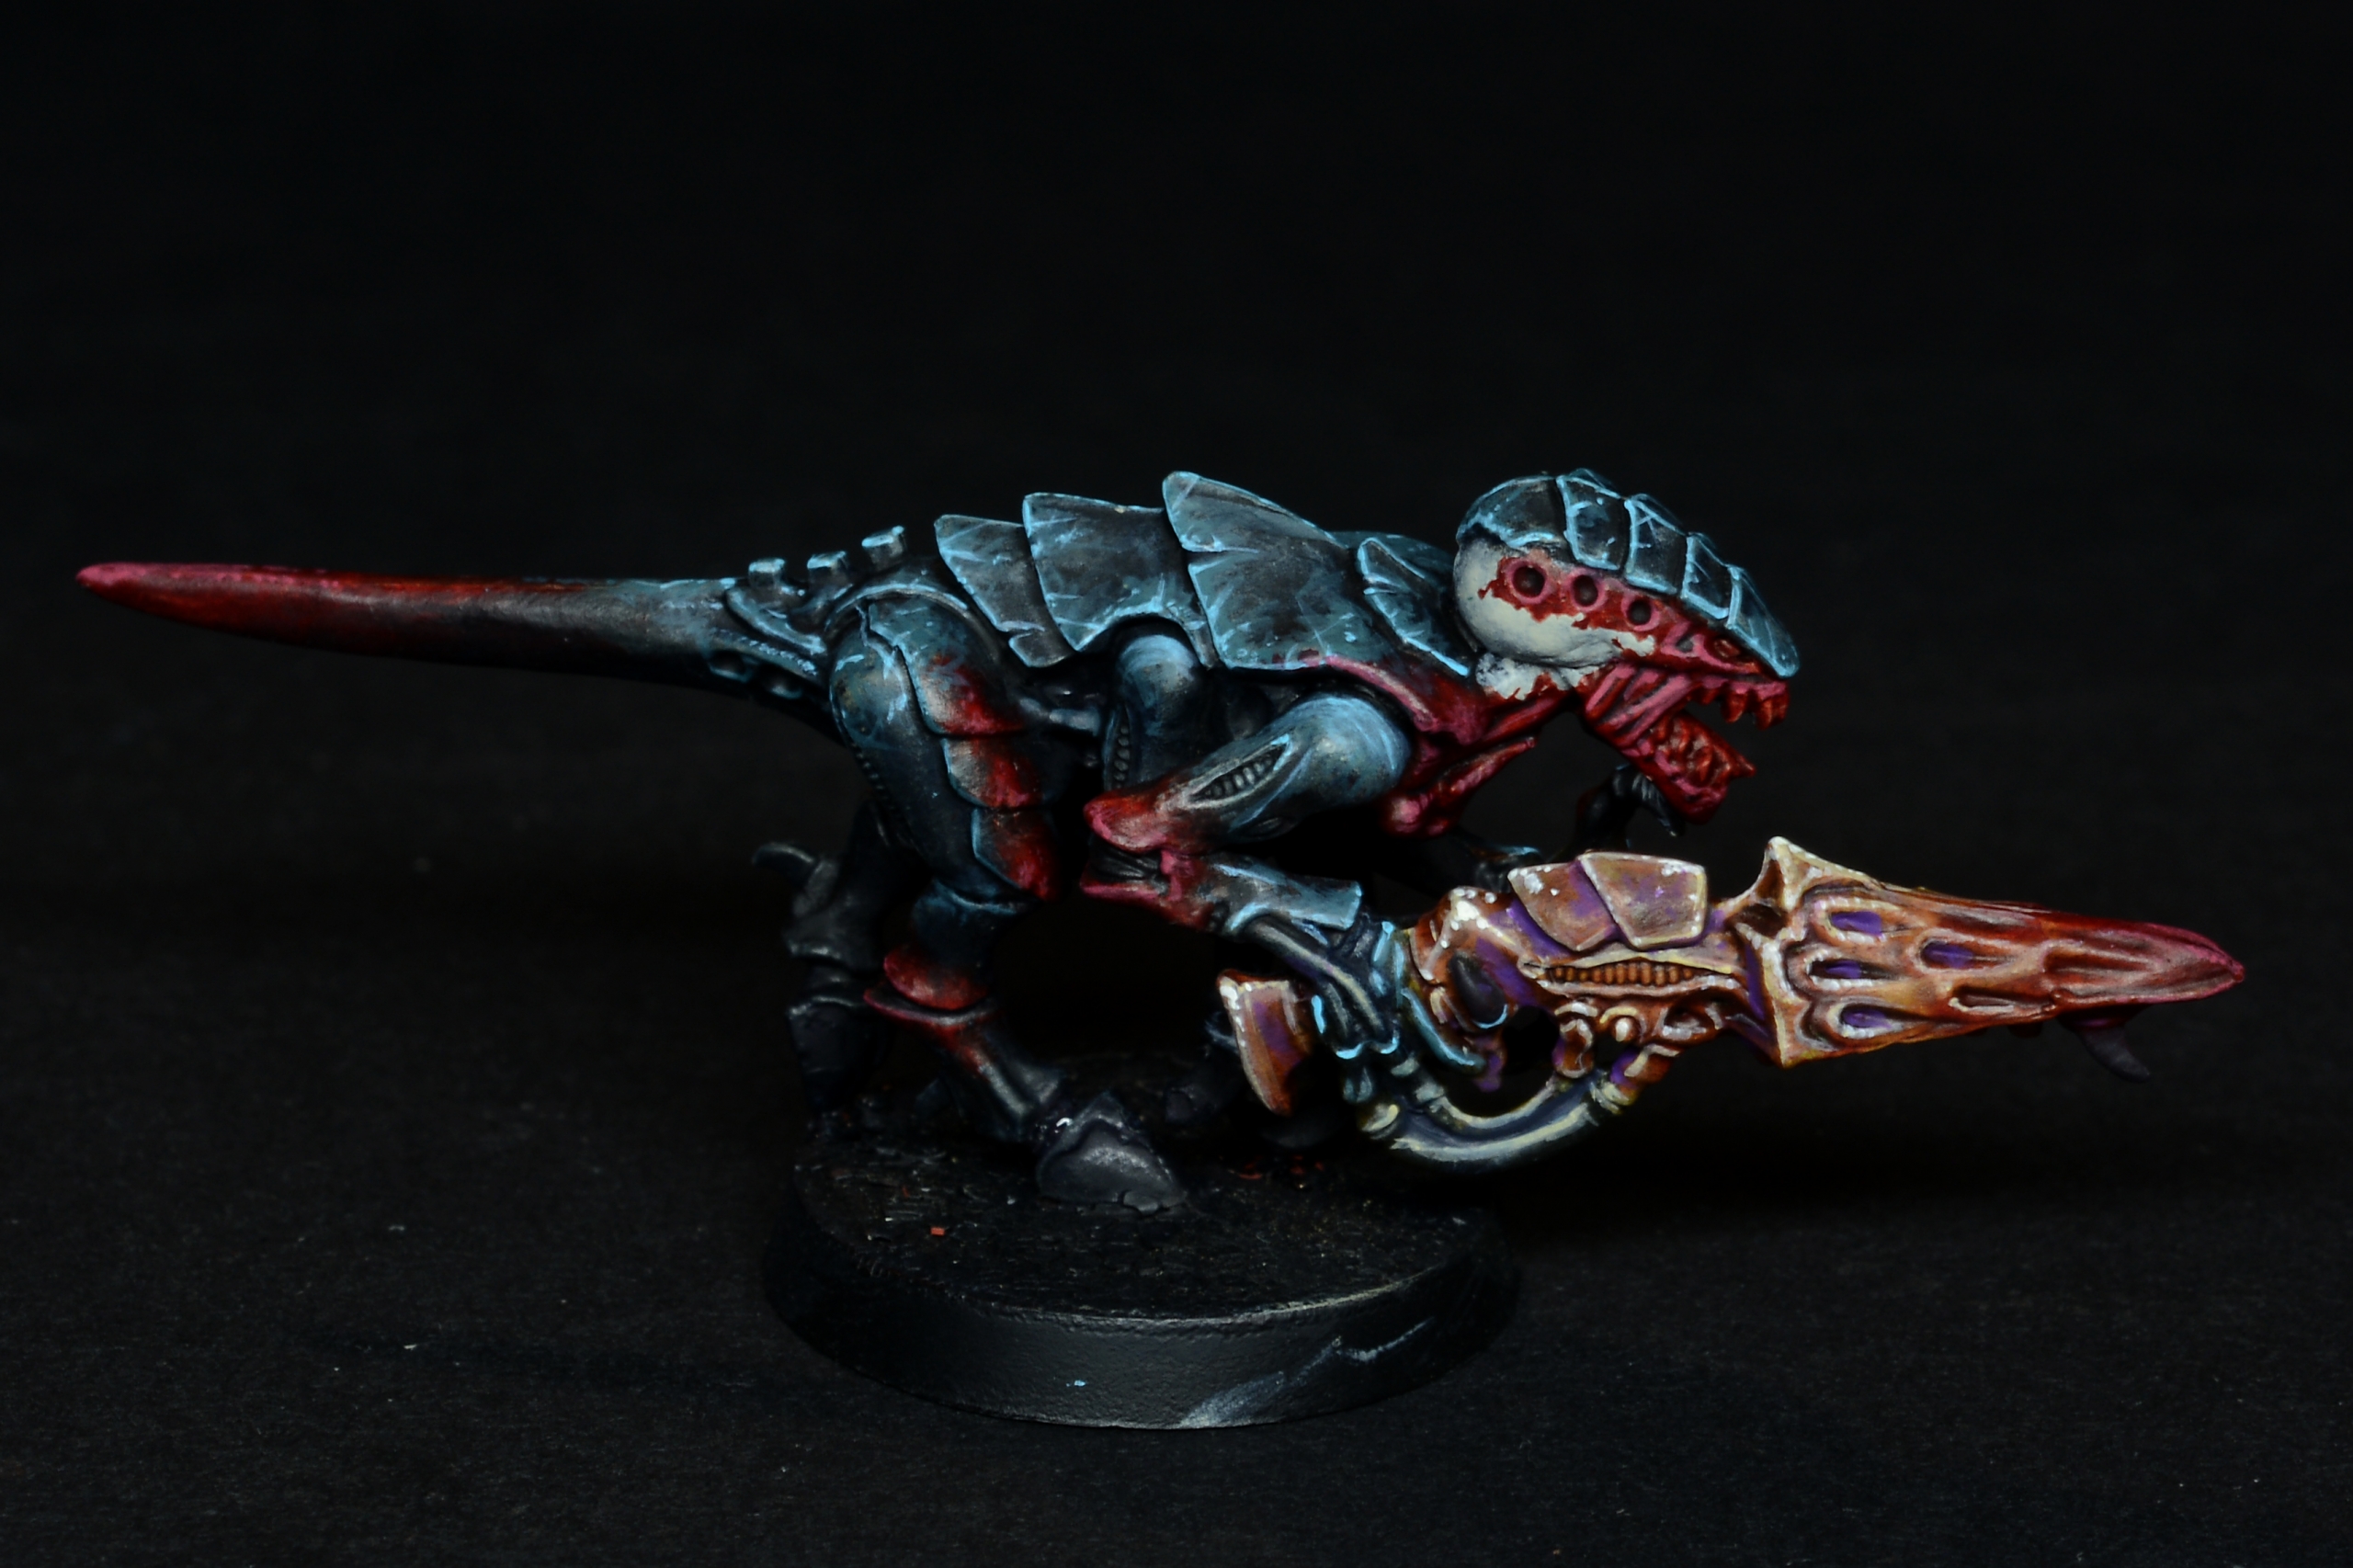
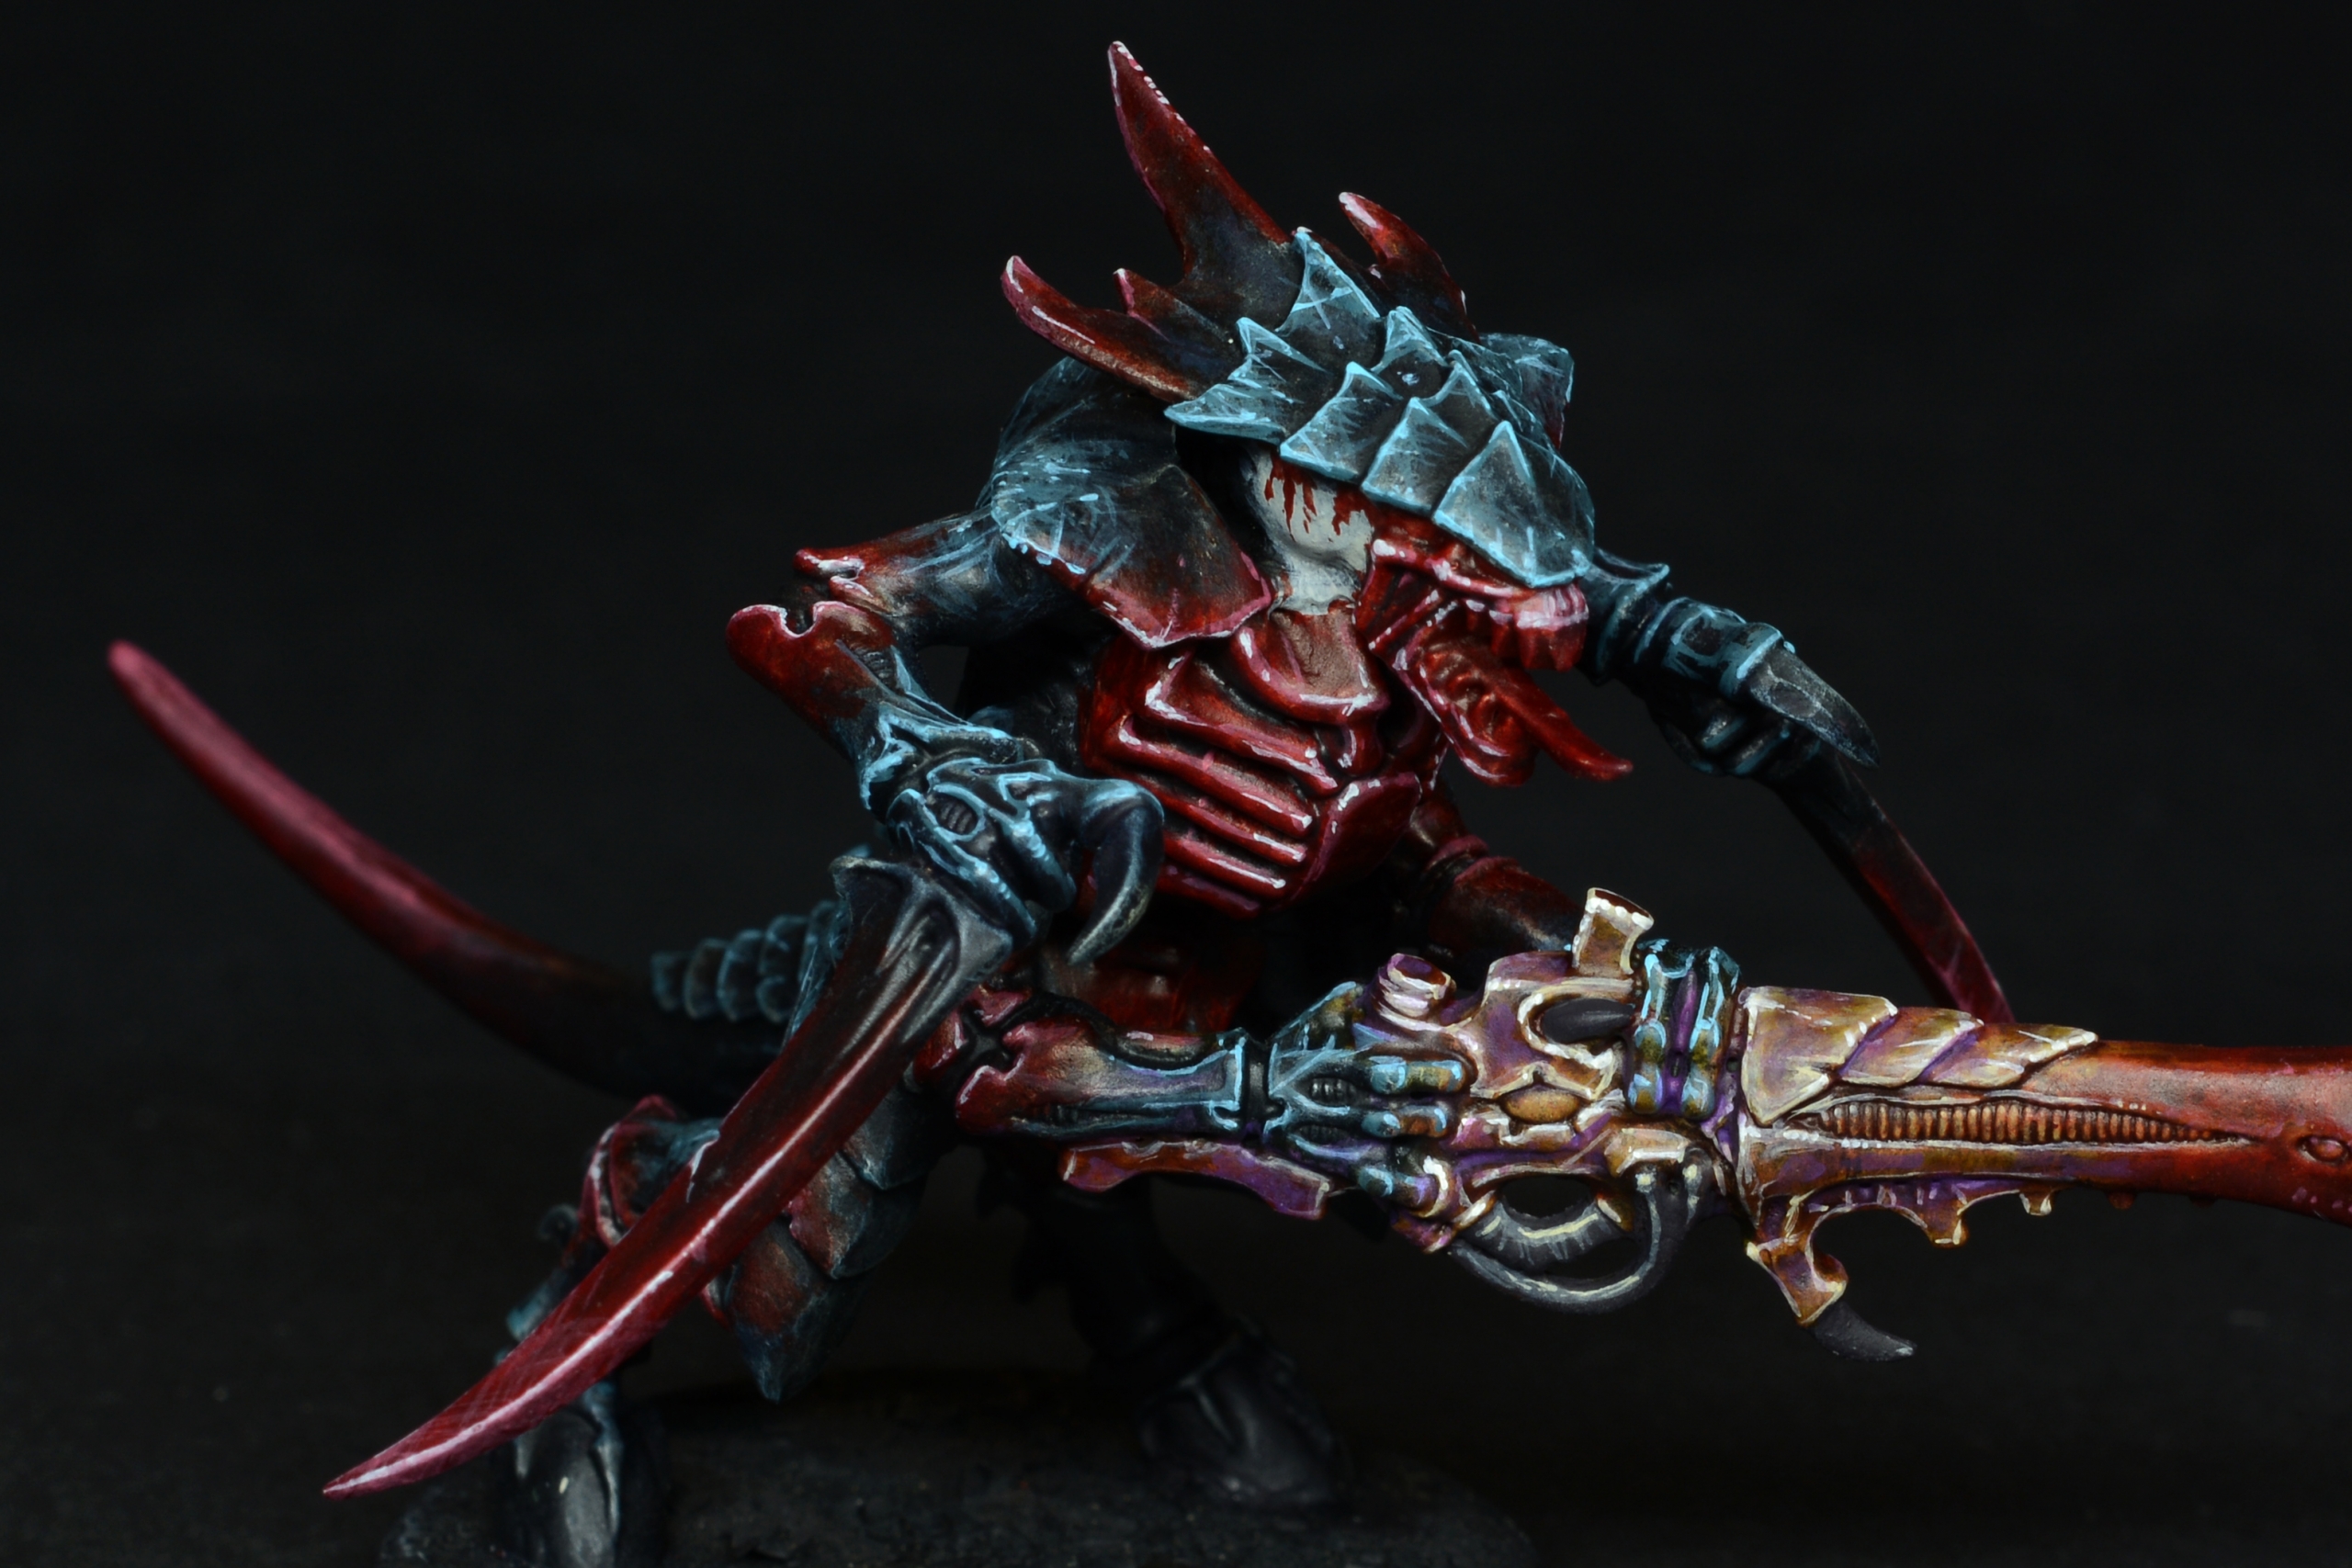
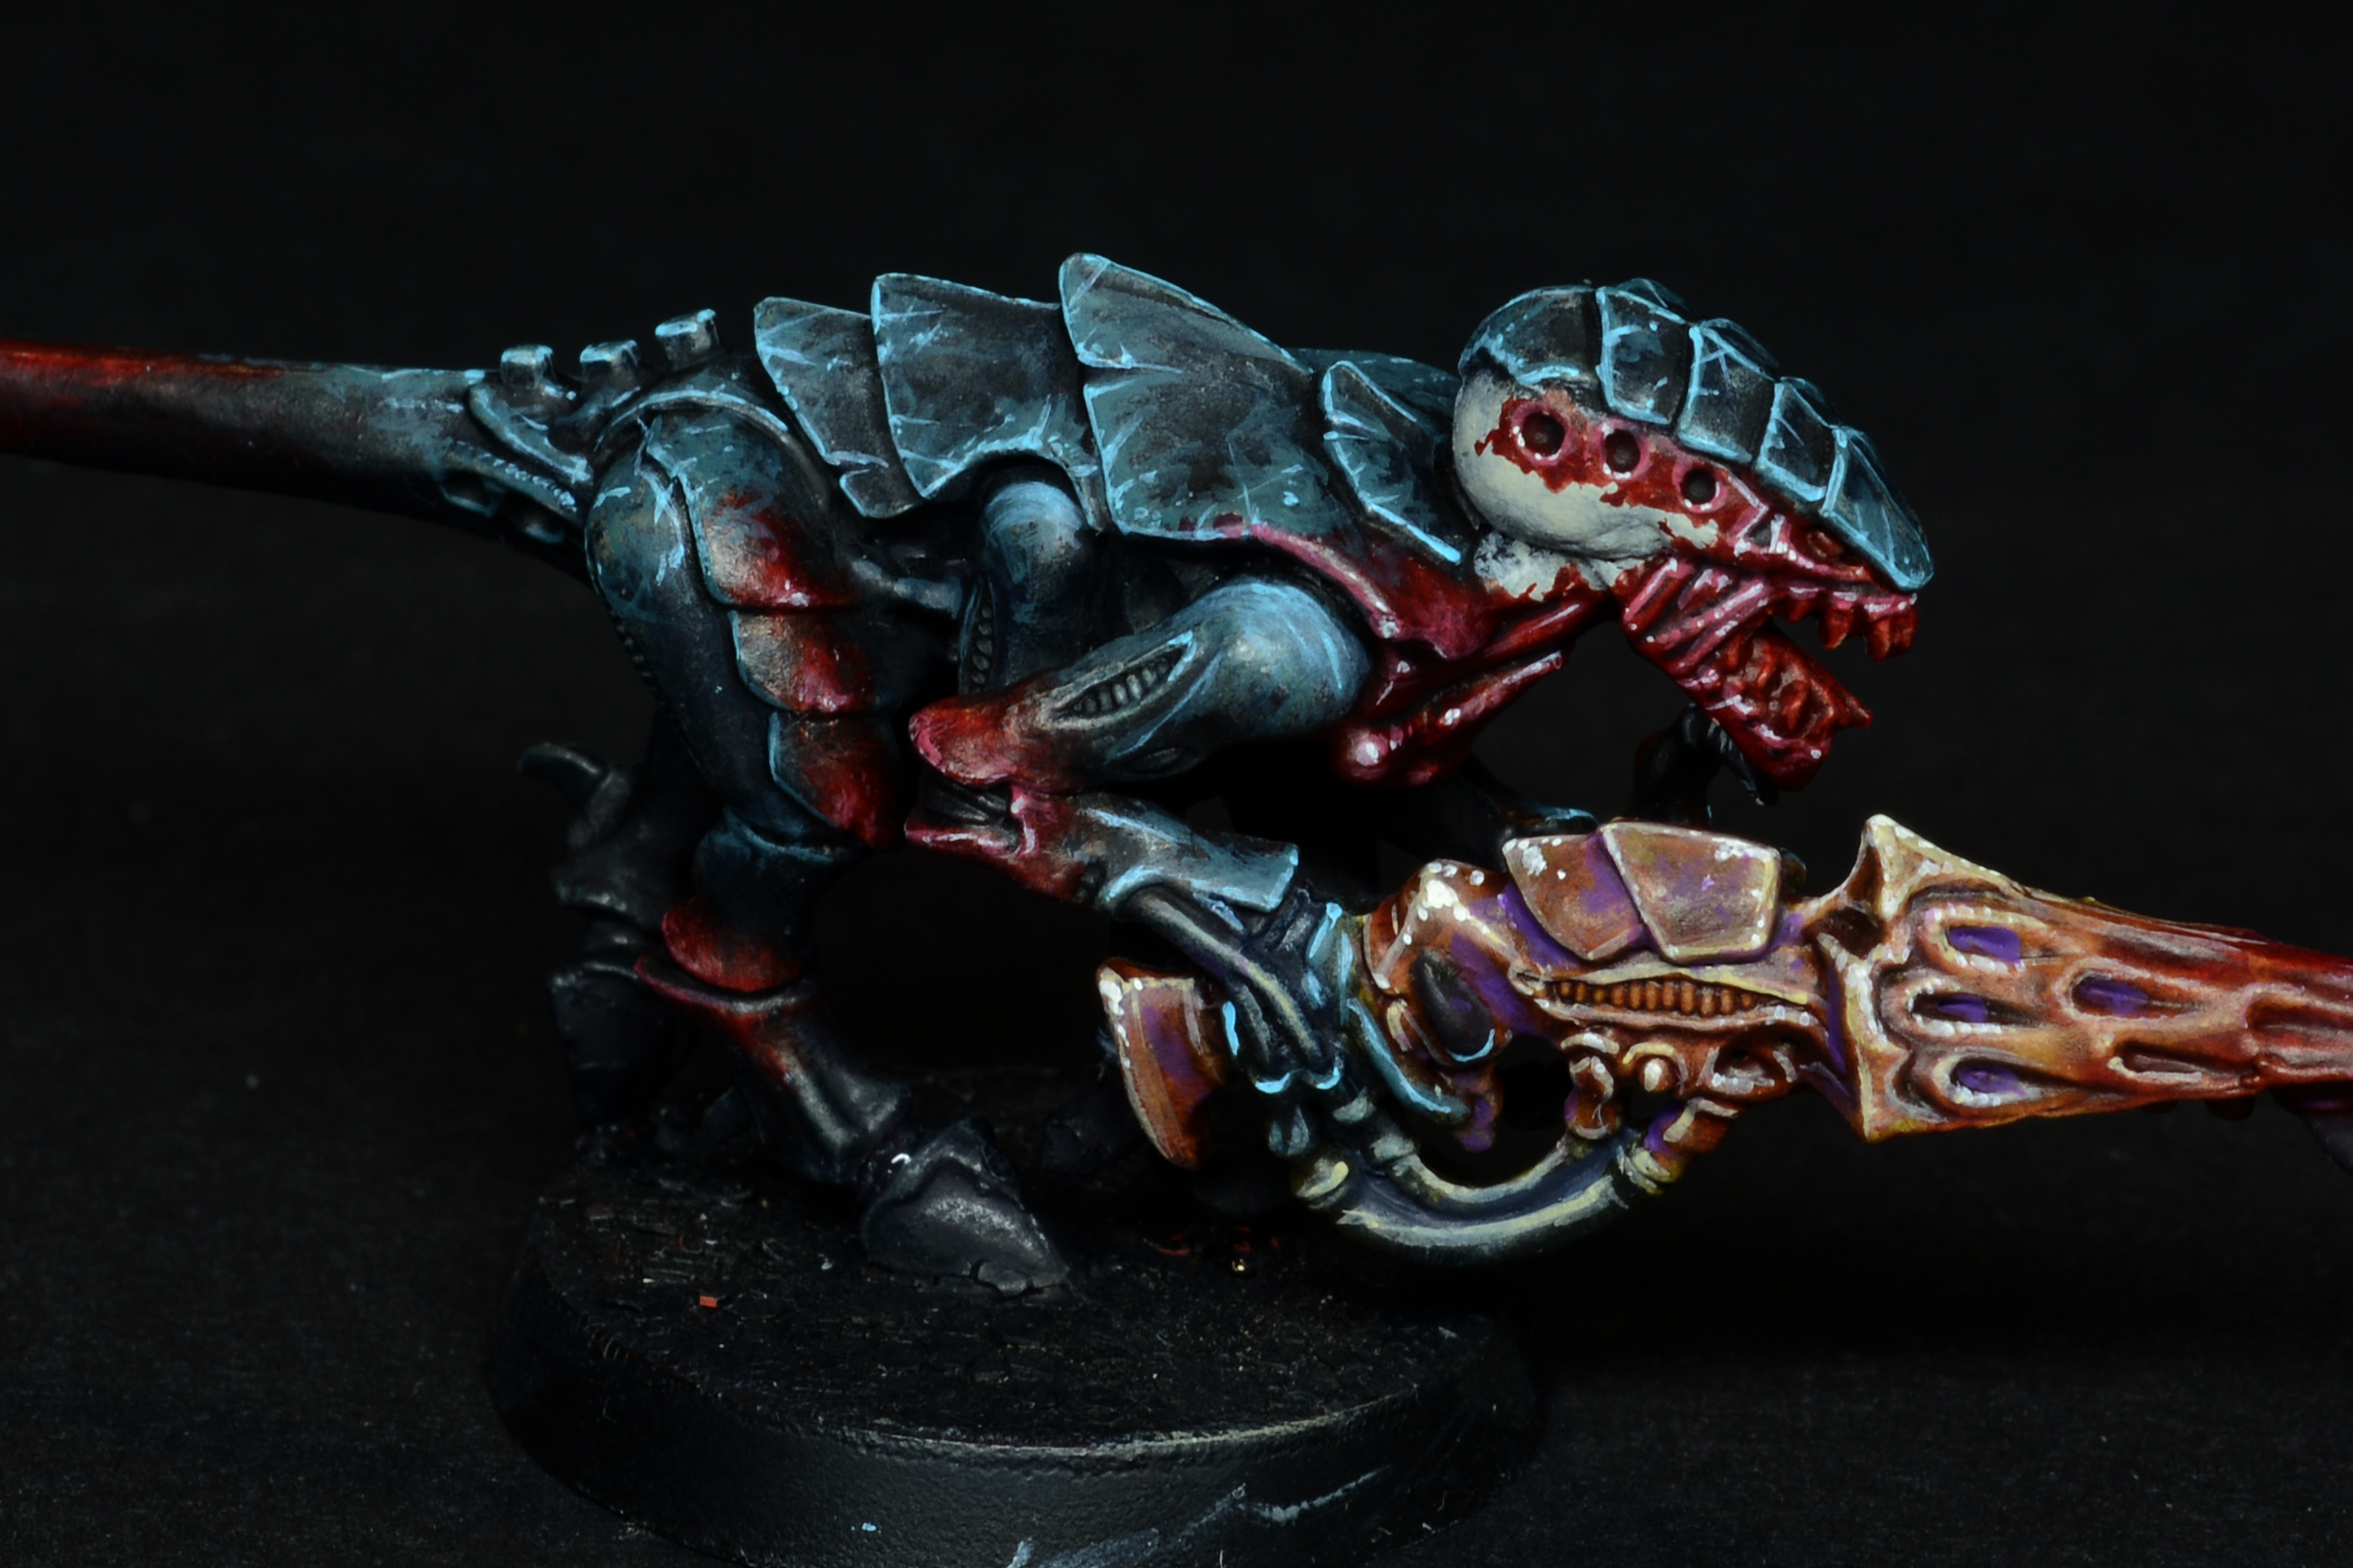
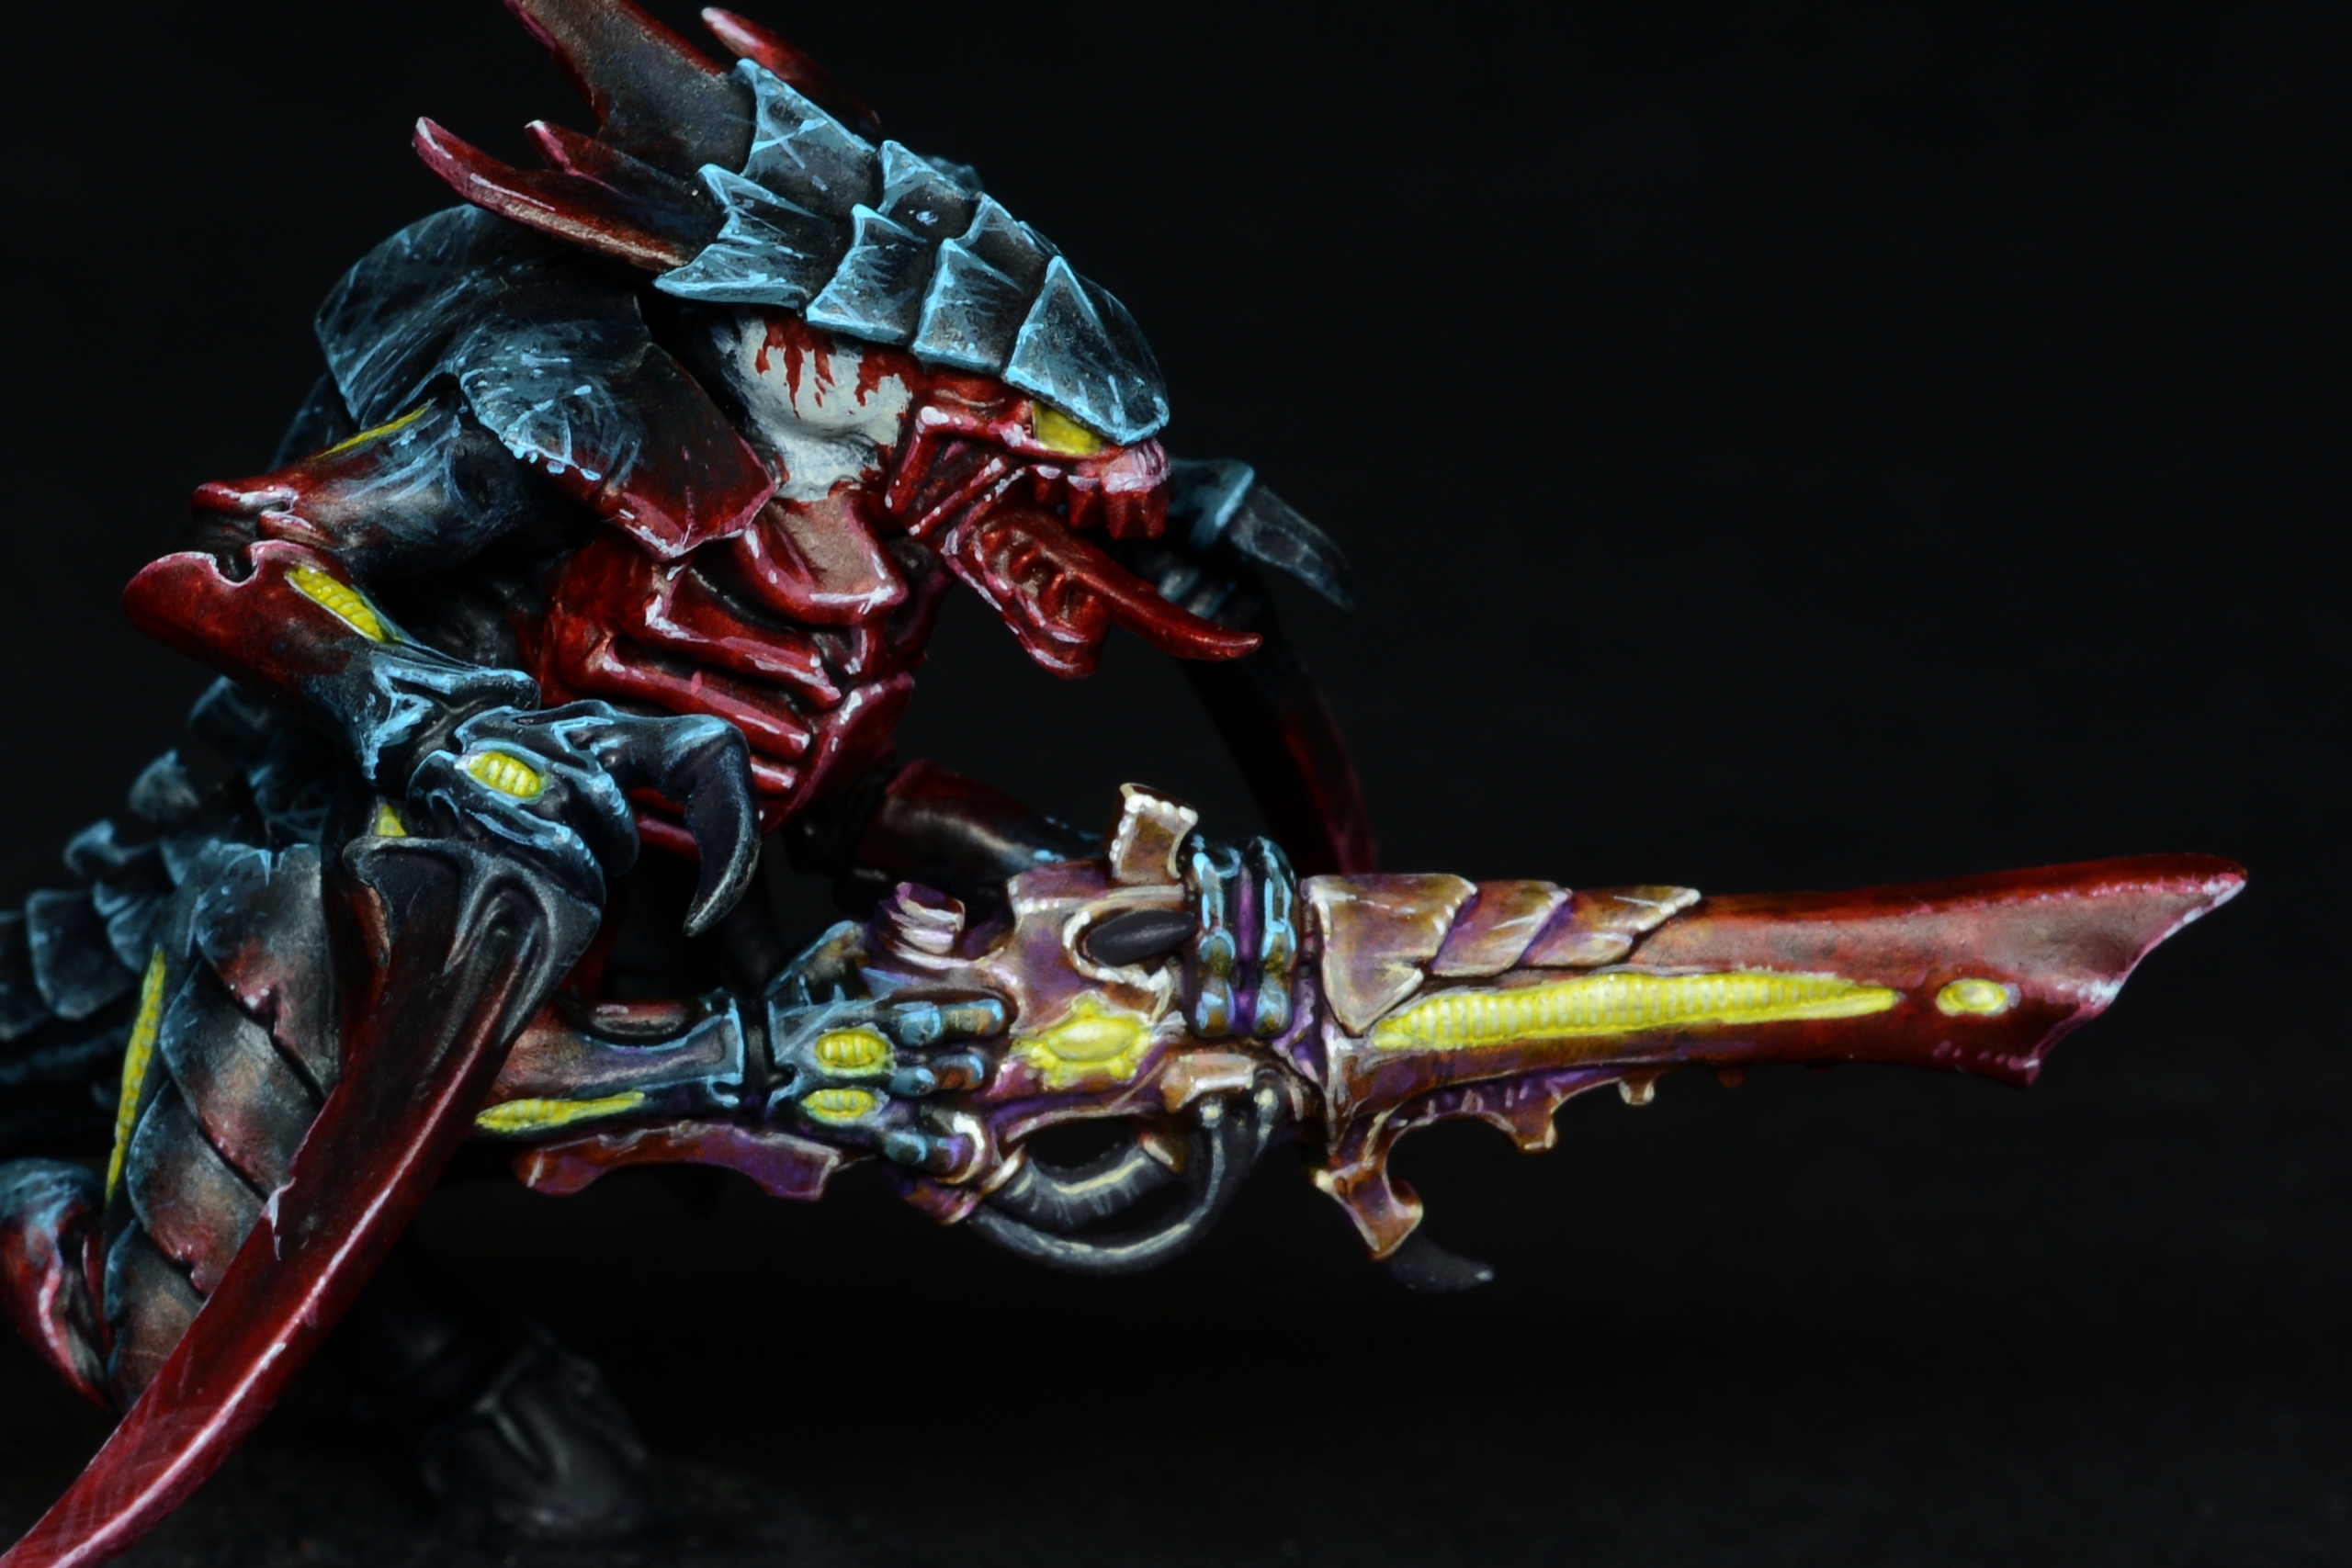
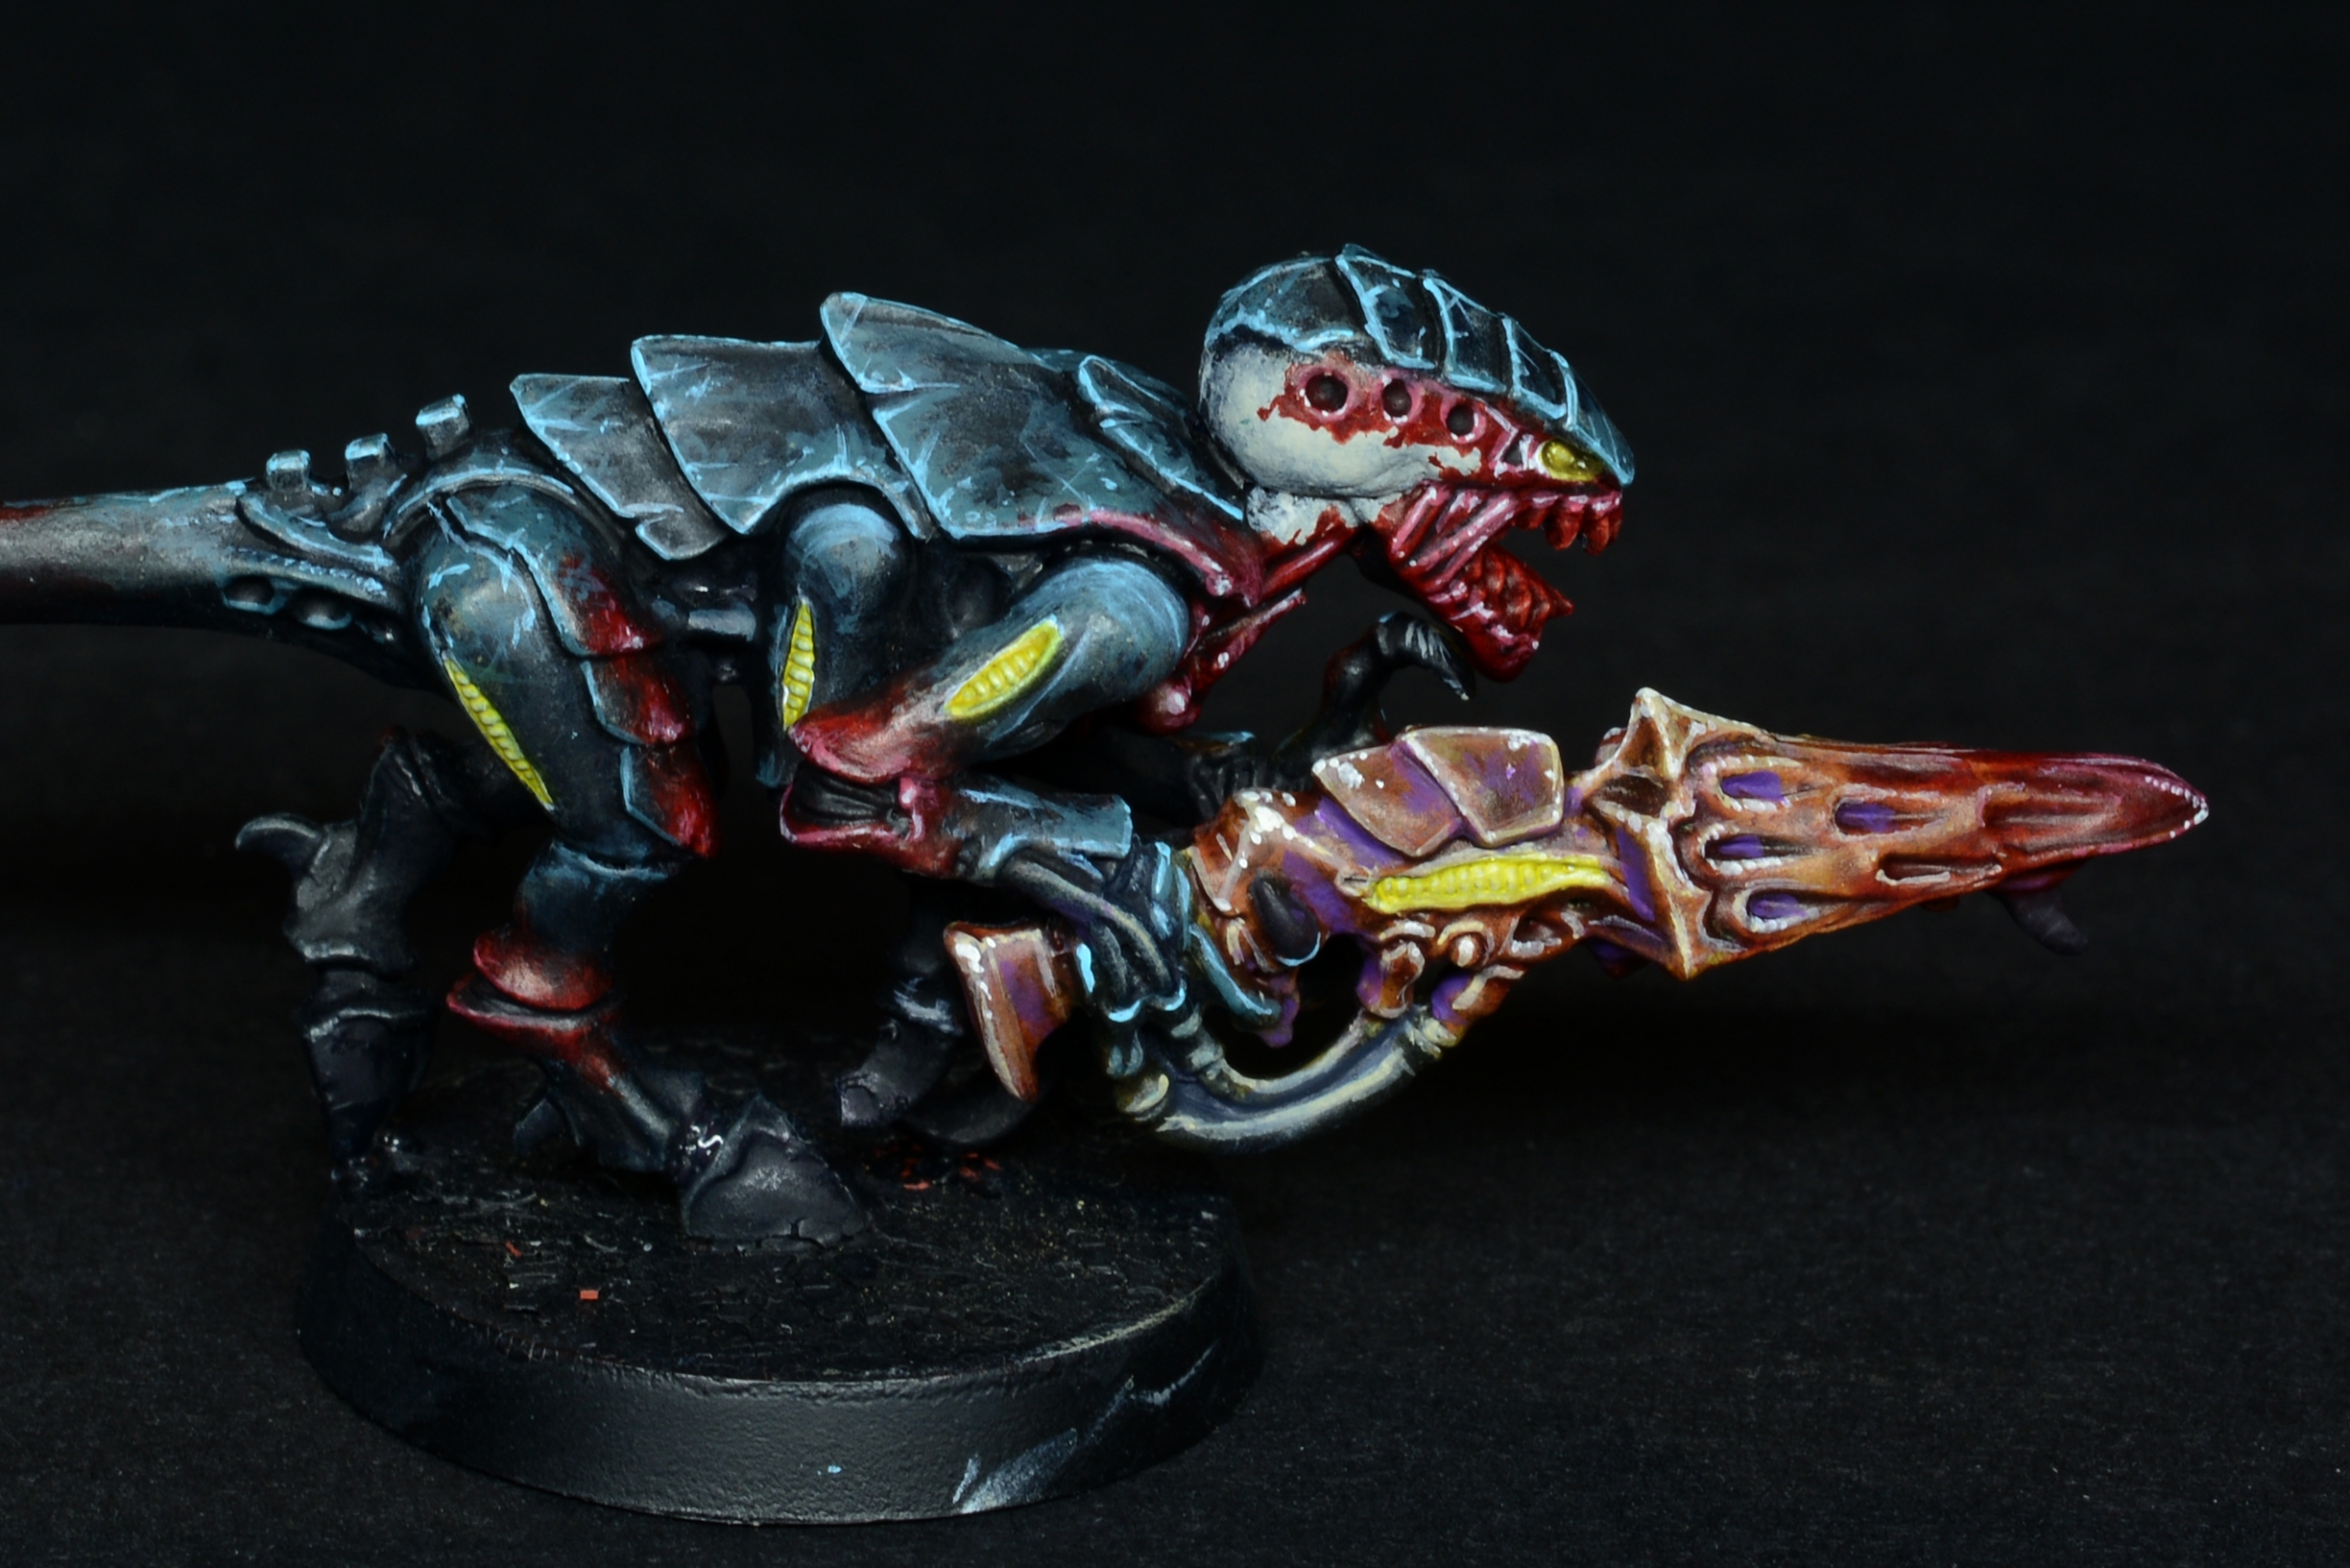
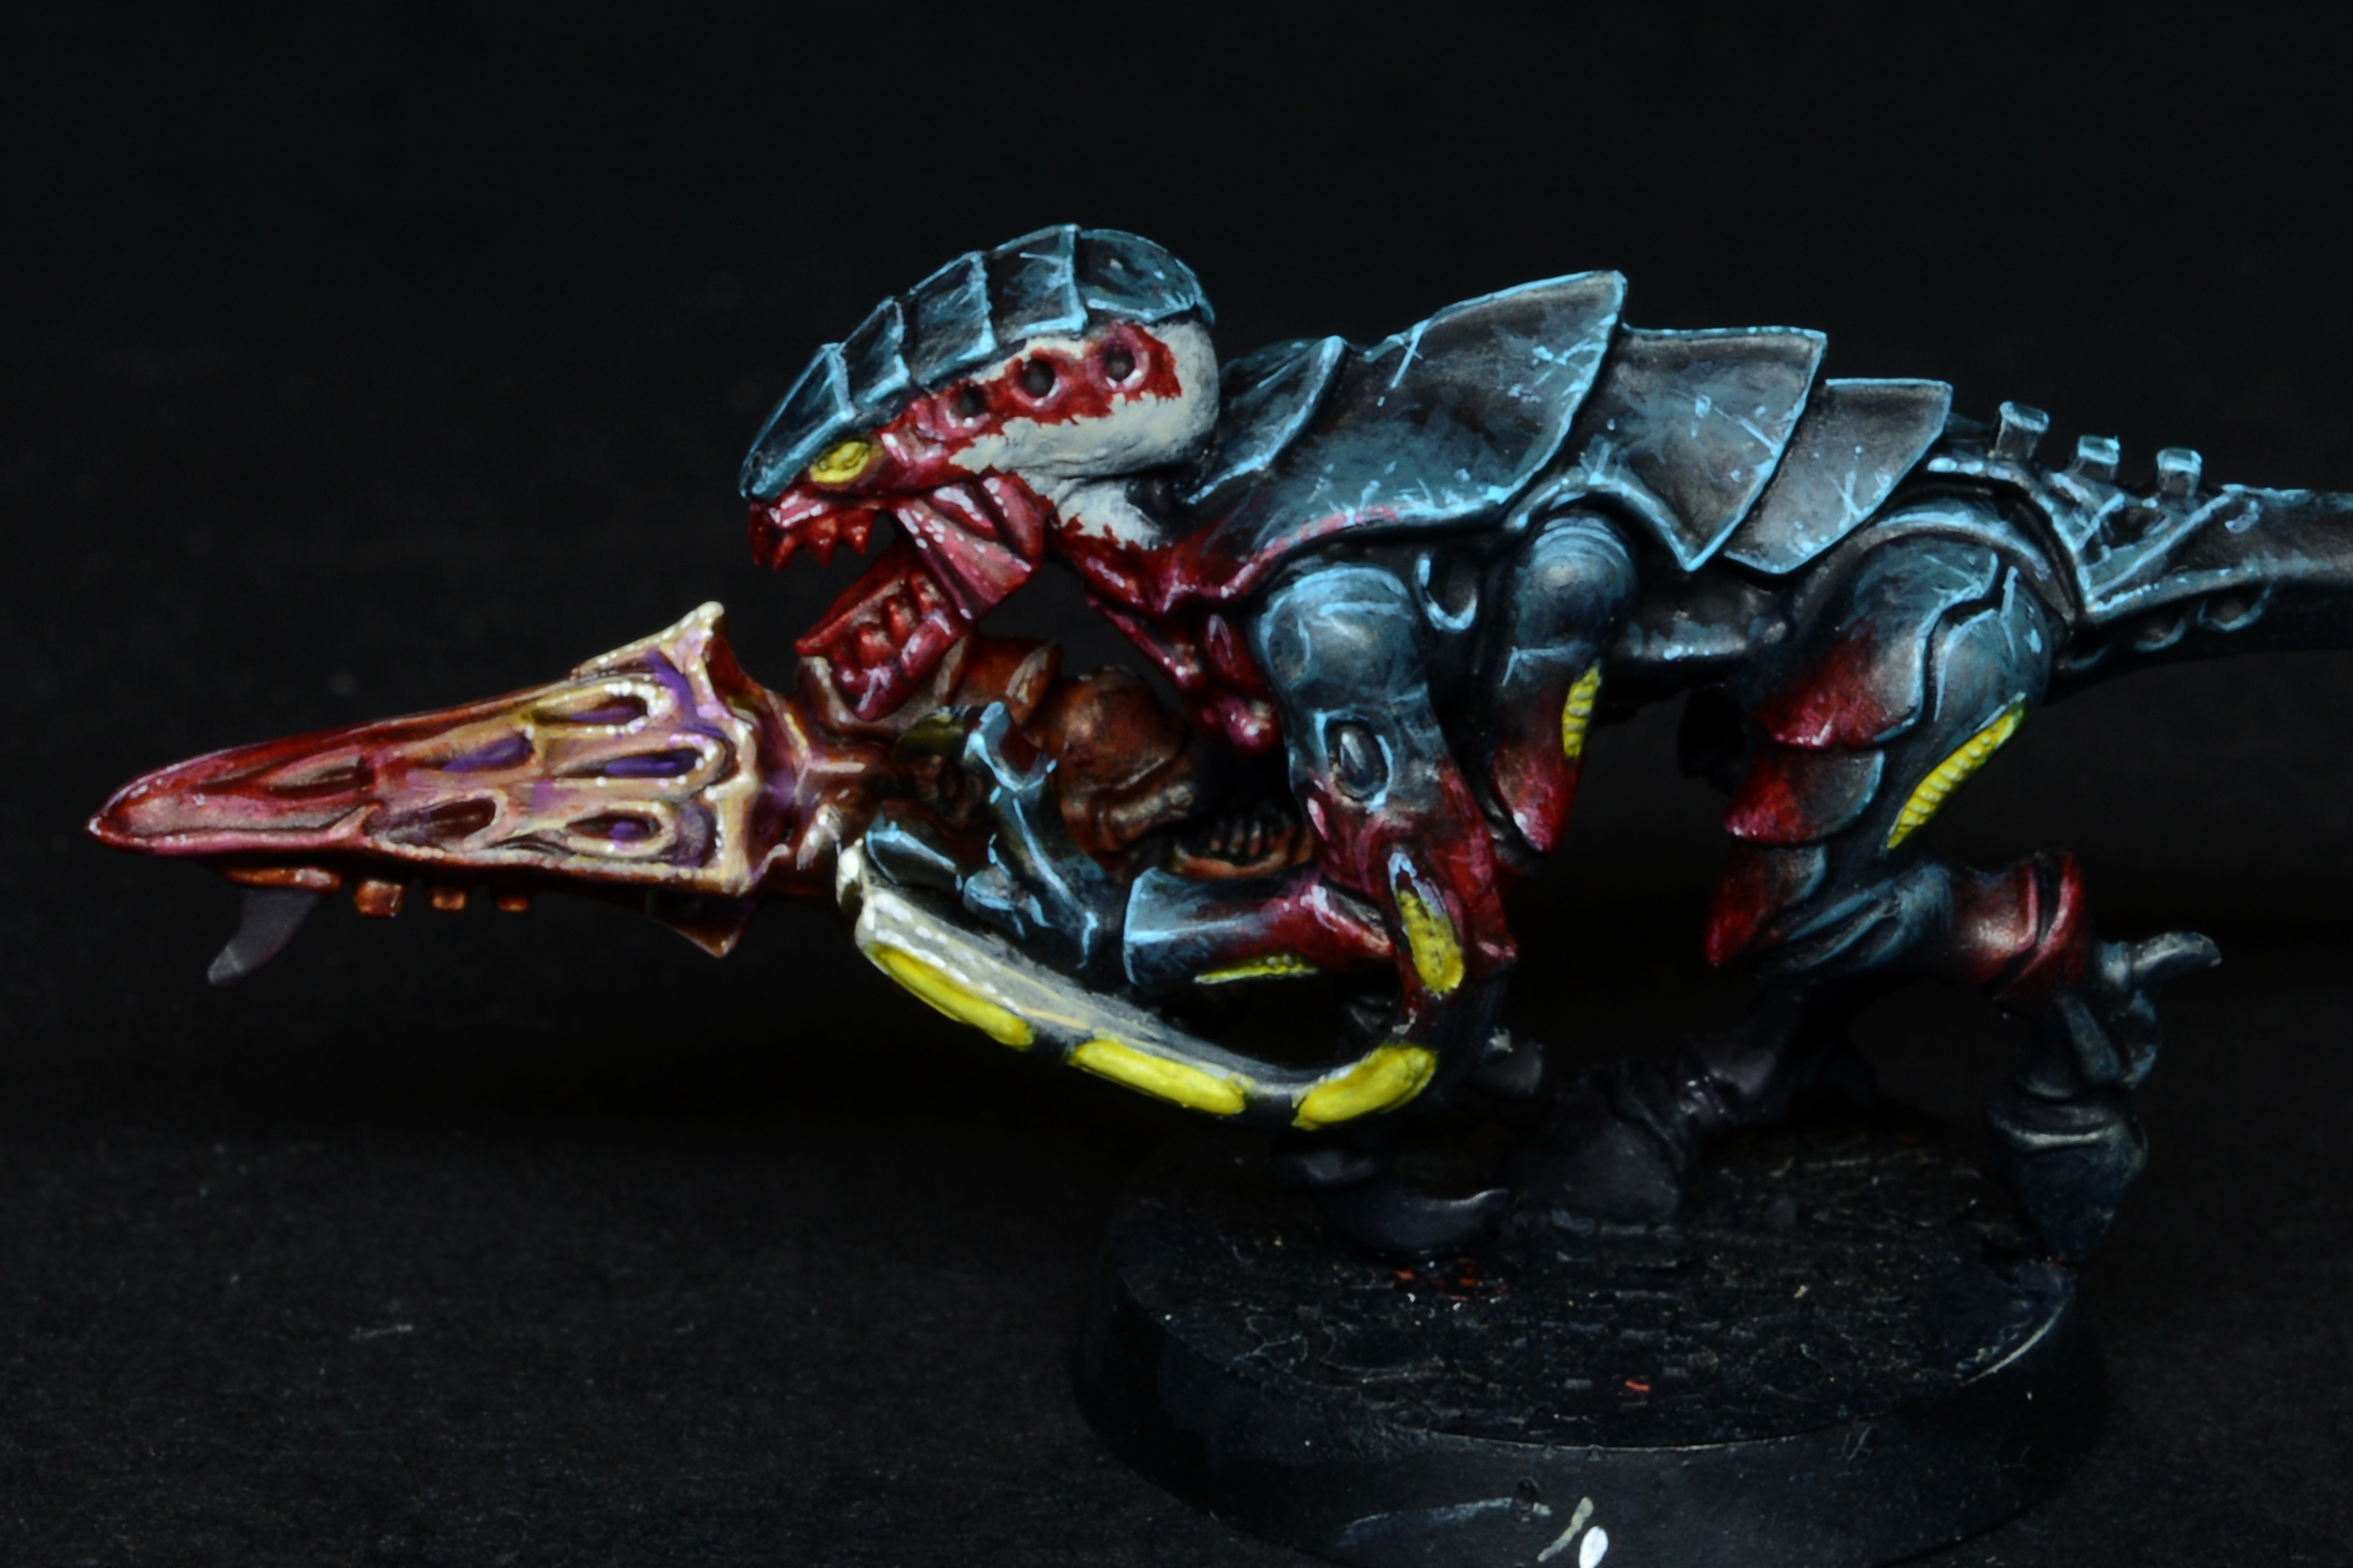
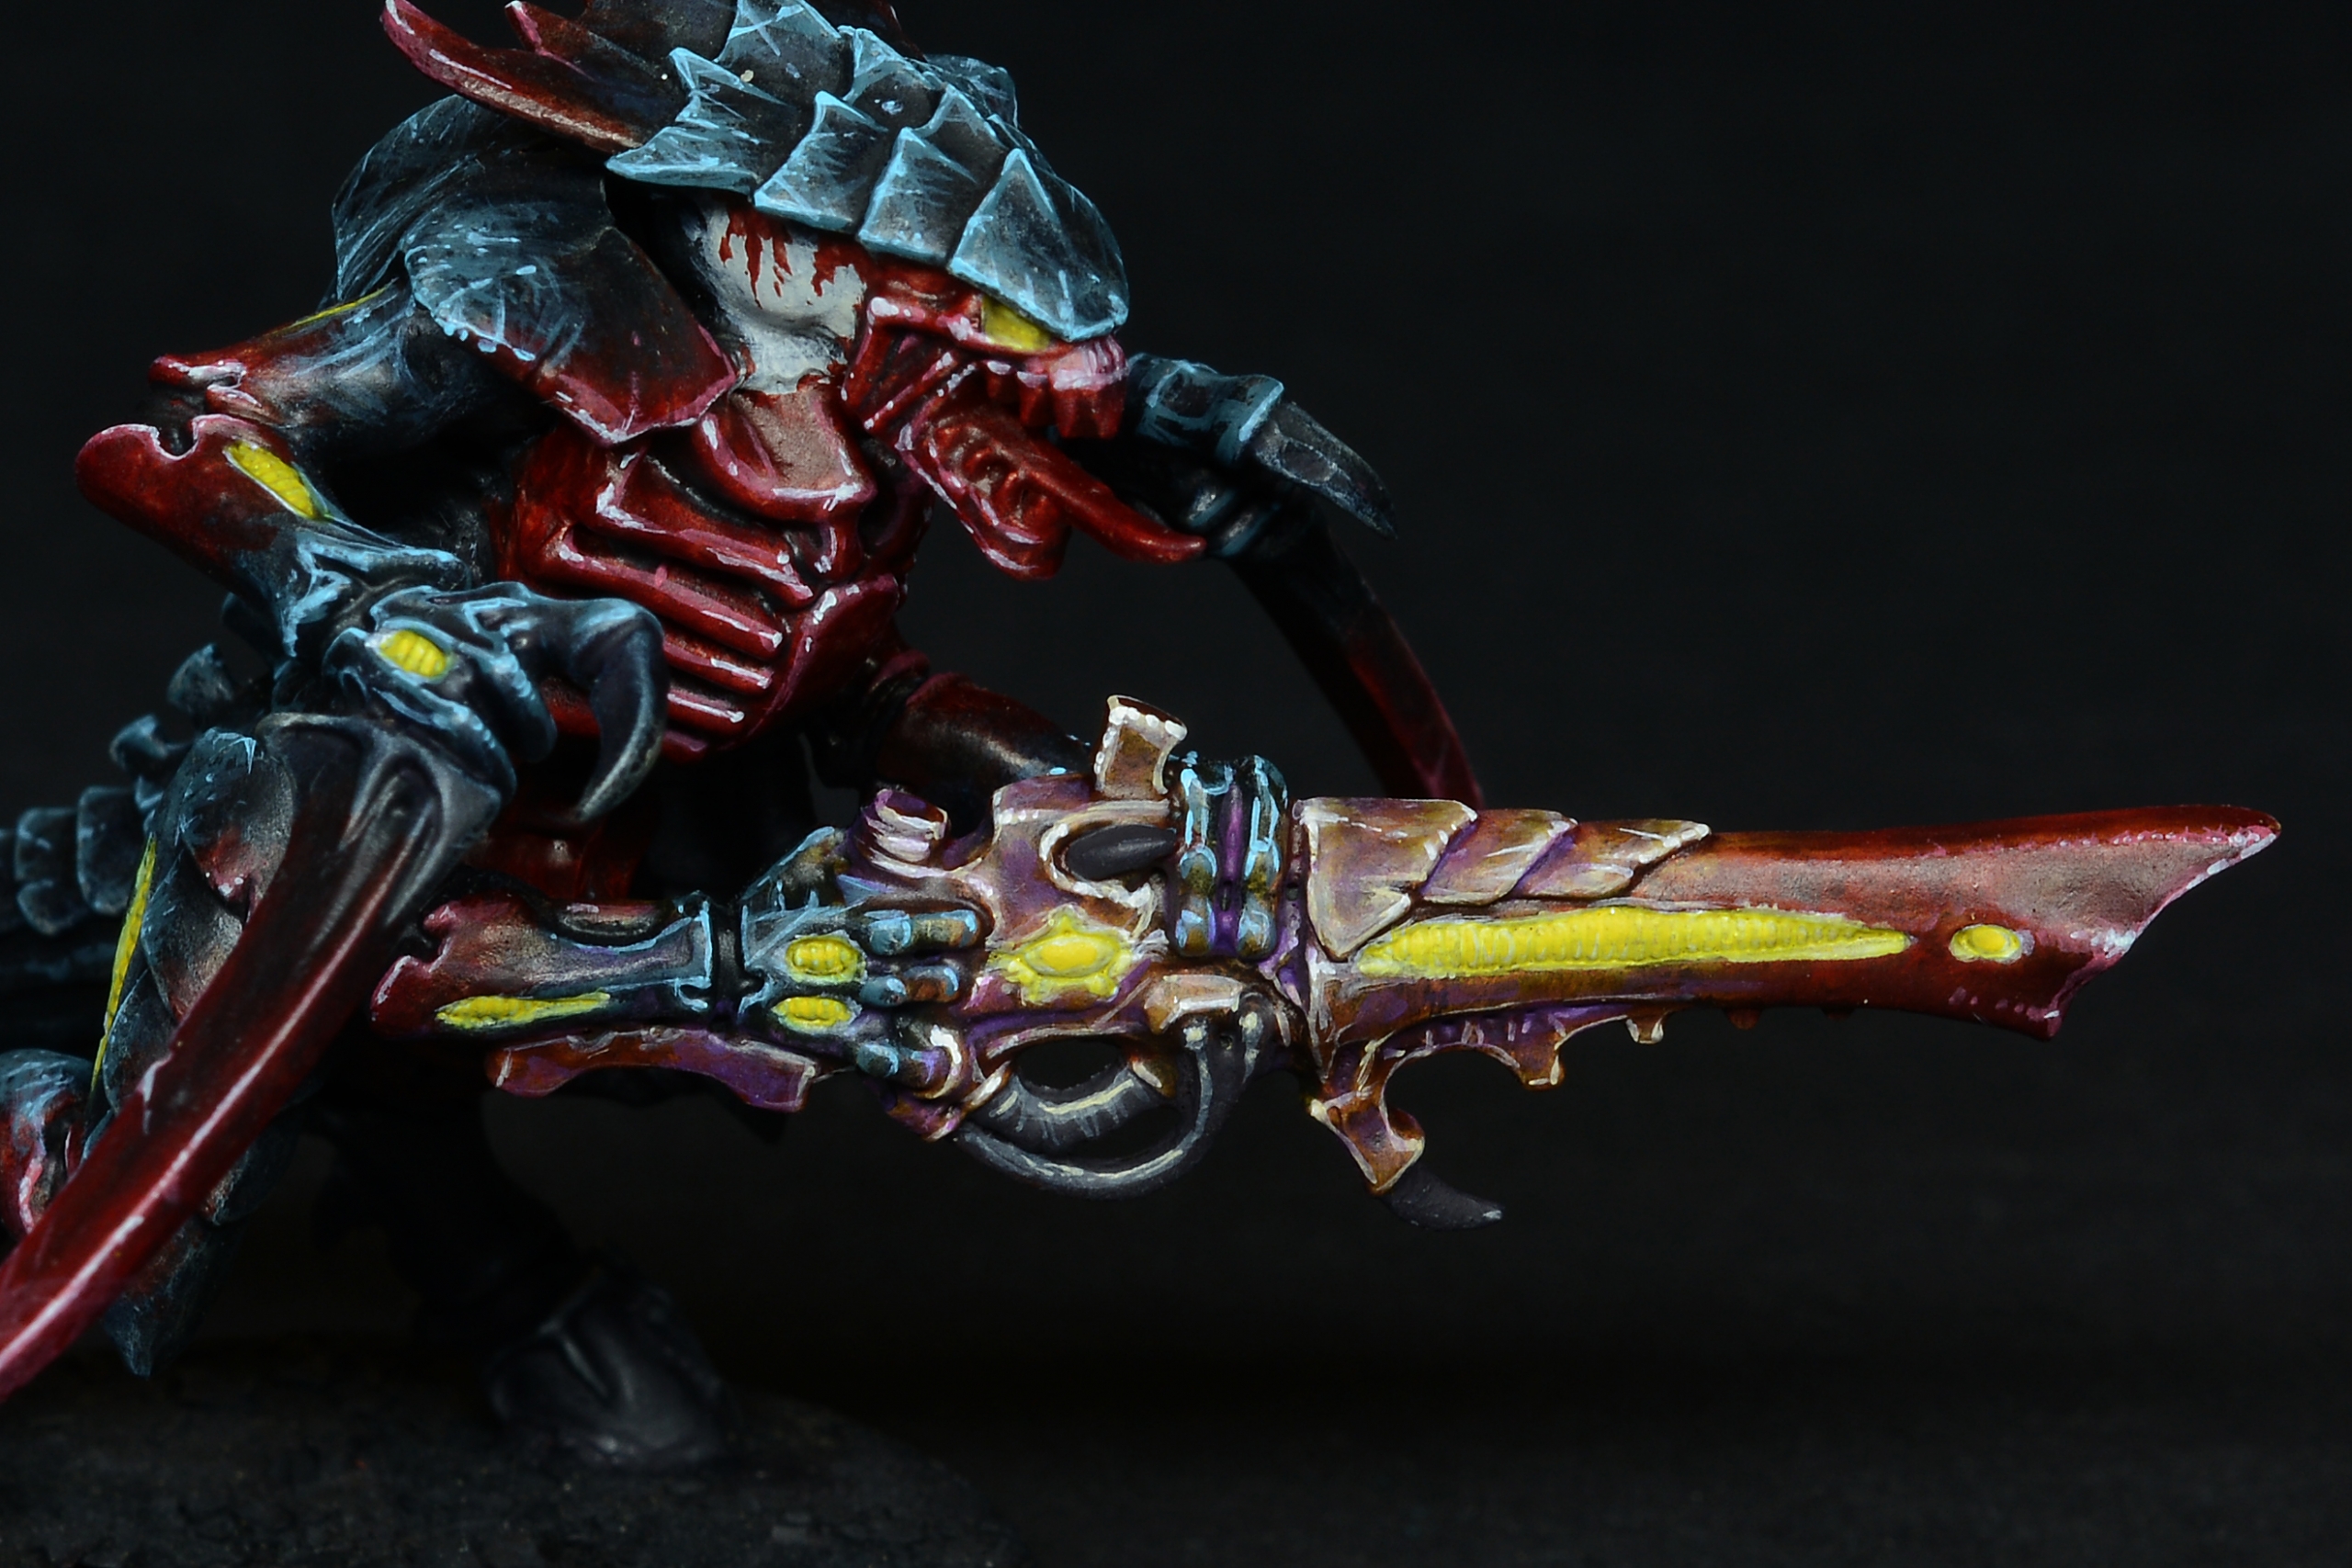
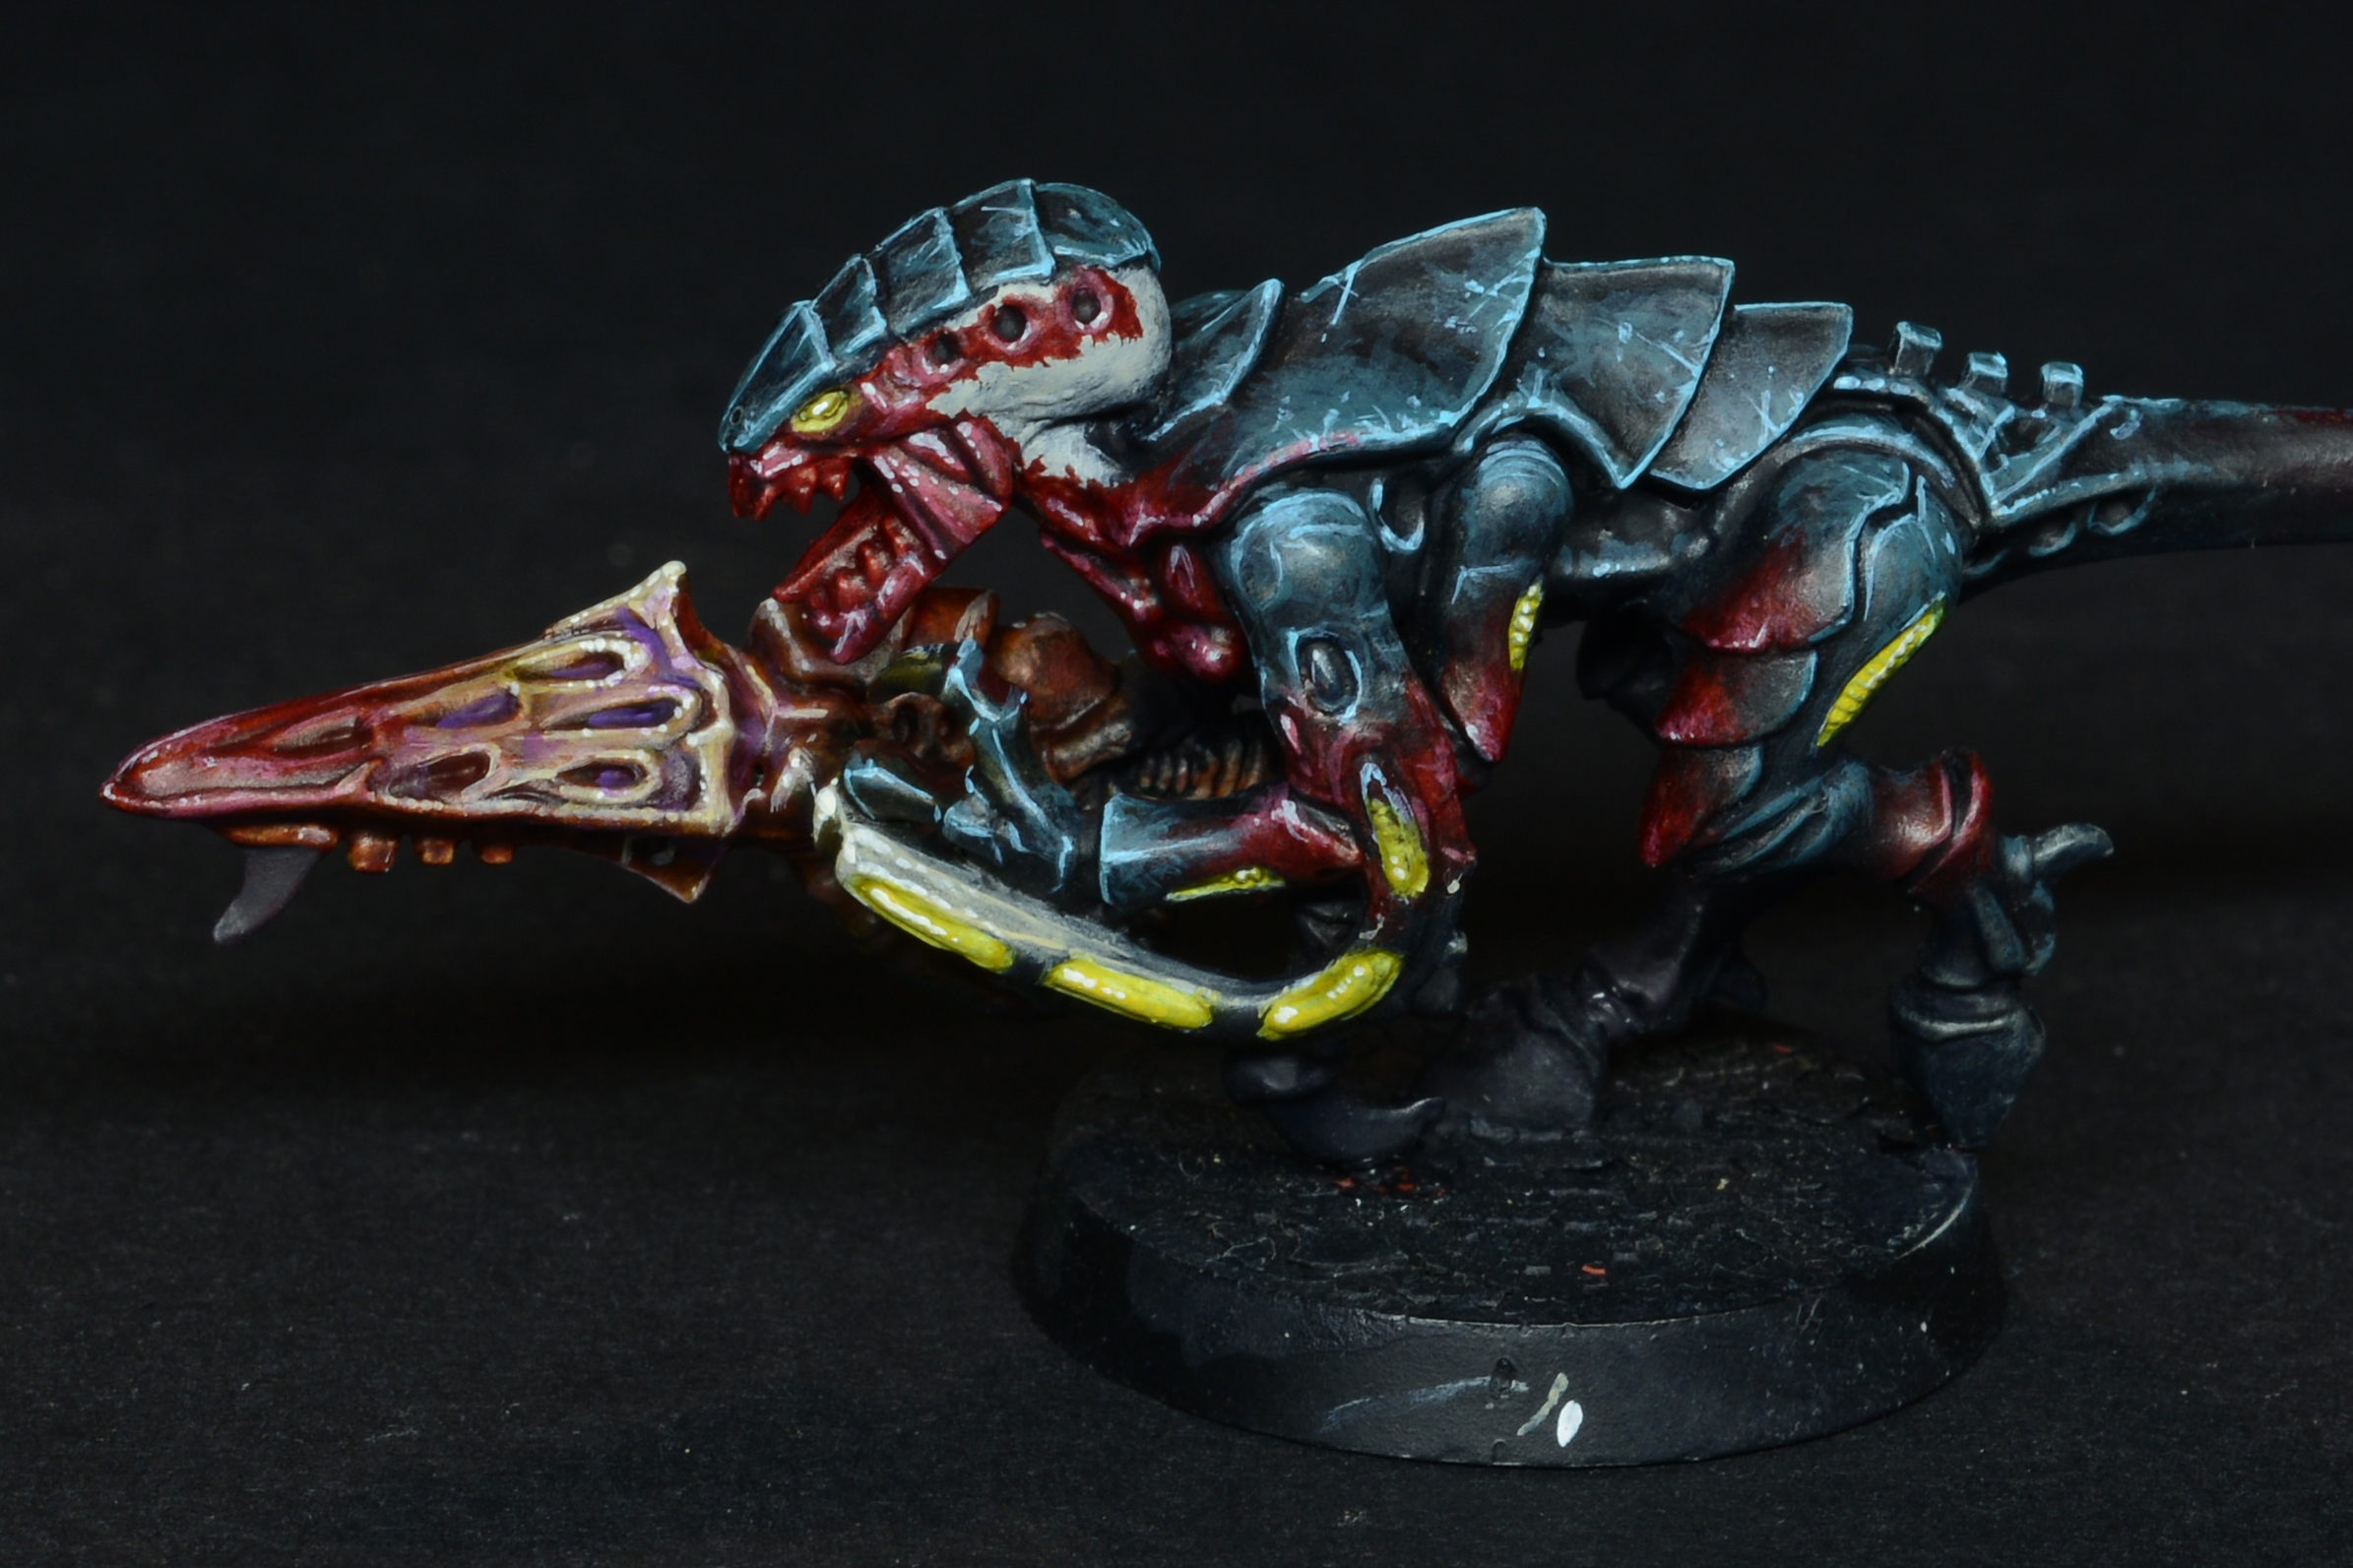
Base lids were painted black, and below are the completed models:
This concludes this two-part tutorial; again, i hope it was an enjoyable reading that provided you with informations and inspirational techniques.
If you liked it and would love to see more articles like these, let me know in the comments!
Until next time,
Lorenzo
This is fantastic. How large was the force that you painted? any chance we could see more photos of it?
Glad you like the article, however for this commission i only painted the 5 models showns in the tutorial; the tutorial itself was the true focus of all.
Incredible! Looks real “fun”/cool and alien! Totally inspiring! Thank you